
How do I write and publish a blog post?
Quick answer: Go to Sites > Blogs, open your blog and click New post. Give the post a title, write it in the editor and click Continue. On the settings screen, check the URL slug, pick a Category and Author, add a cover image and post description, choose Publish and click the Publish button.
Before you start
- You need a blog. If you do not have one yet, click Create blog on the Blogs page first.
- Create at least one category and author for your blog. Both are required before a post can be published.
- Have a cover image ready. The recommended size is 600 by 400 pixels.
Step 1: Open your blog
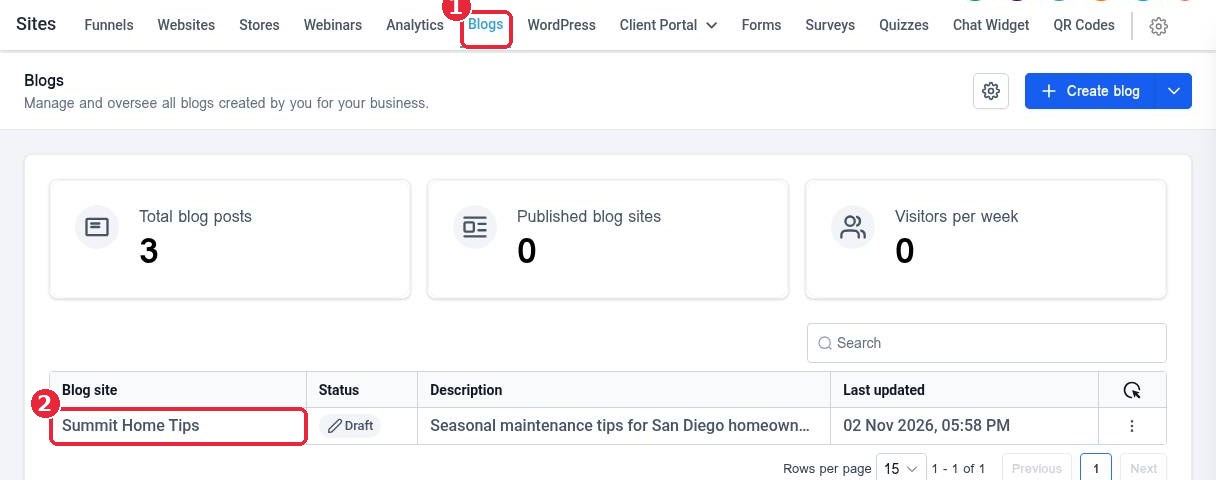
Click Sites in the left menu, then the Blogs tab (1). Click your blog in the list (2).
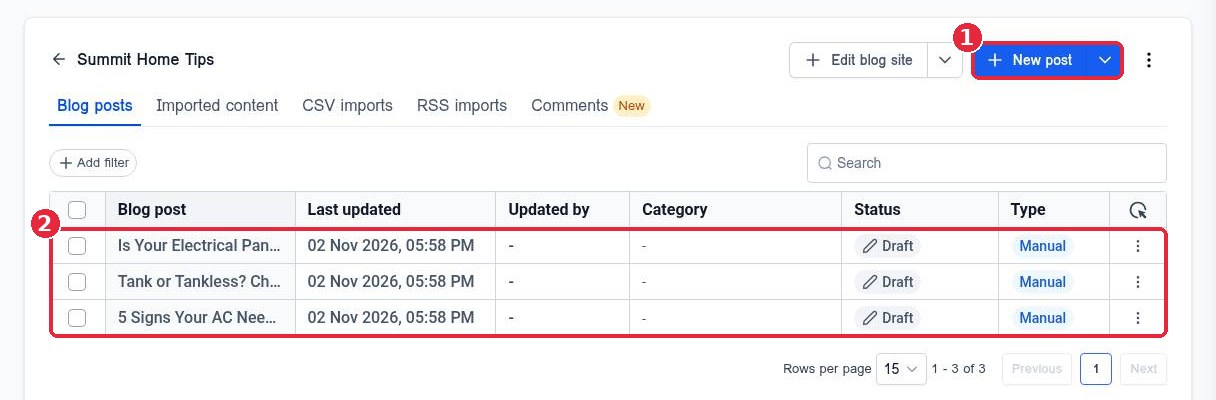
Click New post (1) to start a new post. Your existing posts are listed below with their status, so you can also open a draft to finish it (2).
Step 2: Write the post
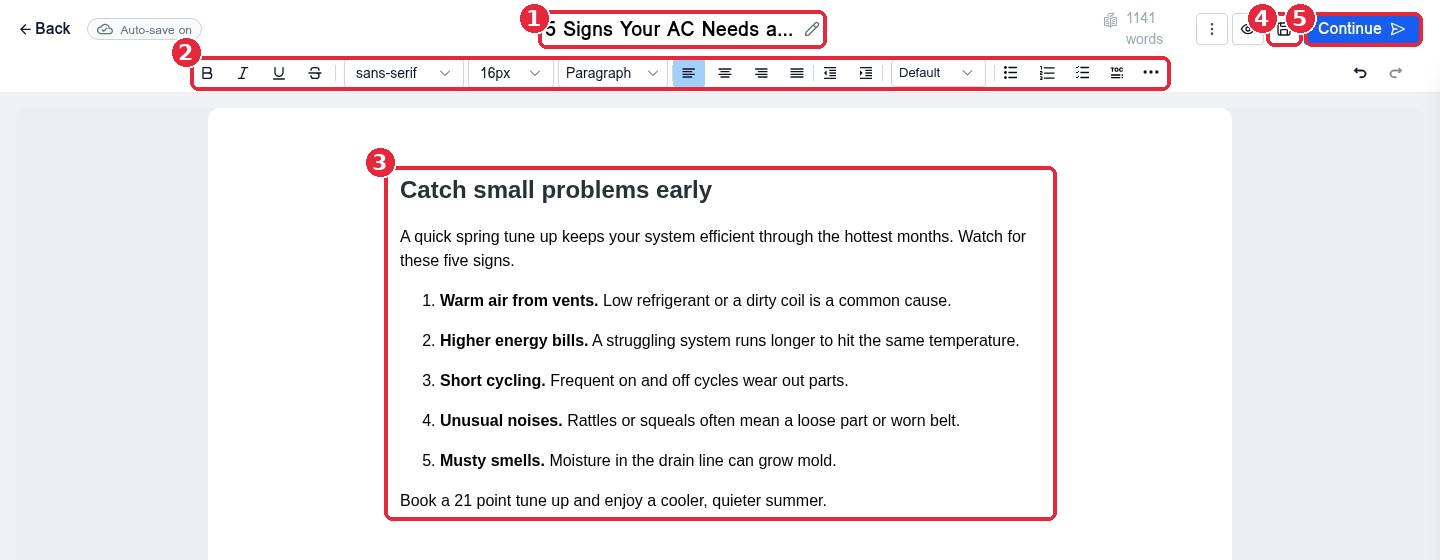
Click the pencil next to the title (1) and type your post title. Use the toolbar (2) for headings, bold text, lists, links and images, and write your post in the page (3). Short paragraphs and clear headings make posts easier to read on a phone. Click the save icon (4) to save your work, then click Continue (5).
Step 3: Fill in the post settings
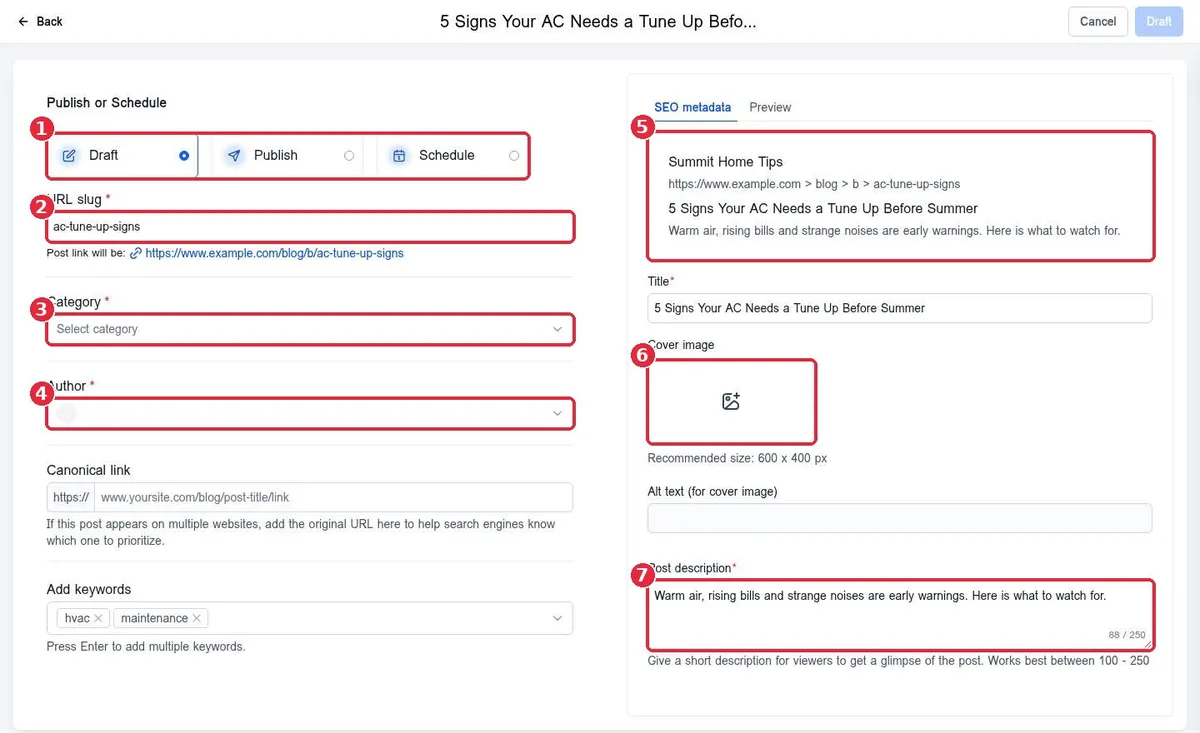
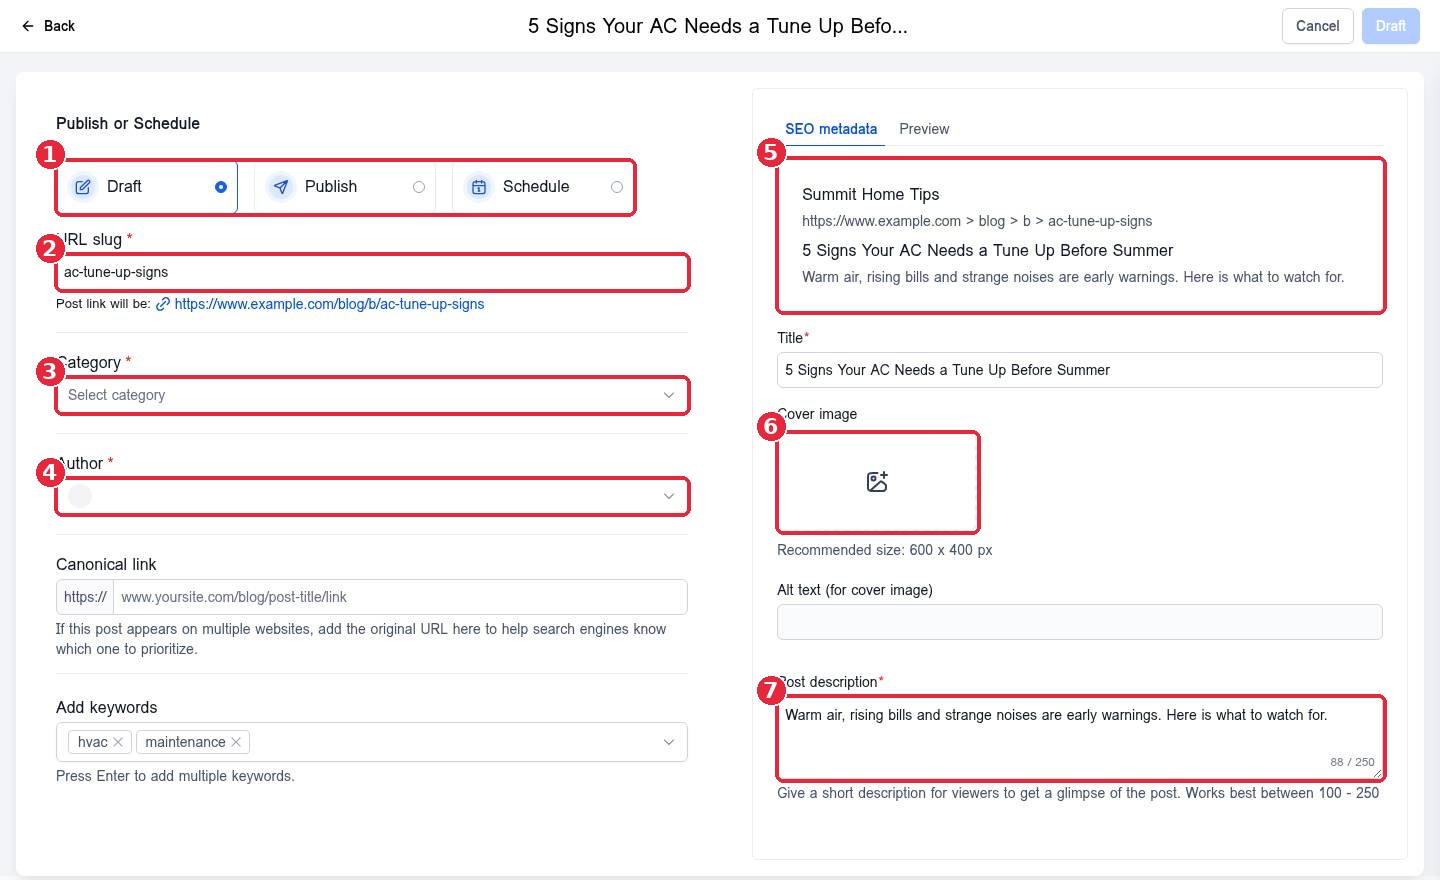
The settings screen controls how and when the post goes live:
- Publish or Schedule (1): keep Draft while you work, or pick Publish or Schedule.
- URL slug (2): the end of the post web address. Keep it short and use the main words from the title.
- Category (3) and Author (4): both are required.
- SEO metadata (5): a preview of how the post can look in search results, built from the title and description.
- Cover image (6): click to pick the image shown at the top of the post and in your blog list. Add alt text that describes the image.
- Post description (7): a short summary for search results and your blog page. It works best between 100 and 250 characters.
You can also add keywords and a canonical link if the same post appears on another website.
Step 4: Publish
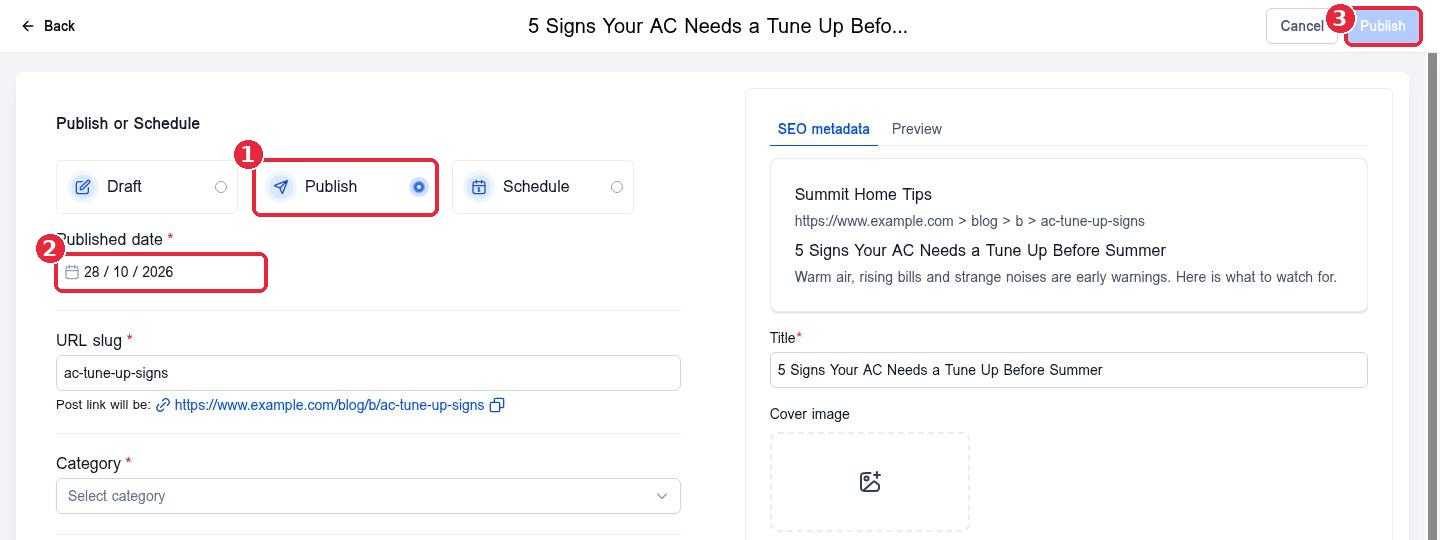
Select Publish (1). Check the Published date (2), then click the Publish button at the top right (3). The button stays grey until every required field is filled in.
Open the post link under the URL slug to see it live. Share it on social media or in your next email so people read it.
FAQ
Why is the Publish button greyed out?
A required field is empty. Check that the post has a URL slug, category, author and post description.
Can I publish later instead of now?
Yes. Choose Schedule instead of Publish and pick the date and time the post should go live.
Can I edit a post after it is published?
Yes. Open it from the blog posts list, make your changes and publish again.
Does my blog need a domain?
Your blog must be connected to a domain or website before readers can see your posts at your own web address.
Want us to handle it? Our team can plan, write and publish search friendly blog posts for your business every week, so you show up when customers search. Book a free strategy call and get a free quote.
Related articles
- How do I set a page title, meta description and social image?
- How do I edit my header and footer on every page?
- How do I connect my domain to my Reachific website?
Still stuck? Submit a ticket and our team will help. Need faster answers? See our support plans.
