
How do I set up an online store?
Quick answer: Go to Sites > Stores and click New store. Type a store name under Quick start (or choose From templates) and click Create. Reachific builds the store pages for you: products list, product details, cart, checkout and thank you. Customize them in the builder, add your products, connect payments, set shipping, connect your domain and publish.
Before you start
- Have your product names, prices, photos and descriptions ready.
- Connect a payment provider such as Stripe so customers can pay at checkout. See How do I connect Stripe to take payments?
- Decide where you ship and what you charge for shipping, if you sell physical products.
Step 1: Open Stores
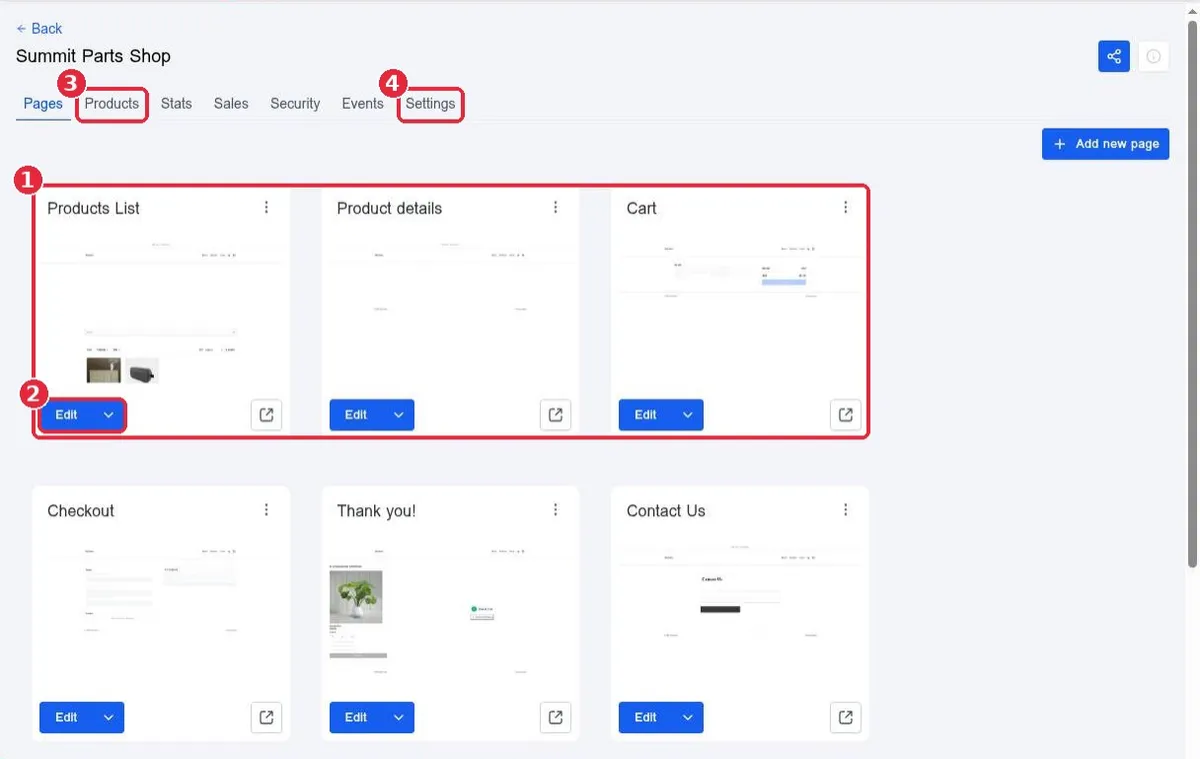
Click Sites in the left menu, then the Stores tab. Click New store (1). The blue banner tracks your setup; click Complete setup (2) any time to see what is left.
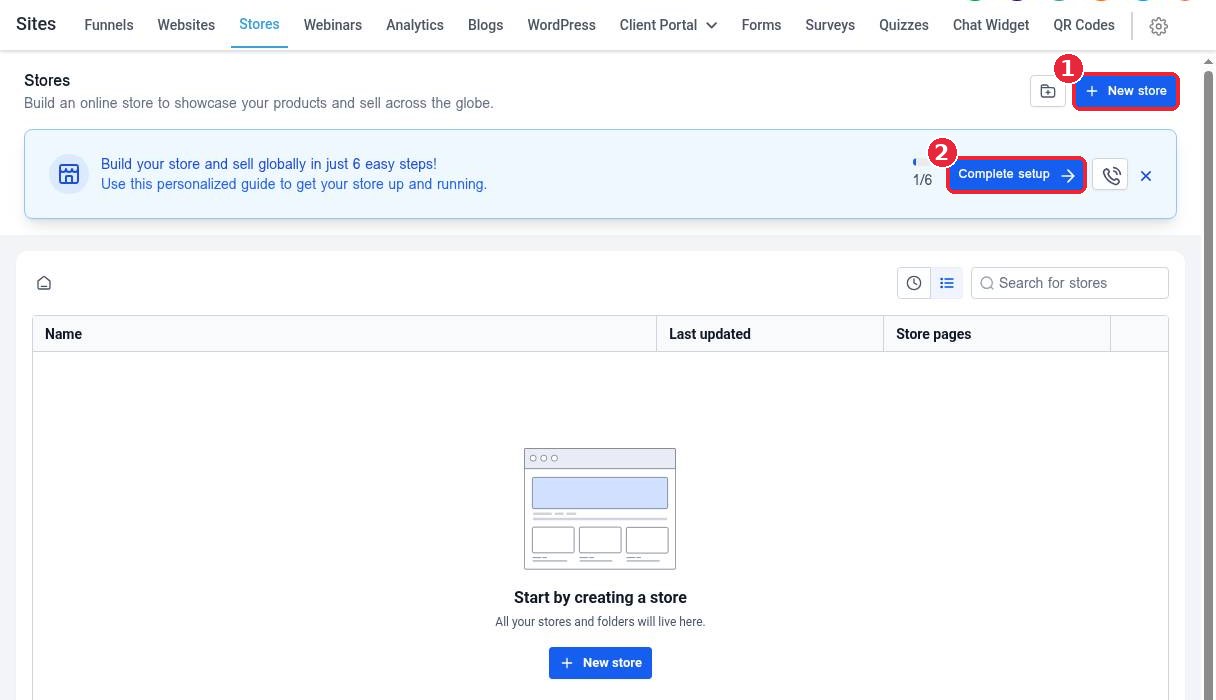
The setup guide (1) walks you through six steps: create your store from a template, connect a custom domain, add at least one product, connect a payment provider, configure shipping zones and rates, and receive your first order.
Step 2: Create the store
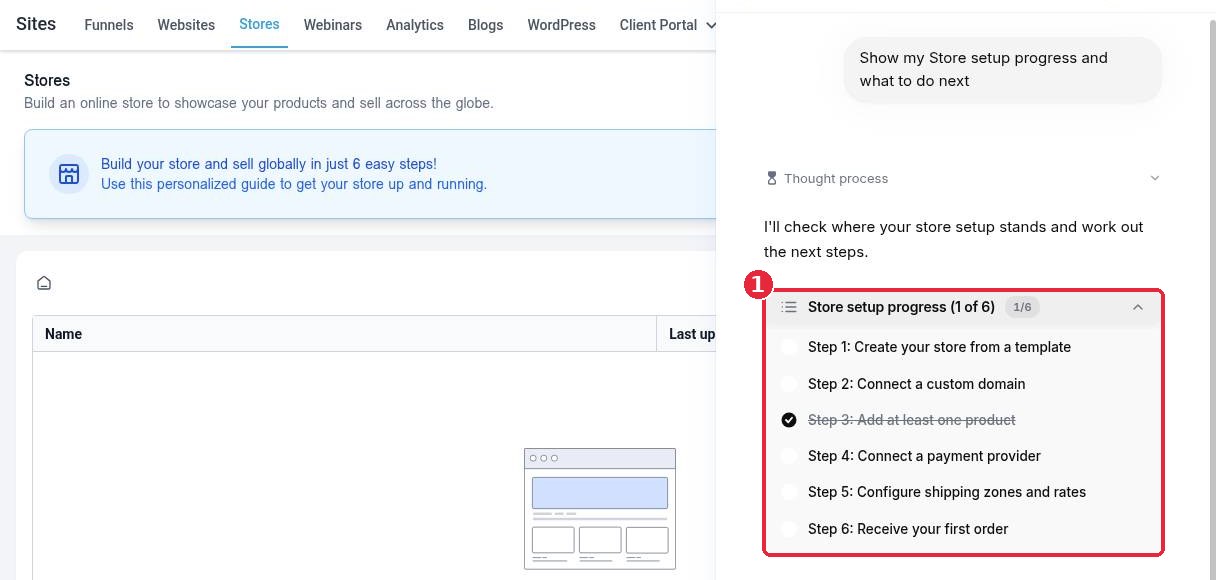
In Create new store, type your store name under Quick start (1) to get a ready to edit store, or choose From templates (2) to pick a design for your type of business. Click Create (3).
Step 3: Customize your store pages
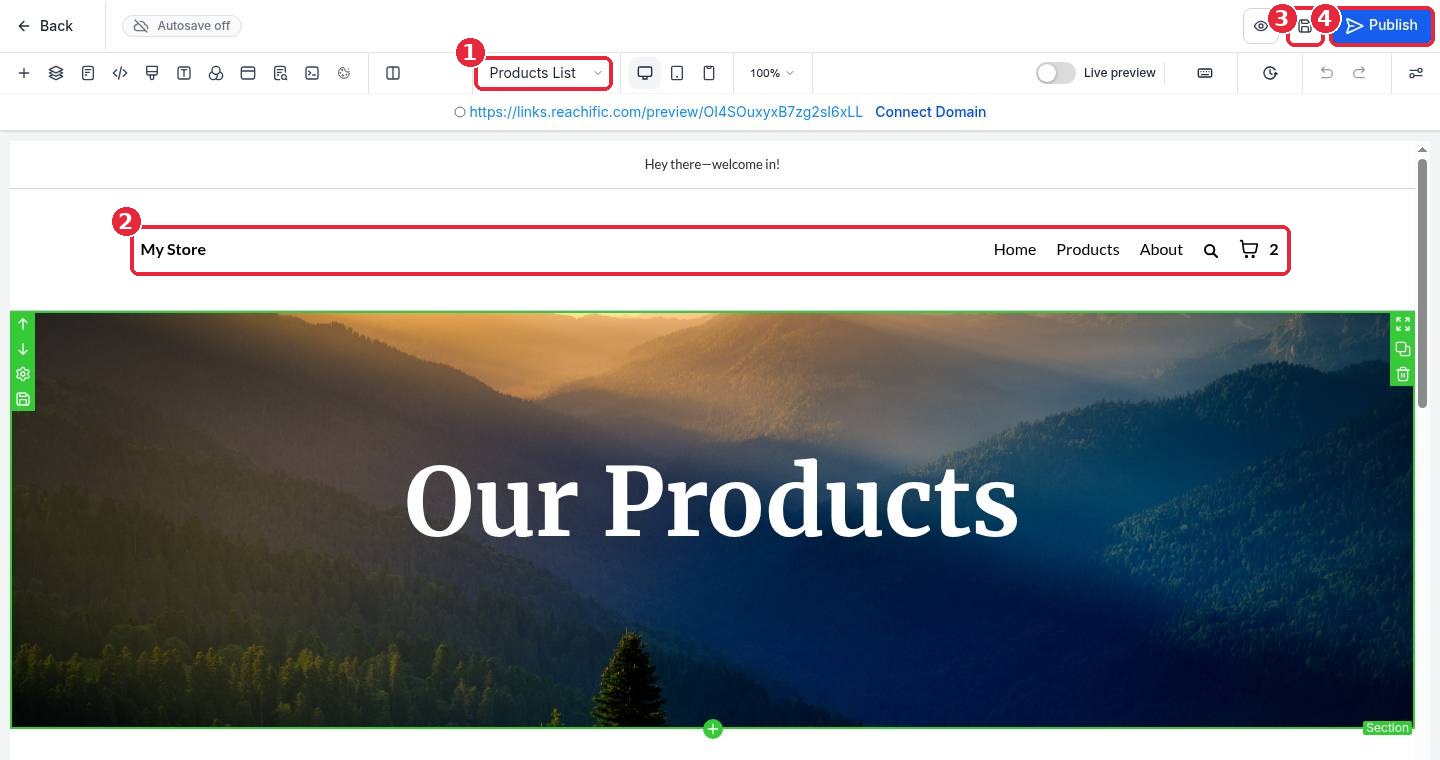
The store opens in the builder. Use the page menu (1) to switch between store pages. Click any text or image to change it, starting with the store name and menu in the header (2). Click Save (3) often and Publish (4) when the store is ready.
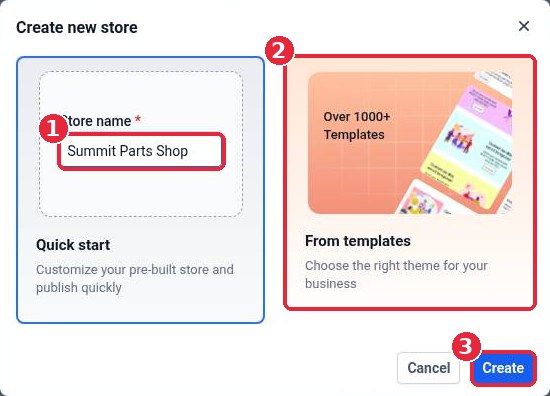
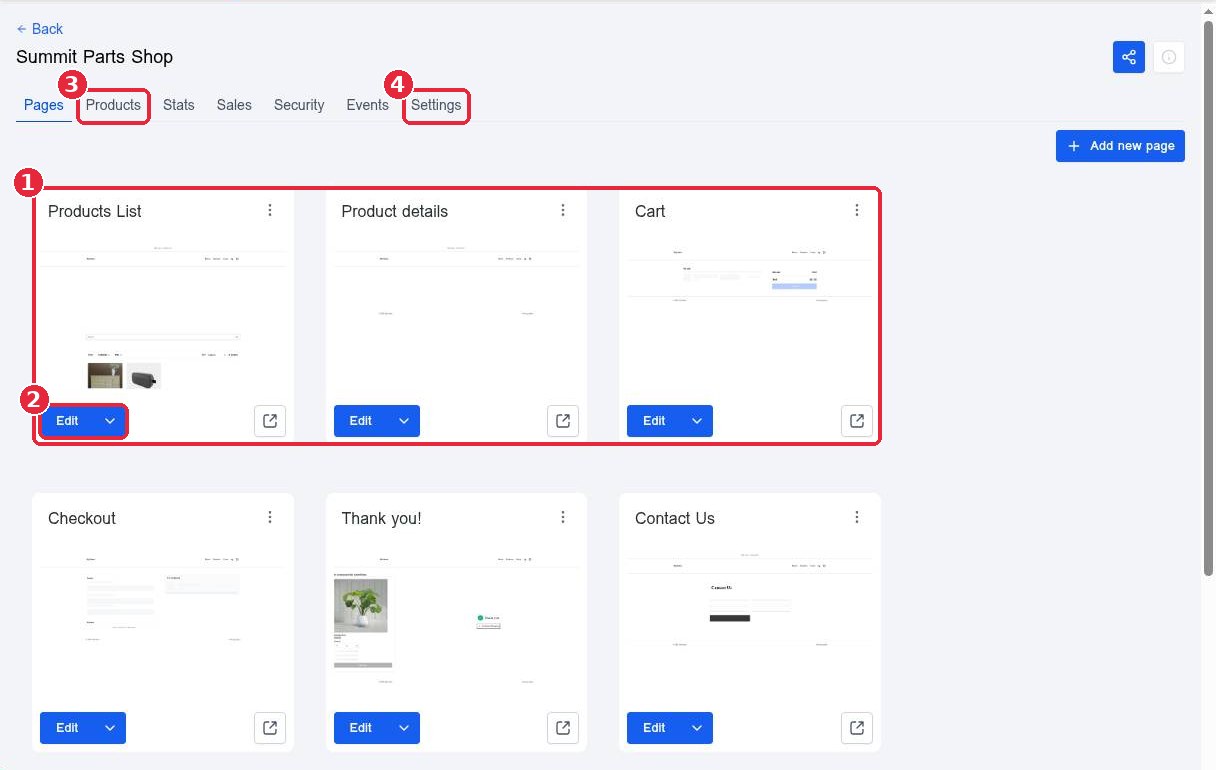
Click Back to see all your store pages (1). Click Edit (2) on any page to change it. Use the Products tab (3) to add what you sell and the Settings tab (4) for store details.
Step 4: Finish setup and go live
- Add at least one product with a price and photo.
- Connect a payment provider so checkout can take payments.
- Set up shipping zones and rates if you ship physical items.
- Connect your domain so the store lives at your own web address. See How do I connect my domain to my Reachific website?
- Publish, then place a test order to check the cart, checkout and thank you page.
FAQ
Do I need a separate website for my store?
No. The store has its own pages, header and checkout. You can link to it from your main website menu.
Can I sell services instead of products?
Yes. Add services as products with a price. For bookings, a calendar or a payment link may be a better fit.
Why can customers not check out?
Make sure a payment provider is connected and that each product has a price. If you ship items, check that your shipping zones cover the customer address.
Can I use a template later?
You can create another store from a template at any time and keep the one that fits best.
Want us to handle it? Our team can build your store, load your products, connect payments and shipping and test checkout so you are ready to sell. Book a free strategy call and get a free quote.
Related articles
- How do I connect Stripe to take payments?
- How do I create and send an invoice?
- How do I edit my header and footer on every page?
Still stuck? Submit a ticket and our team will help. Need faster answers? See our support plans.
