
How do I create and send an invoice?
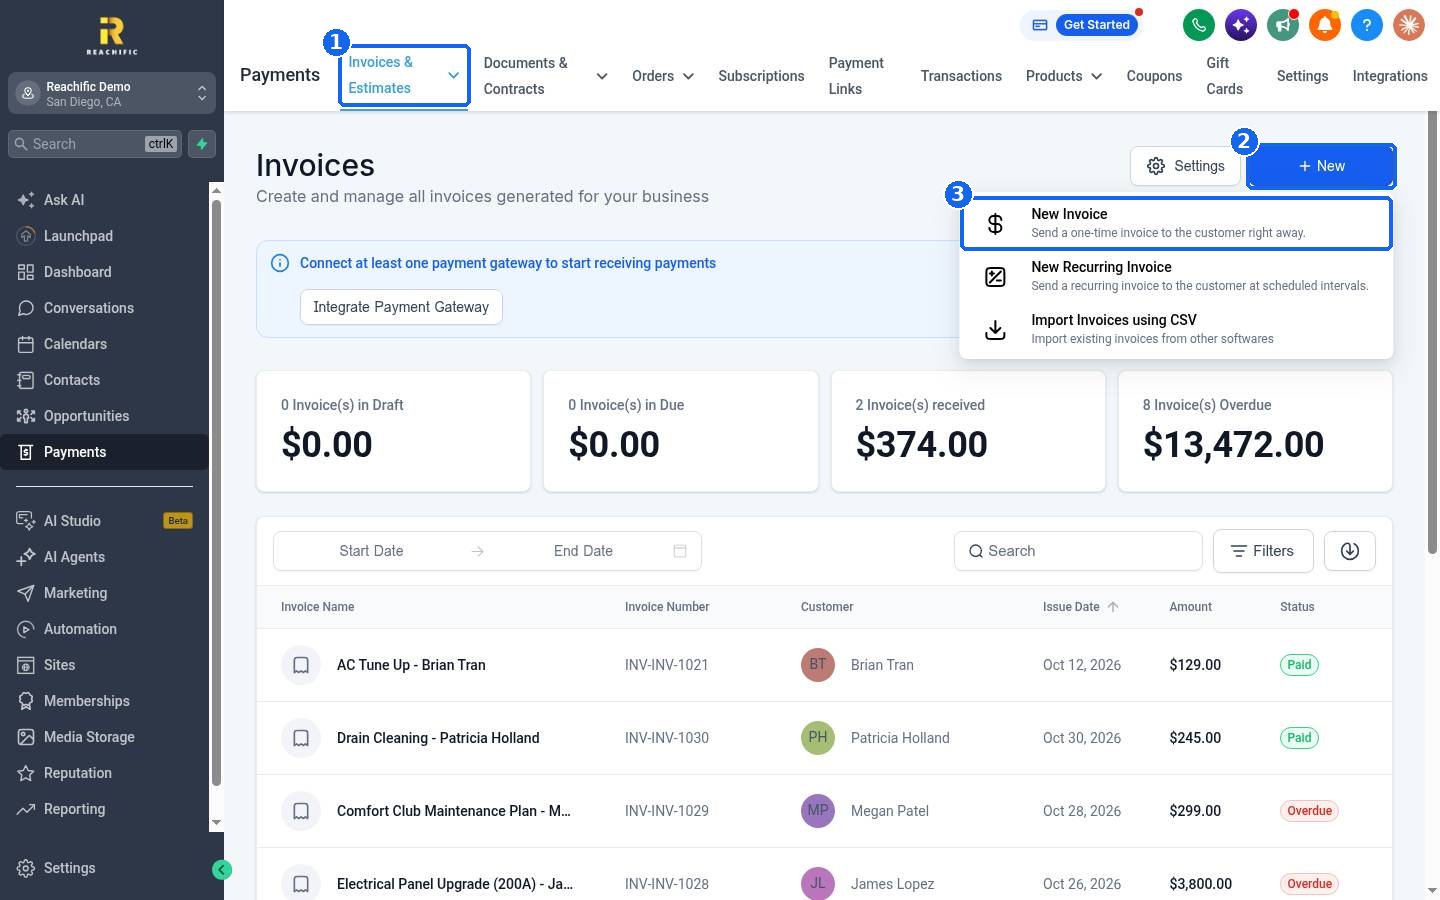
Quick answer: Go to Payments > Invoices & Estimates, click New > New Invoice, choose the customer, check the invoice number and dates, add products, then click Send. Pick email, text or both, choose Live and click Send. Your customer gets a link to view and pay the invoice.
Before you start
To get paid online, connect a payment provider first. See How do I connect Stripe to take payments?
Add the products or services you sell in Payments > Products so you can pick them in one click. You can also create a product while you build the invoice.
The customer must be a contact with an email address or phone number.
Step 1: Start a new invoice
Click Payments in the left menu, then Invoices & Estimates (1). On the Invoices page, click New (2) and choose New Invoice (3). The same menu also has New Recurring Invoice for bills that repeat and Import Invoices using CSV.
Step 2: Fill in the invoice
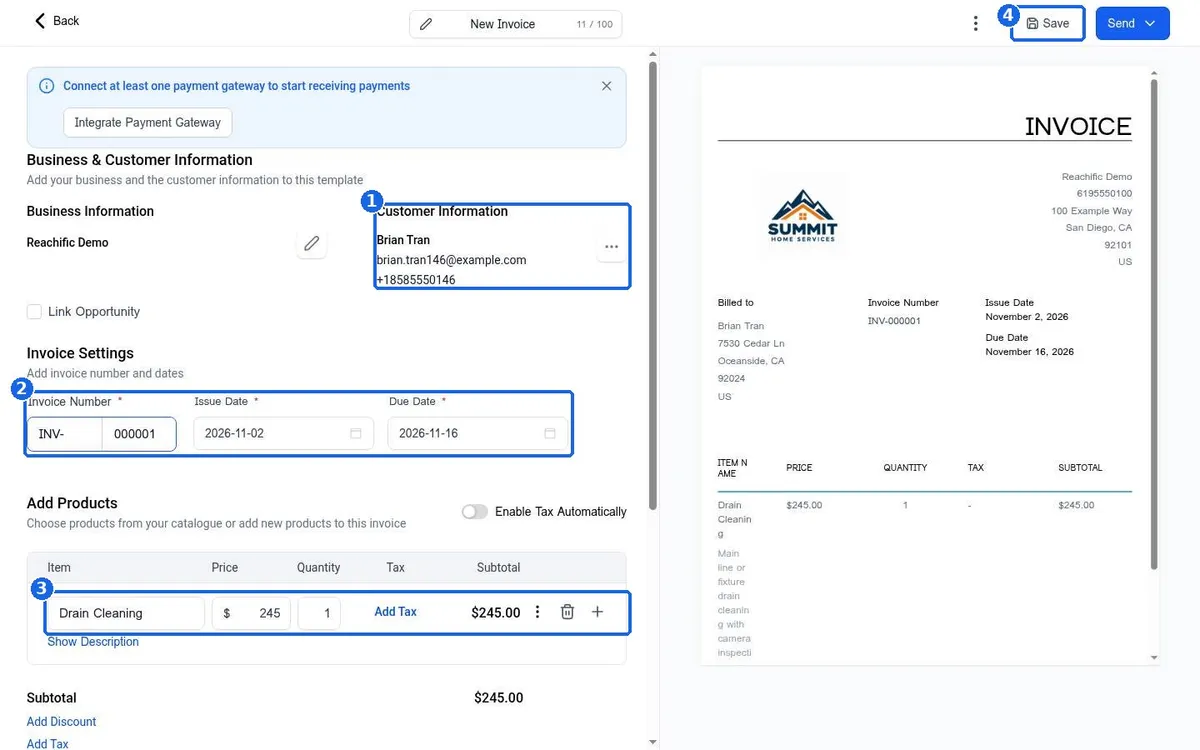
Under Customer Information (1), click Select Customer and type a name. Pick the contact, or click Add Customer to create one. Check Link Opportunity if you want the invoice tied to a deal in your pipeline.
Under Invoice Settings (2), check the Invoice Number, Issue Date and Due Date.
Under Add Products (3), click Add Product and choose an item from your catalog or click Create Product. Change the price or quantity if needed. Use Add Discount and Add Tax below the subtotal, or turn on Enable Tax Automatically.
Click Save (4). The preview on the right shows exactly what your customer will see.
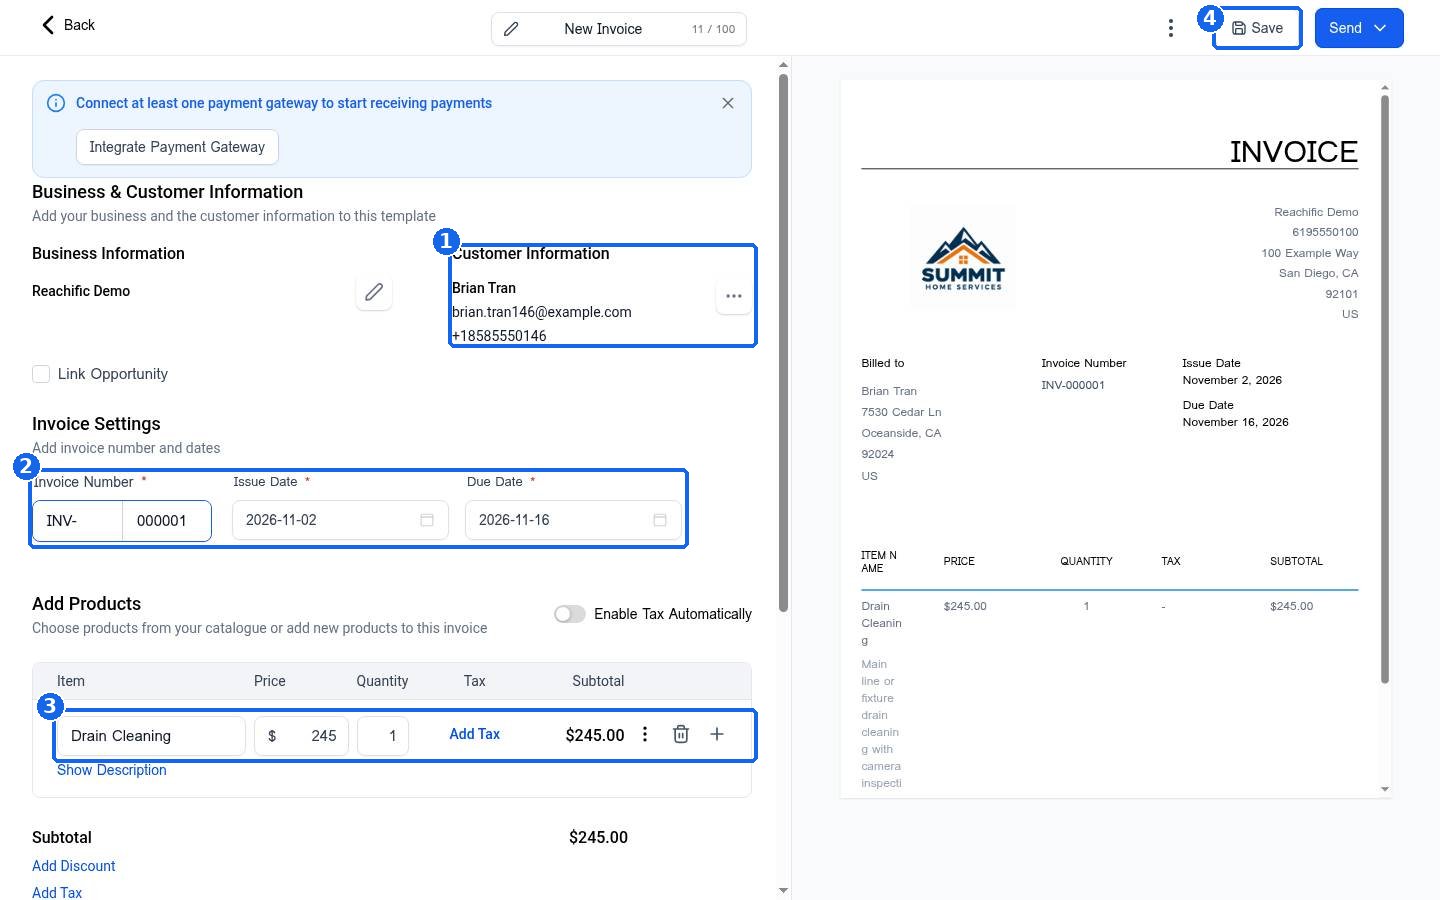
Tip: click the pencil next to New Invoice at the top to give the invoice a clear name, such as Drain Cleaning for Brian Tran.
Step 3: Send the invoice
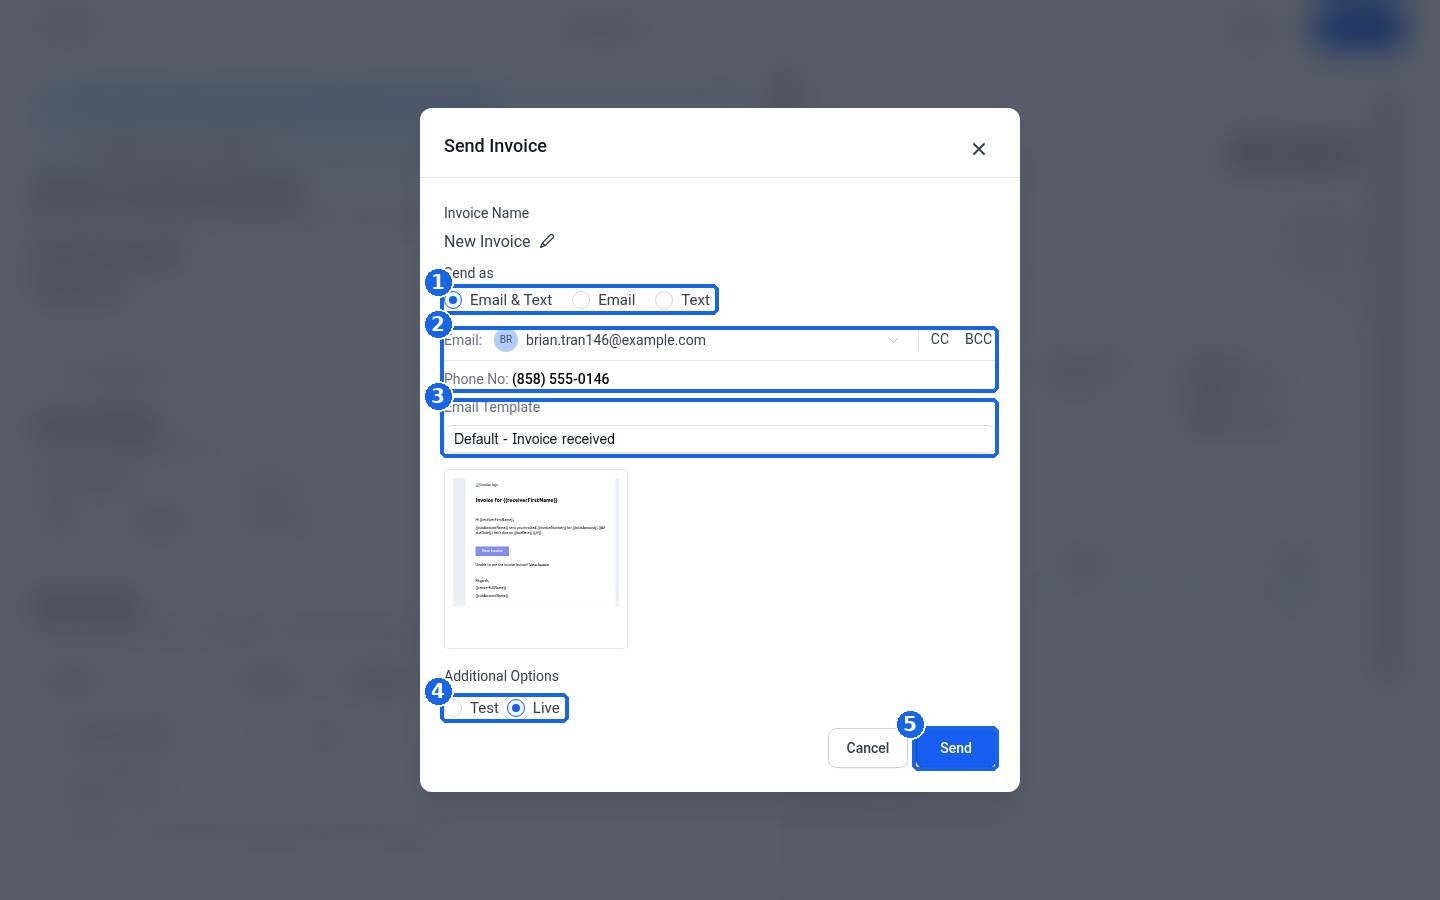
Click Send at the top right. In the Send Invoice window:
Under Send as (1), pick Email & Text, Email or Text.
Check the customer email and phone number (2). Use CC or BCC to copy someone else.
Choose the Email Template (3).
Under Additional Options (4), choose Test to send a sample or Live to send the real invoice.
Click Send (5).
Already gave the customer the invoice another way? Click the arrow next to Send and choose Copy & Mark as Sent to copy the payment link without sending a message.
Step 4: Track payment
Back on the Invoices page, the cards at the top show totals for Draft, Due, Received and Overdue invoices, and each invoice shows its status. When a customer pays online, the status changes to Paid. If they pay by cash or check, open the invoice and use Record Payment to mark it paid by hand.
FAQ
Why can my customer not pay the invoice online?
No payment provider is connected yet. Connect Stripe or another provider in Payments > Integrations.
Can I send the same invoice every month?
Yes. Choose New > New Recurring Invoice and set how often it repeats.
How do I send a quote before the job?
Use an estimate. Open the Invoices & Estimates menu and choose Estimates.
Does sending by text cost anything?
Texts are usage based and billed to your wallet per message segment, and sending texts requires a Reachific phone number.
Can I change an invoice after I send it?
Open the invoice from the list to see your options. If the amount is wrong, the cleanest fix is to void it and send a corrected invoice.
Related articles
Still stuck? Submit a ticket and our team will help. Need faster answers? See our support plans.
