
How do I create an online course?
Quick answer: Go to Memberships > Courses and click Create Product, then Start from Scratch. Pick a template such as Sprint Course, Marathon Course, Membership or Build your own and click Start Building. Name the course and click Create Product. Reachific opens the course outline, where you add categories and lessons. On the Details tab, add a description and thumbnail, then click Save.
Before you start
Plan your modules first. A short course with three to five modules is easier to finish and sell than one big library.
Have your lesson videos, PDFs and a thumbnail image ready, or upload them to Media Storage first.
If you will charge for the course, connect a payment processor like Stripe under Payments. Free courses do not need one.
Step 1: Open Courses and create a product
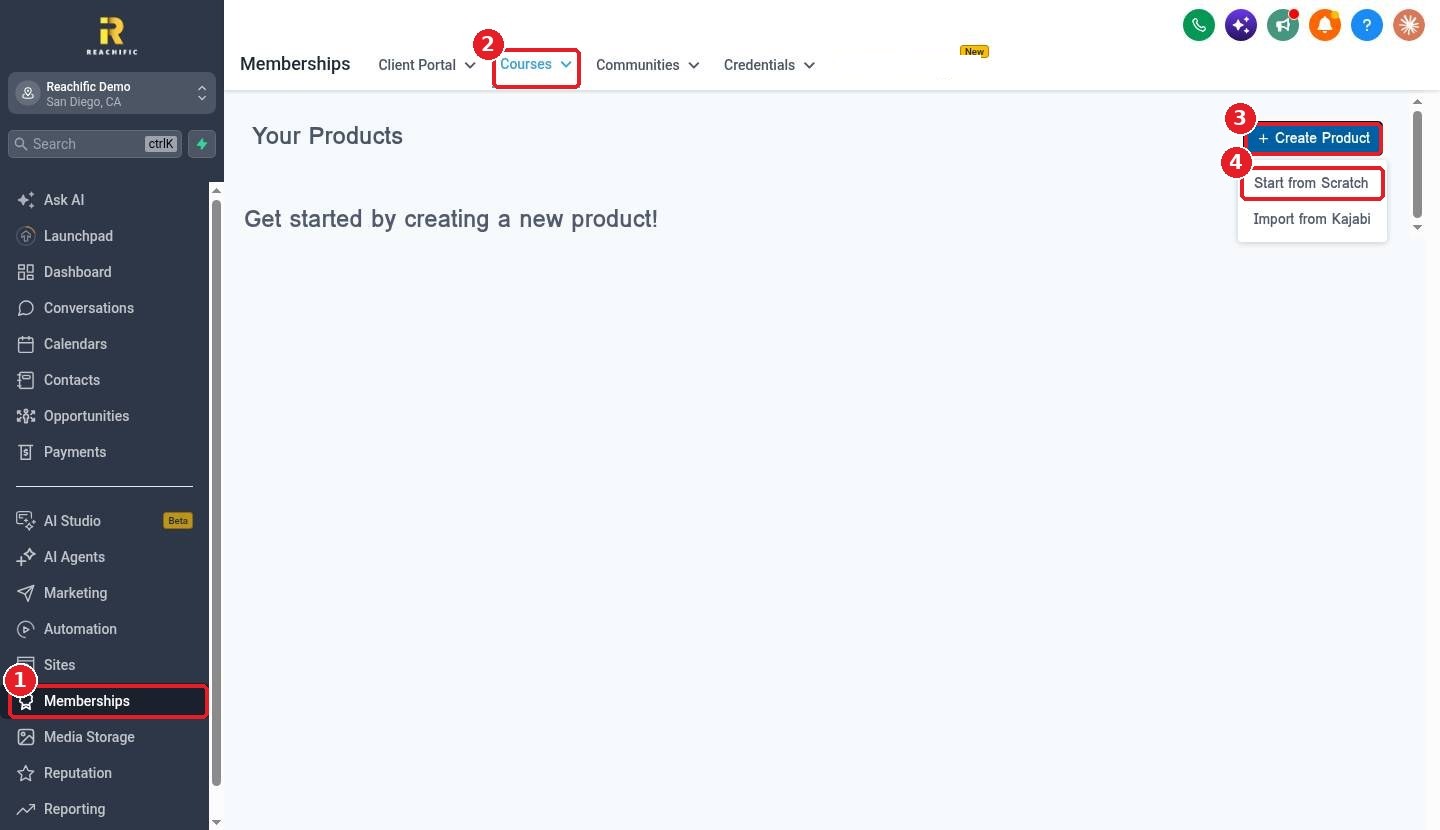
Click Memberships in the left menu (1), then the Courses tab (2). Click Create Product (3) and choose Start from Scratch (4). If your course lives on Kajabi today, choose Import from Kajabi instead.
Step 2: Pick a course template
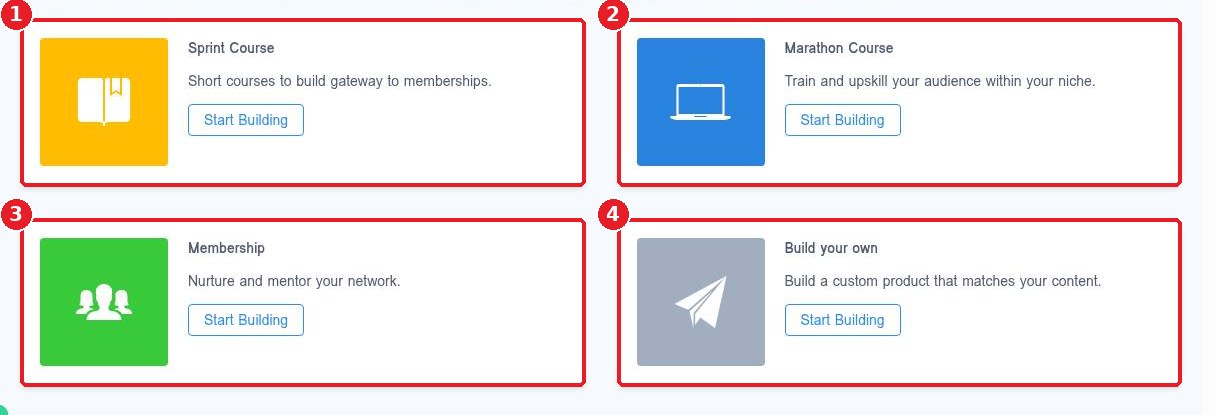
Choose the layout that fits your content and click Start Building on it:
Sprint Course (1): a short course, great as a starter offer.
Marathon Course (2): a longer training program.
Membership (3): ongoing content for a member community.
Build your own (4): a blank structure you shape yourself.
Step 3: Name the course
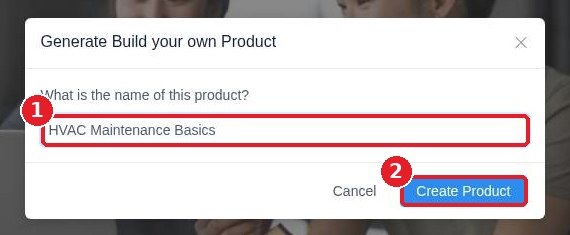
Type the course name (1), for example HVAC Maintenance Basics, and click Create Product (2). You can change the name later.
Step 4: Build the outline
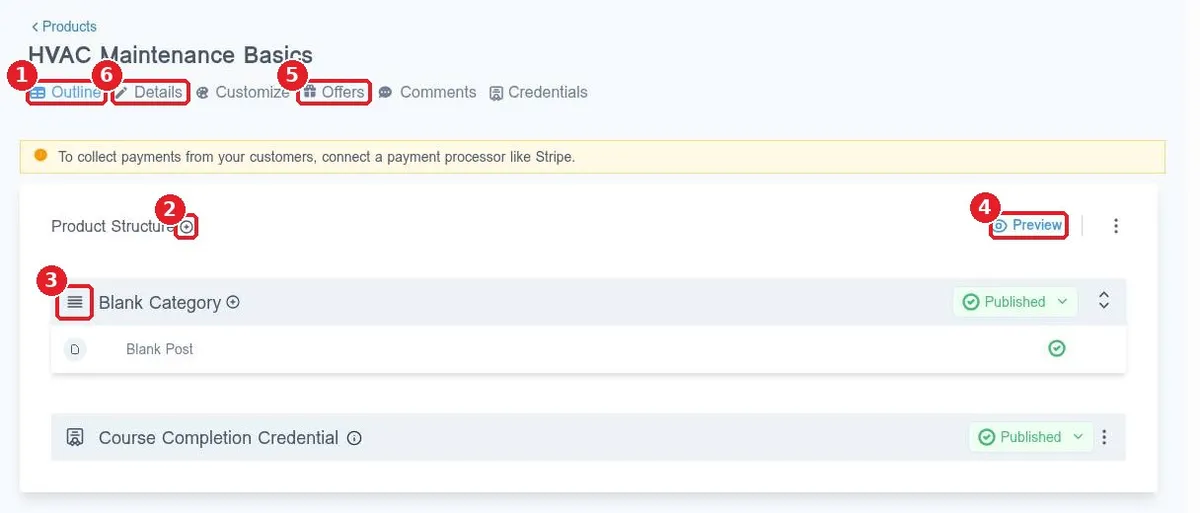
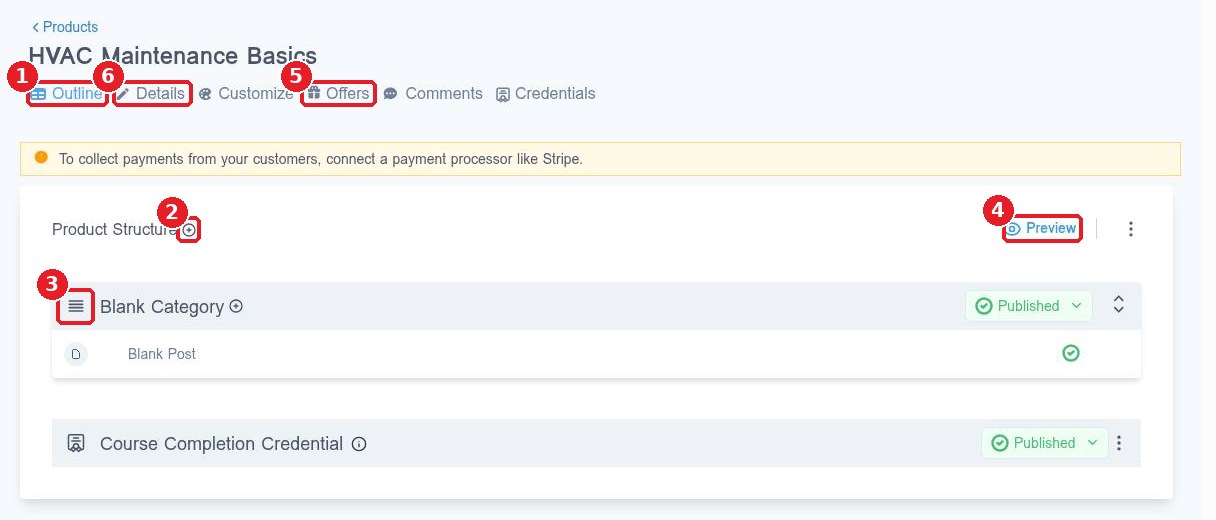
The course opens on the Outline tab (1). Use the plus icon next to Product Structure (2) to add a category, which works like a module. Each category (3) holds lessons, called posts. Rename or replace the starter Blank Category and Blank Post with your own. Click Preview (4) to see the course the way a student will. Use Offers (5) when you are ready to sell it or give access, and Details (6) for the course info.
Step 5: Add the course details
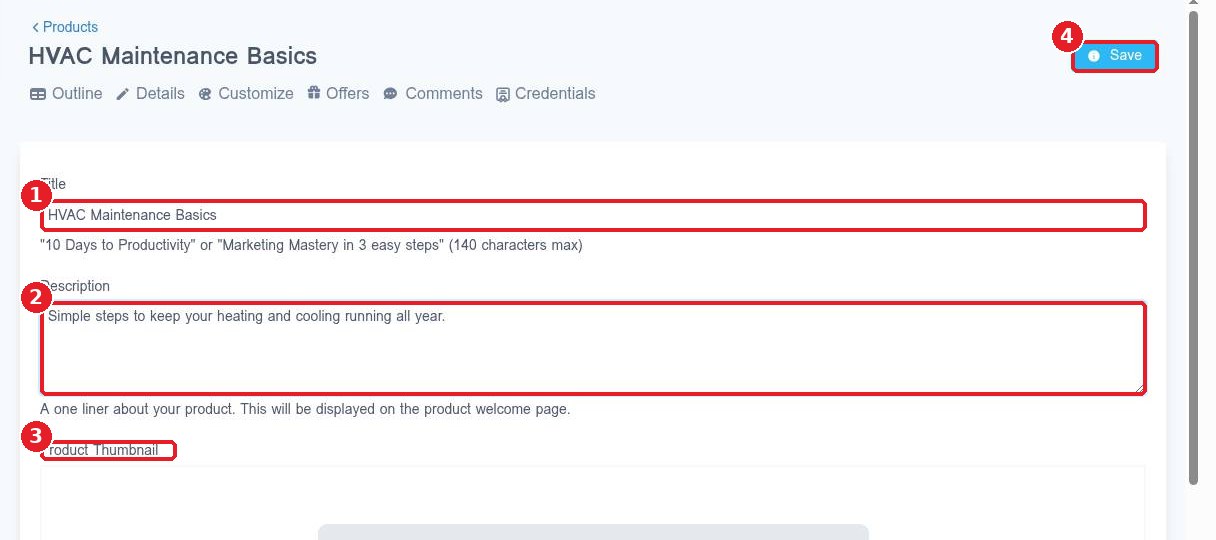
On the Details tab, check the Title (1) and write a one line Description (2). It shows on the course welcome page. Upload a Product Thumbnail (3) so the course looks good in the student library, then click Save (4).
Next, add your lessons and videos, then create an offer so customers can buy or get access to the course.
FAQ
Do I need Stripe to create a course?
No. You can build and give away a course without it. You only need a connected payment processor to charge for access.
What is the Course Completion Credential?
New courses include a completion credential item in the outline. Use the Credentials tab to set it up if you want to issue certificates when students finish.
Can I change the template after I start?
The template only sets the starting structure. You can add, rename, reorder or delete categories and lessons at any time.
Where do students log in?
Students access their courses through your client portal. Set up the portal under Memberships > Client Portal.
Related articles
Still stuck? Submit a ticket and our team will help. Need faster answers? See our support plans.
