
How do I build a form?
Quick answer: Go to Sites > Forms and click Create form. Choose Start from Scratch or From templates and click Create. Click + to open the field panel and drag fields such as First Name, Phone and Email onto the form. Click a field and its gear icon to change the label, placeholder and Required setting. On the Settings tab, choose what happens on submit, then click Save.
Before you start
Keep forms short. Name, phone, email and one question about the job is often enough to get the lead.
Decide what should happen after someone submits: a thank you message, or a redirect to a thank you page or booking calendar.
If you text leads, keep the consent checkboxes on the form and replace the placeholders with your business details.
Step 1: Create the form
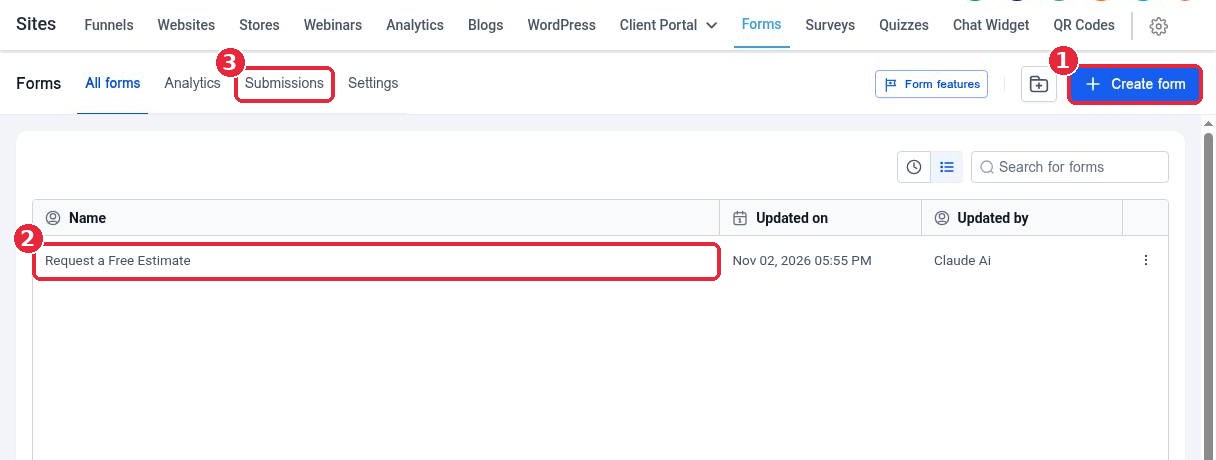
Click Sites in the left menu, then Forms. Click Create form (1). You can also open an existing form from the list (2) to edit it. The Submissions tab (3) shows every entry.
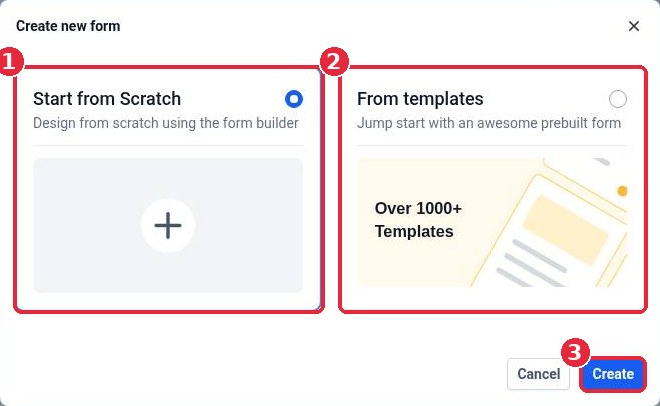
Choose Start from Scratch (1) to build your own, or From templates (2) to begin with a ready made form. Click Create (3).
Step 2: Add fields
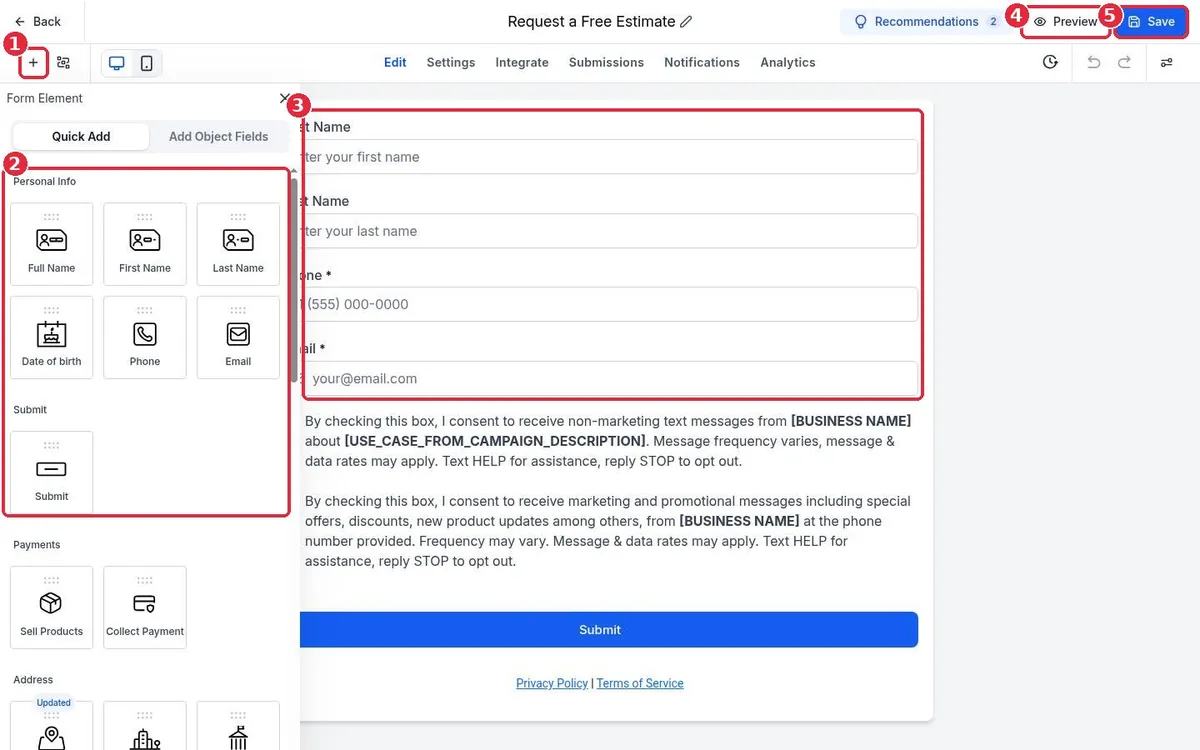
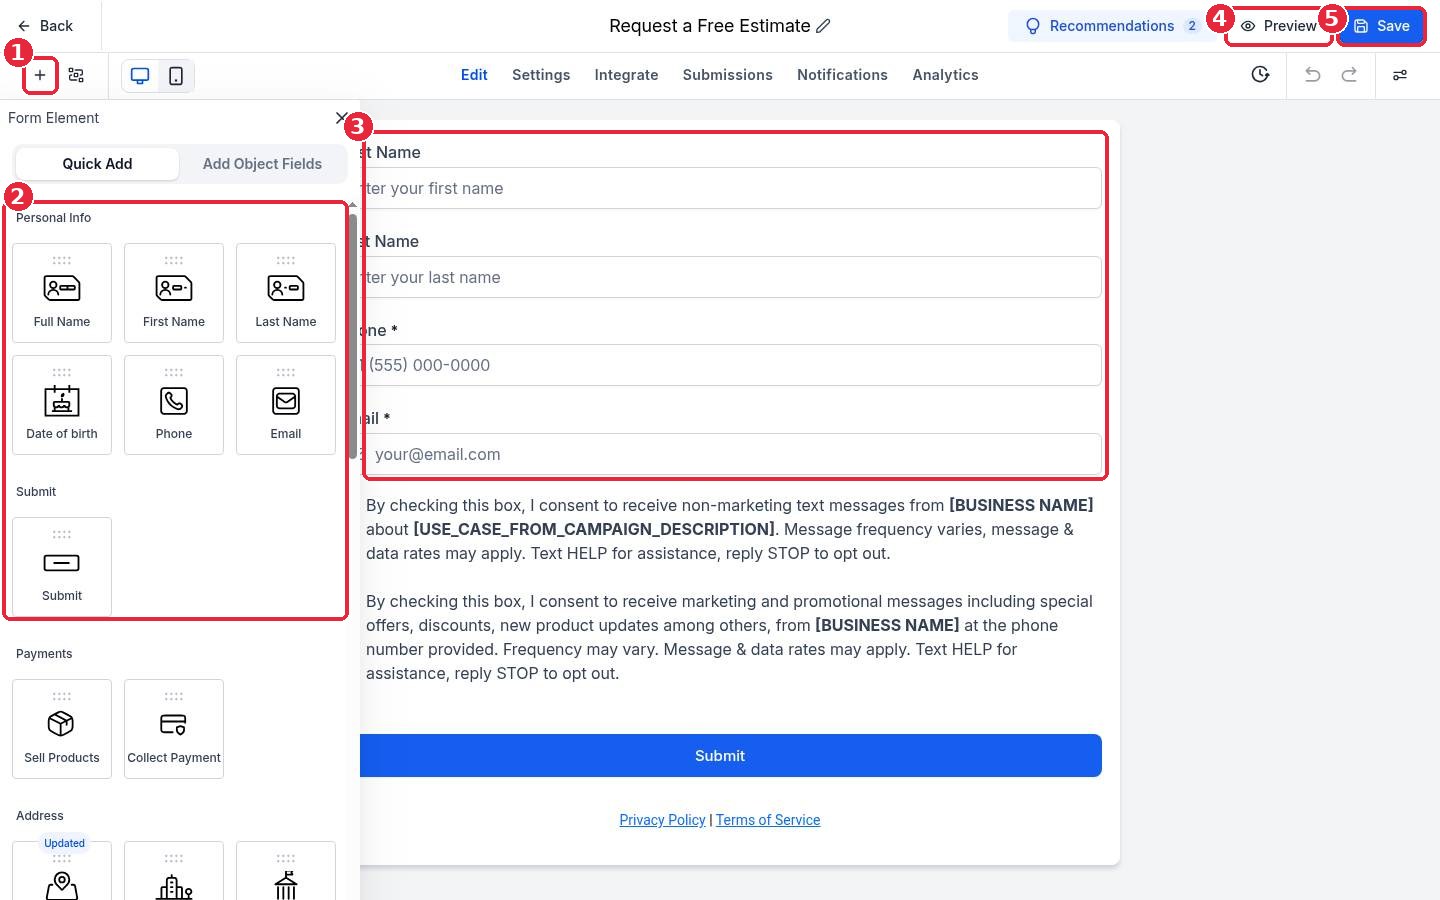
Click + (1) to open the Form Element panel. Under Quick Add (2), drag fields such as Full Name, Phone, Email, address fields or a Submit button onto the form (3). Use Add Object Fields to add your own custom fields. Click the pencil next to the form name at the top to rename it. Use Preview (4) to test how it looks, and Save (5) often.
Step 3: Set up each field
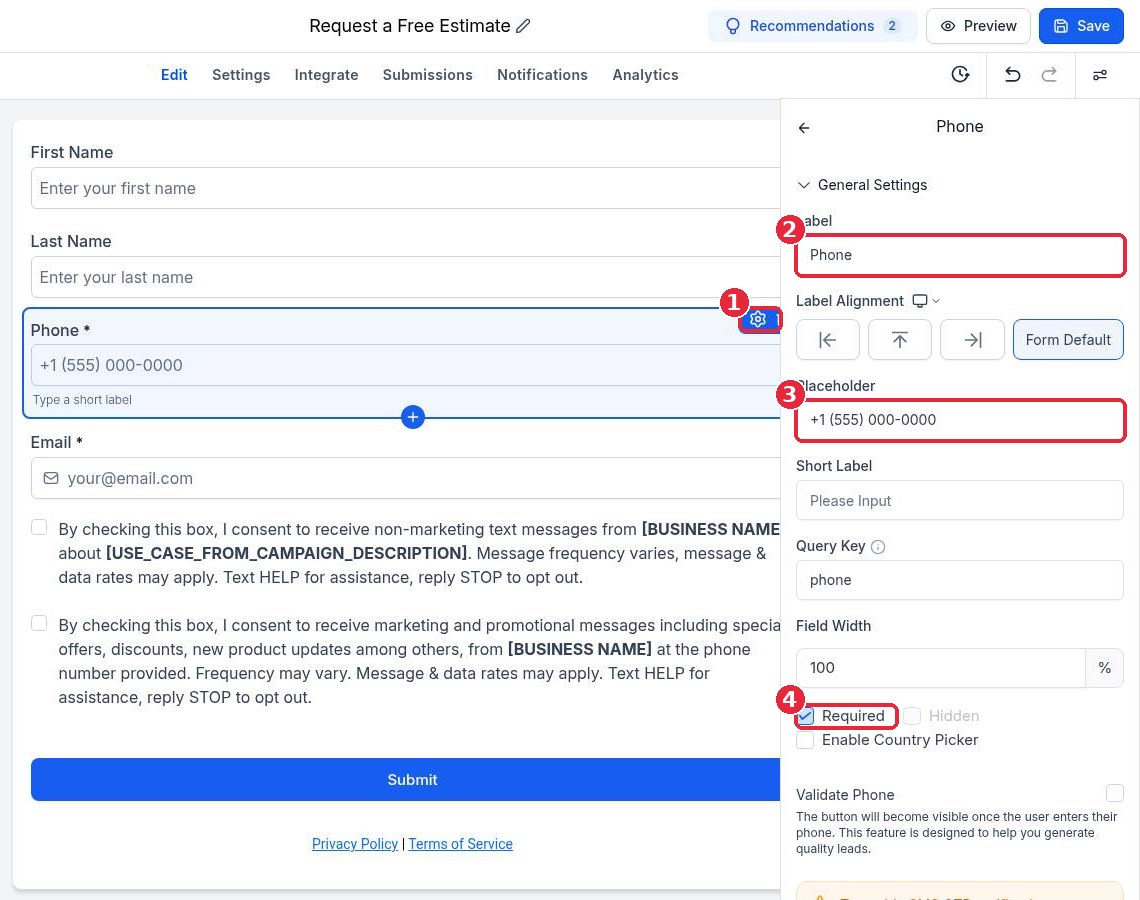
Click a field on the form, then click its gear icon (1). In the settings panel, change the Label (2) and Placeholder (3), and tick Required (4) for fields you must have, such as phone or email. You can also hide a field or set its width.
Step 4: Choose what happens on submit
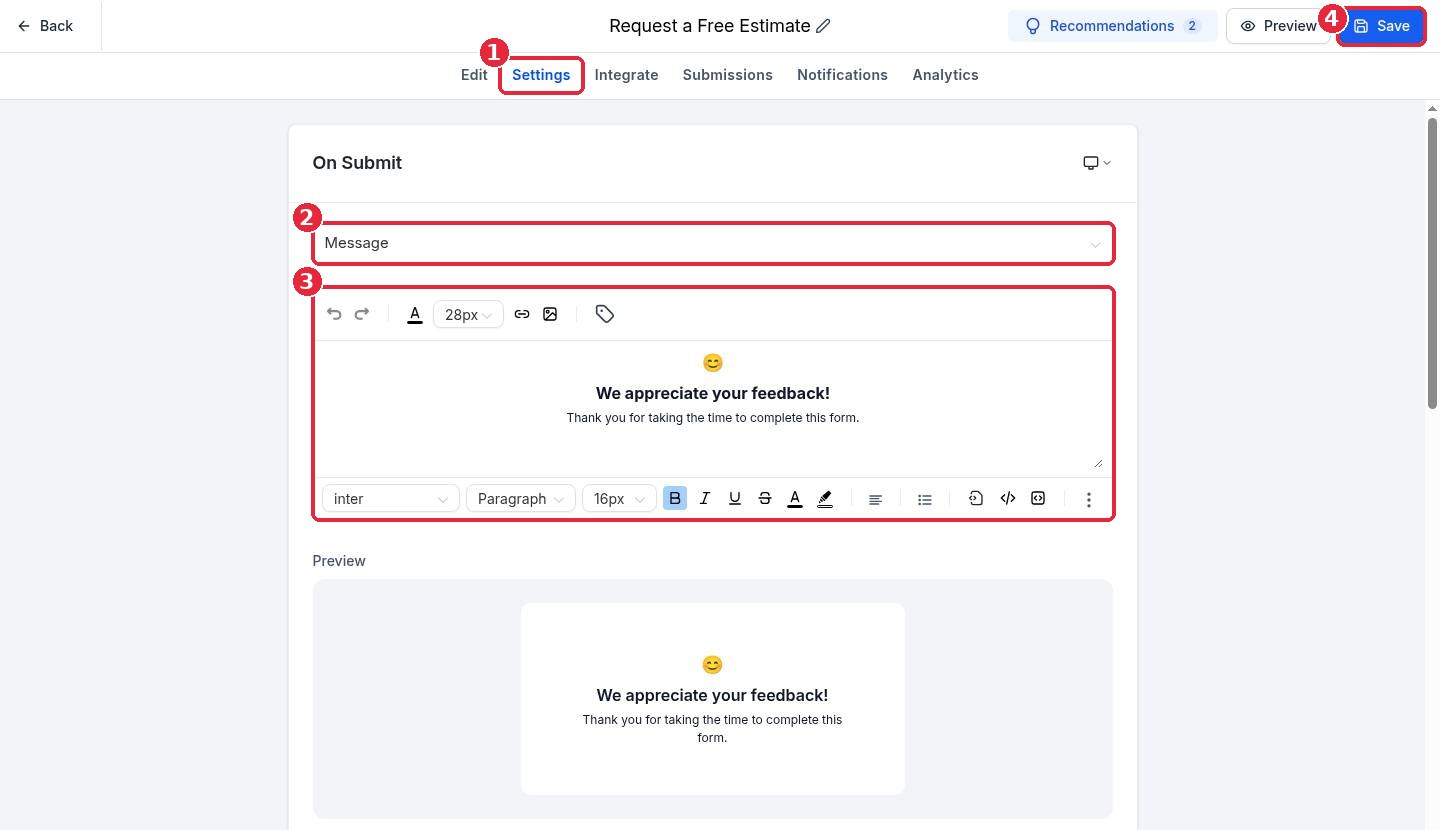
Click the Settings tab (1). Under On Submit, pick an action (2), such as showing a message or opening a URL. If you show a message, write it in the editor (3) and check the preview below. Click Save (4).
Next, use the Integrate tab to put the form on your website, and the Notifications tab to get an alert when someone submits. Every submission also creates or updates a contact.
FAQ
Where do form submissions go?
They show on the Submissions tab and create or update the contact in Contacts. You can also start a workflow with the Form submitted trigger.
Can I send people to a thank you page?
Yes. On the Settings tab, change the On Submit action to open a URL and paste your thank you page address.
Should I use a form, survey or quiz?
Use a form for simple lead capture on one screen. Use a survey for longer, multi step questions, and a quiz when you want to score answers.
Can I test the form without creating a real lead?
Use Preview to check the layout. Submit a test with your own details, then delete the test contact if you want.
Want us to handle it? Our team can build your lead forms, connect them to your website and set up instant follow up so every new lead gets a fast response. Book a free strategy call and get a free quote.
Related articles
Still stuck? Submit a ticket and our team will help. Need faster answers? See our support plans.
