
How do I create my first workflow?
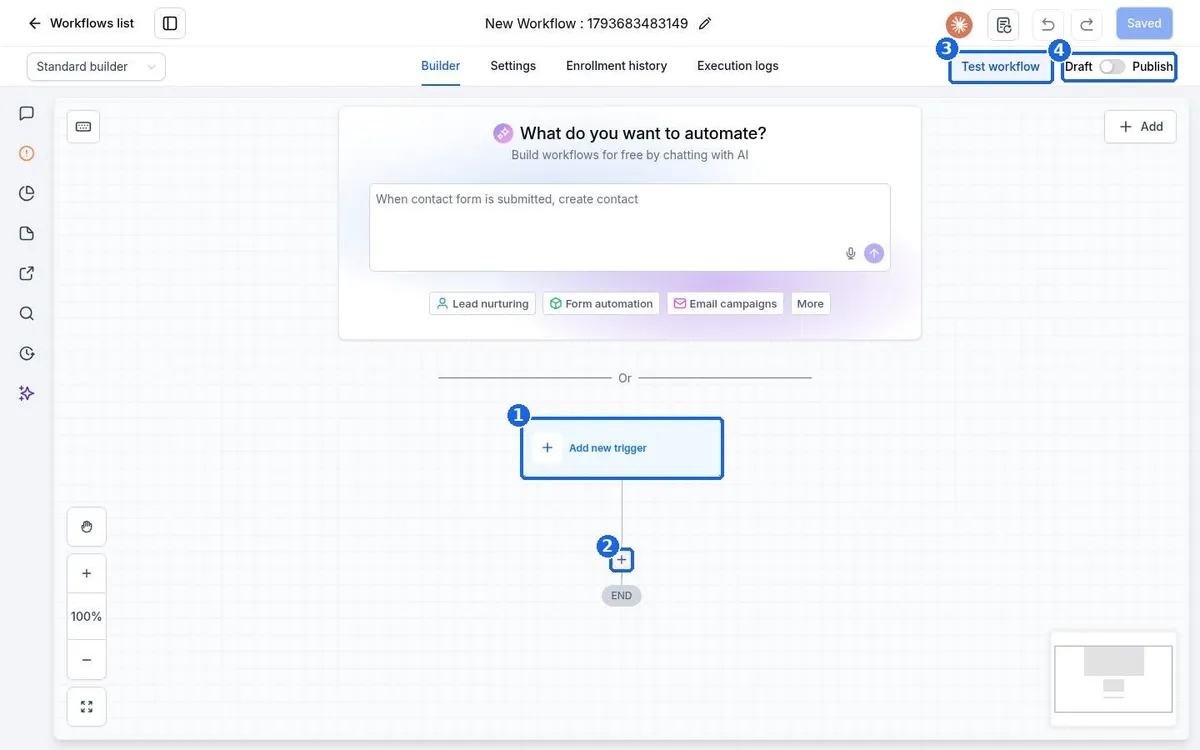
Quick answer: Go to Automation > Workflows, click Create workflow > Start from Scratch, click Add new trigger and pick what starts the workflow (for example a tag being added). Click the + under the trigger to add actions such as Send SMS, Send Email or Wait. Name the workflow, click Test workflow, then switch the toggle from Draft to Publish.
Before you start
- Decide the one job this workflow will do, for example: when a contact gets the tag new lead, text them right away and remind the team the next day.
- Have any message text ready. Texts need a Reachific phone number and emails need a sending email set up.
- Workflows stay in Draft until you publish them, so you can build and test safely.
Step 1: Create the workflow
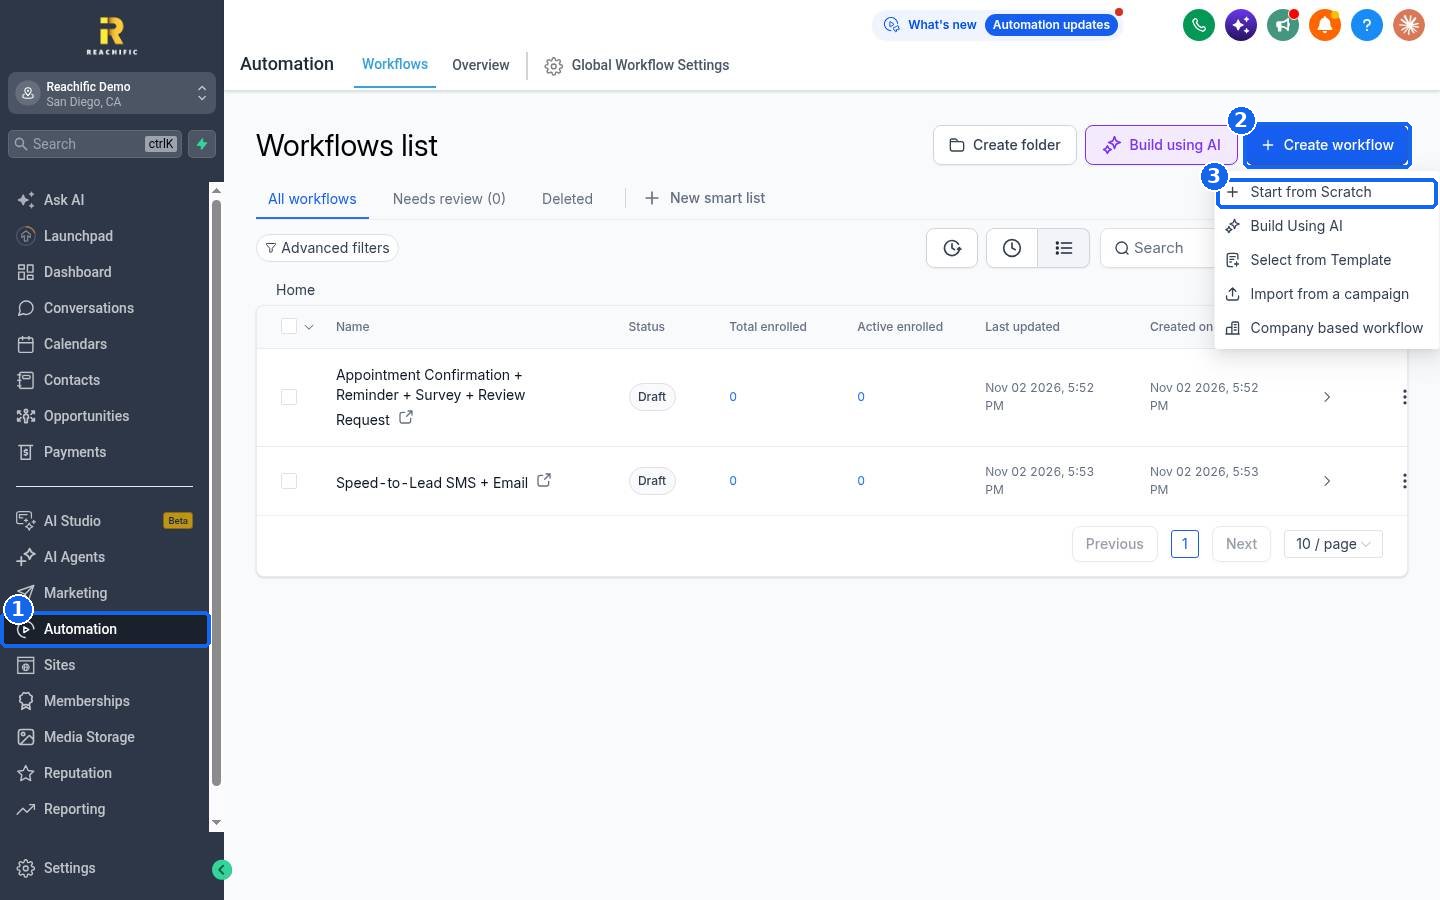
Click Automation in the left menu (1). On the Workflows list, click Create workflow (2) and choose Start from Scratch (3). You can also pick Build Using AI to describe what you want in plain words, or Select from Template to start from a ready made recipe.
Step 2: Add a trigger
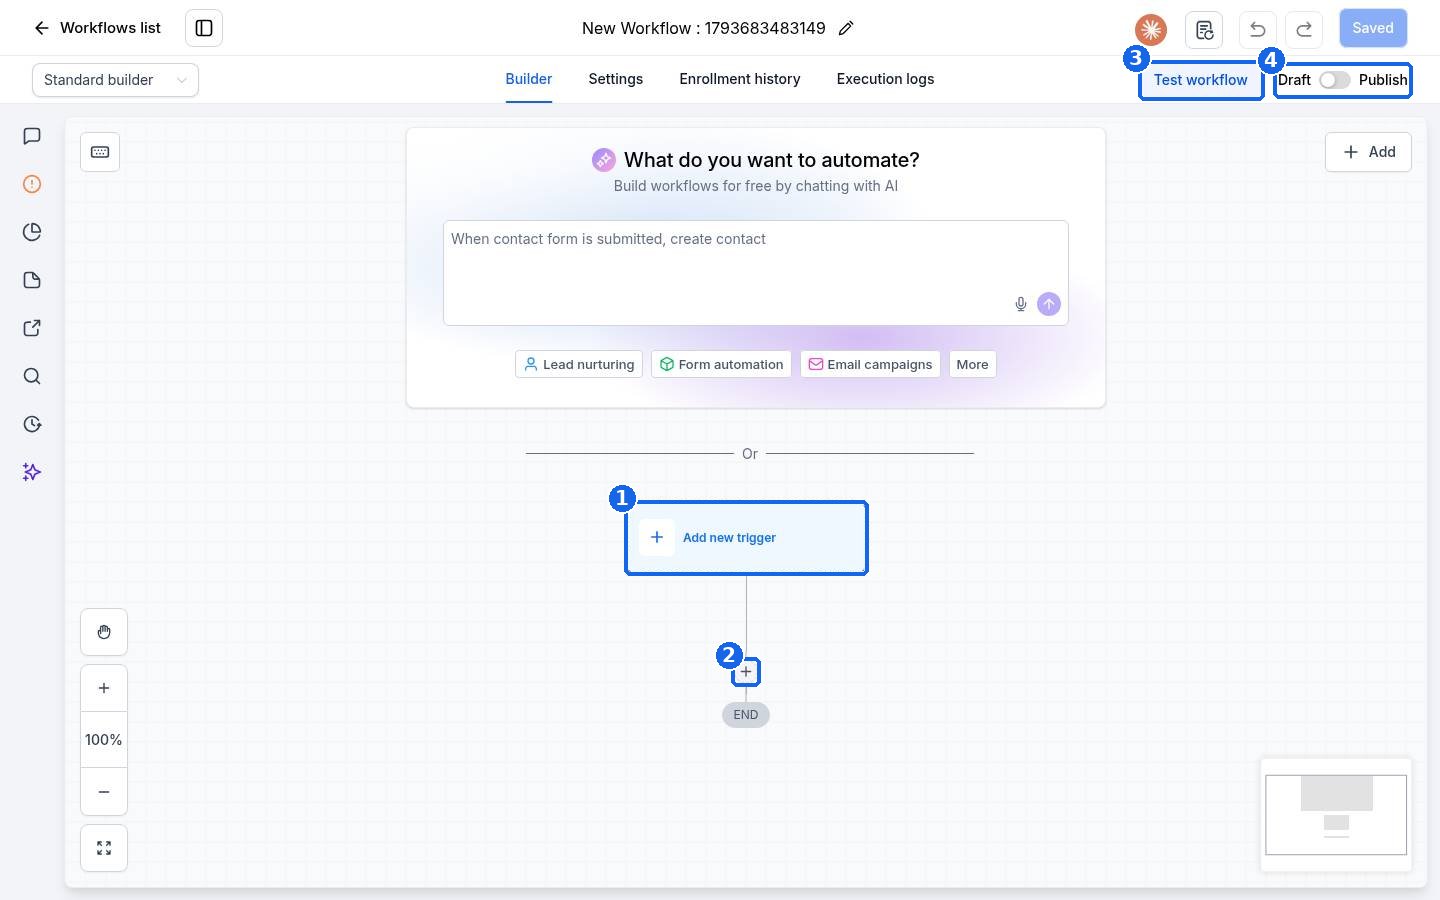
The builder opens with an empty workflow. Click Add new trigger (1). The trigger is the event that starts the workflow for a contact.
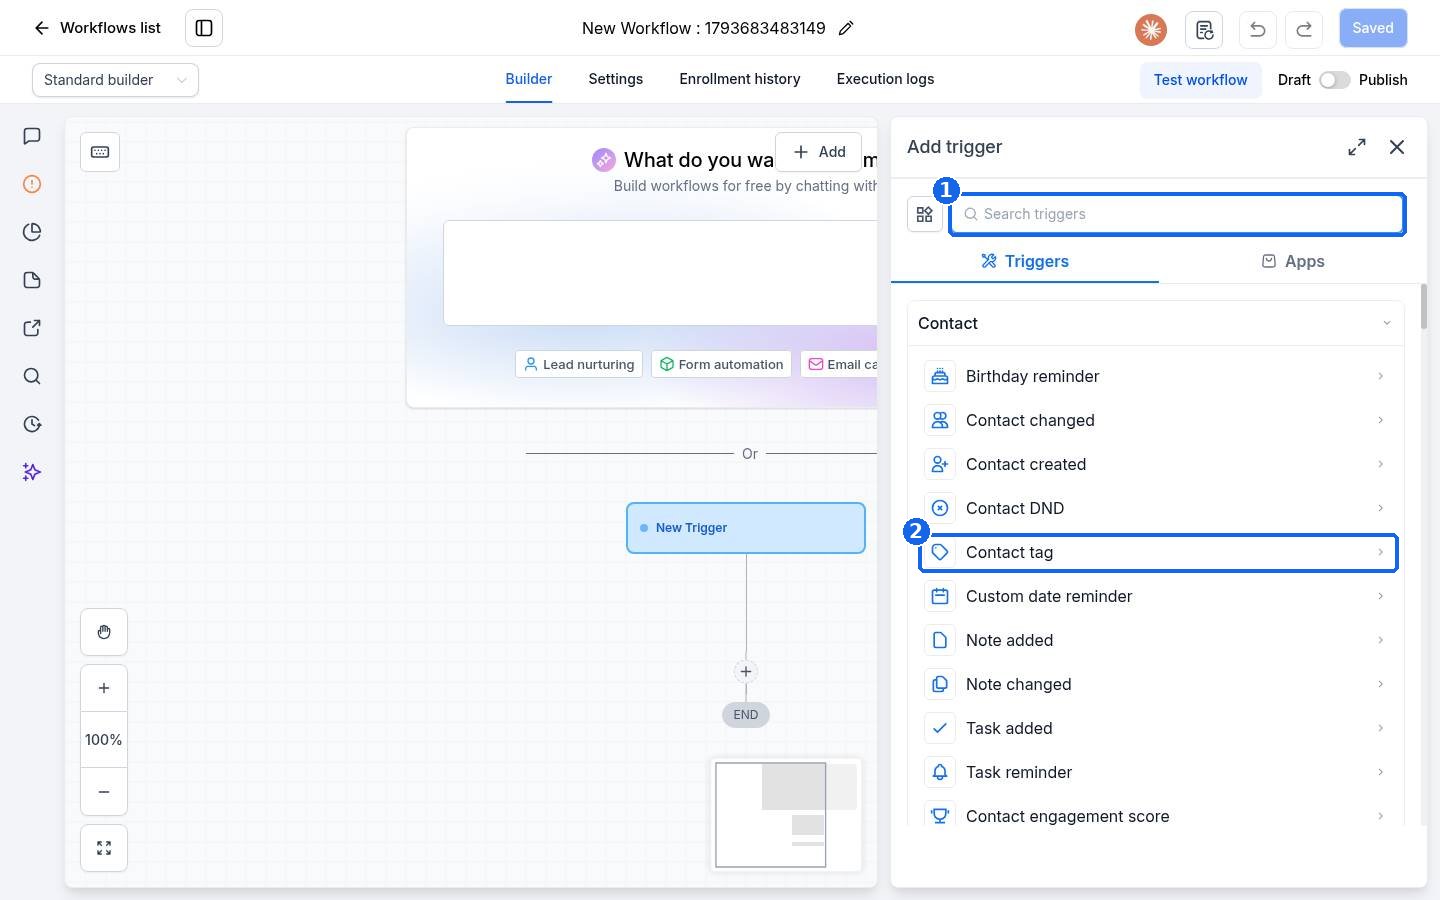
In the Add trigger panel, search for a trigger (1) or browse the list. Common choices are Contact tag (2), Form submitted, Appointment status and Customer replied.
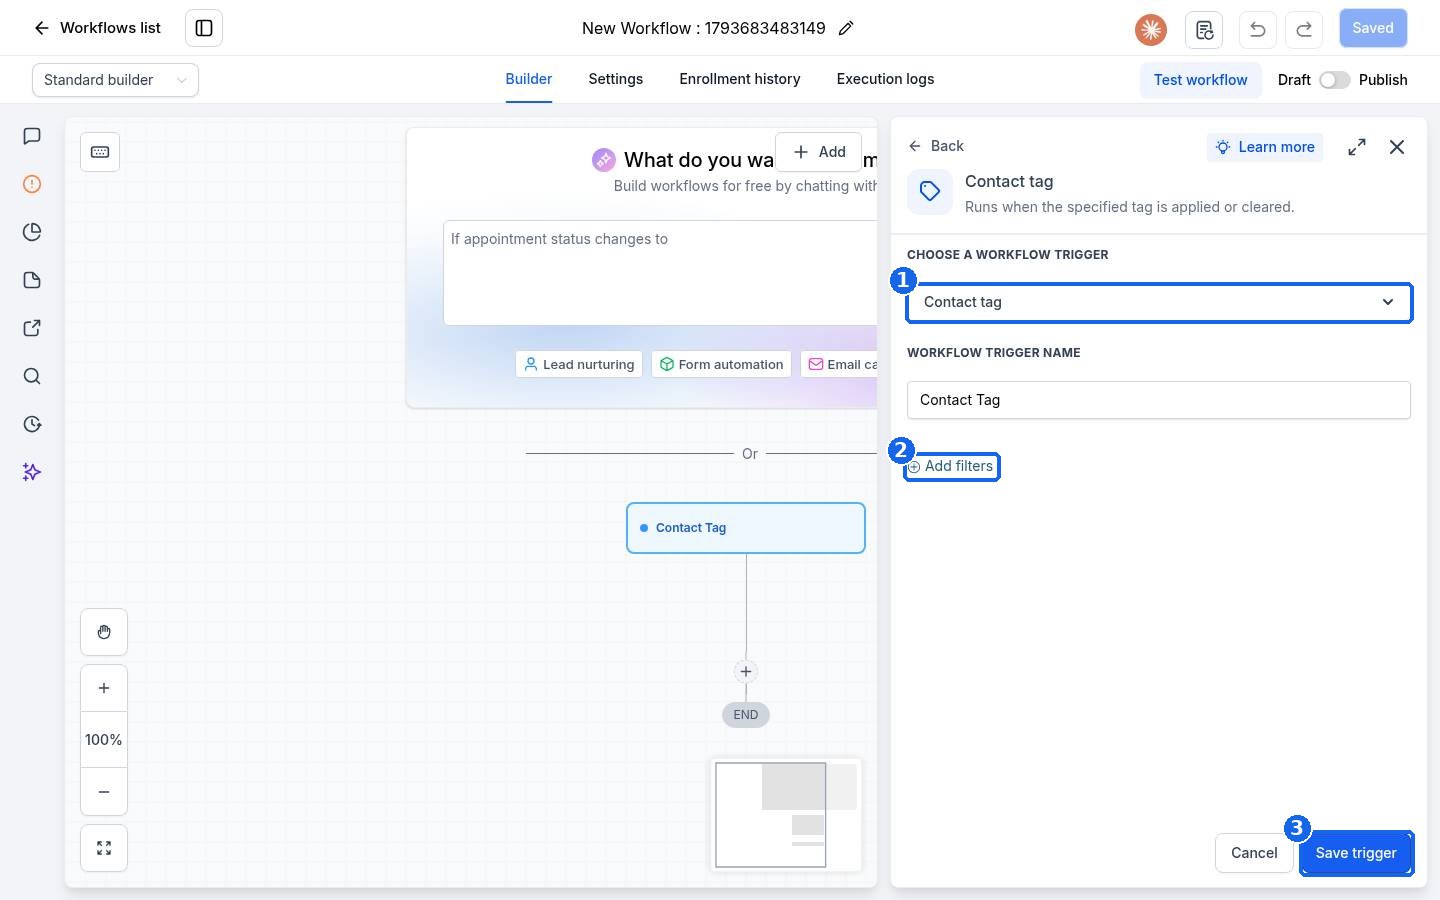
Check the trigger type (1), then click Add filters (2) to narrow it, for example to the exact tag that should start this workflow. Click Save trigger (3).
Step 3: Add actions
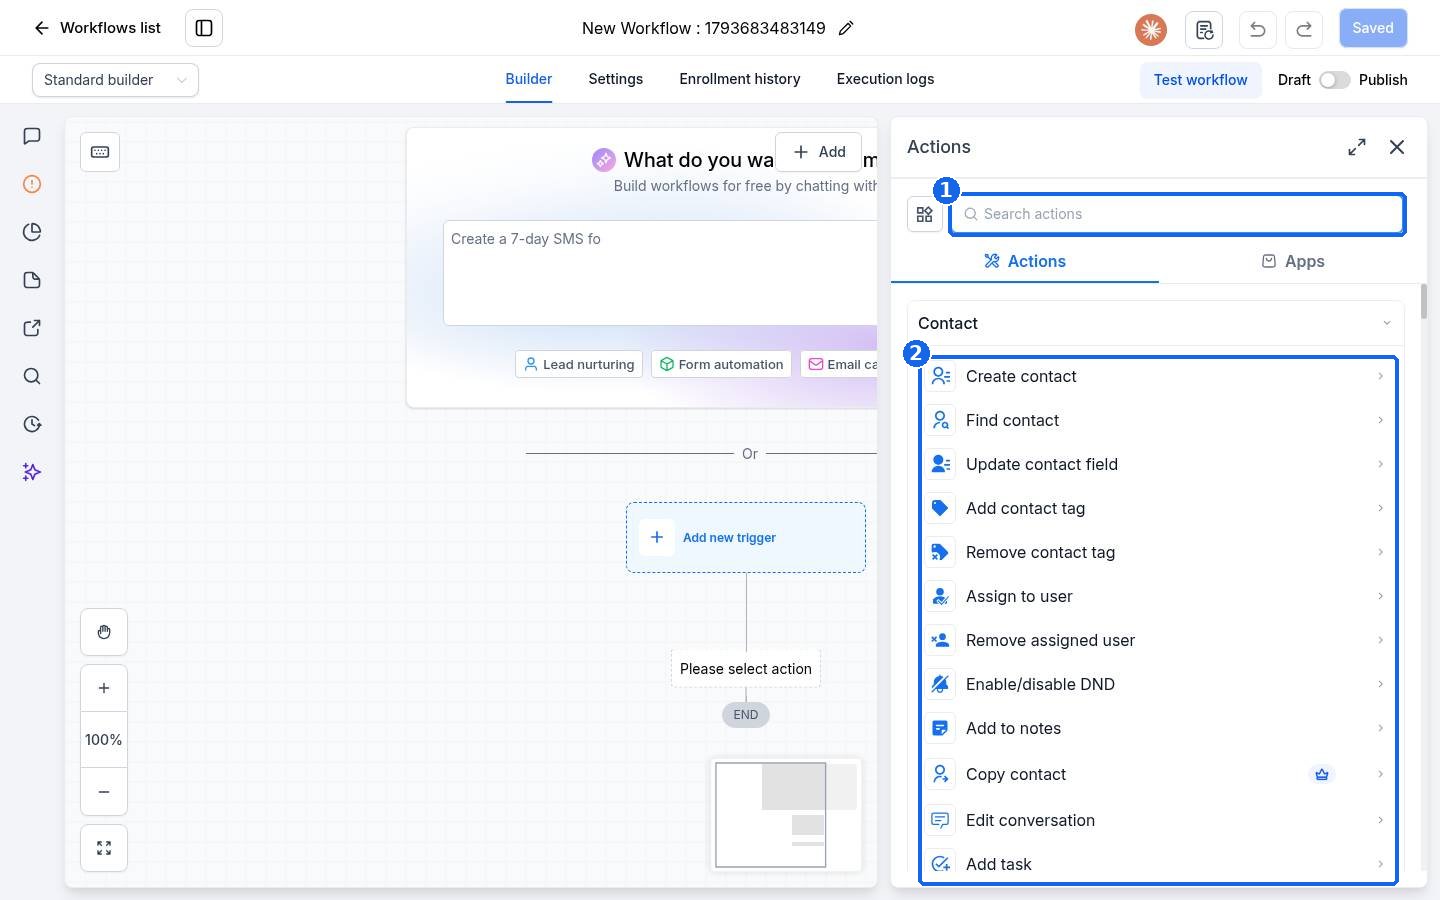
Click the + under the trigger (2 in the builder picture above). In the Actions panel, search for an action (1) or pick one from the list (2): for example Send SMS, Send Email, Wait, Add contact tag, Assign to user or Add task. Fill in the action and save it. Click the next + to add more steps in order.
Step 4: Name, test and publish
- Click the pencil next to the workflow name at the top and give it a clear name, such as New lead welcome text.
- Click Test workflow (3 in the builder picture) and run it on a test contact, such as yourself, to check every step.
- Switch the toggle from Draft to Publish (4) and make sure it saves. From now on, every contact that meets the trigger enters the workflow.
Use the Enrollment history and Execution logs tabs at the top of the builder to see who entered the workflow and what each step did.
FAQ
Why is my workflow not running?
Check that it is switched to Publish, that the trigger filters match (for example the exact tag name), and look at Execution logs for errors.
Will publishing send messages to everyone already in my account?
No. A workflow only starts for contacts when the trigger happens after you publish, unless you add contacts to it on purpose.
Can I copy a workflow I already built?
Yes. On the Workflows list, open the menu on the workflow row and choose the option to copy it.
What does the Wait action do?
It pauses the contact for a set time, or until a condition is met, before the next step runs.
Can AI build the workflow for me?
Yes. Choose Build Using AI, or type what you want in the What do you want to automate? box in the builder, then review every step before you publish.
Want us to handle it? Our team builds and tests the automations that matter most, like missed call text back, speed to lead and review requests, so they run correctly from day one. Book a free strategy call and get a free quote.
Related articles
- How do I set up a Conversation AI bot to answer texts and chats?
- How do I send a bulk text or email to a list?
- How do I import contacts from a CSV file?
Still stuck? Submit a ticket and our team will help. Need faster answers? See our support plans.
