
How do I import contacts from a CSV file?
Quick answer: Go to Contacts and click Import. Choose Start CSV import, select Contacts, upload your CSV file and pick how to handle existing contacts. Check that every column is matched to the right field, set any extras such as tags or a smart list, tick the consent box and click Start import.
Before you start
Save your list as a CSV file (in Excel or Google Sheets use File > Save as or Download > CSV). The file can be up to 30 MB.
Put one contact per row and give every column a clear header in the first row, such as First Name, Last Name, Email, Phone and Tags.
Each contact needs at least an email address or a phone number so Reachific can match and message them.
Only import people who agreed to hear from you. Buying or renting lists hurts your sender reputation and can break texting and email rules.
Step 1: Open the import tool
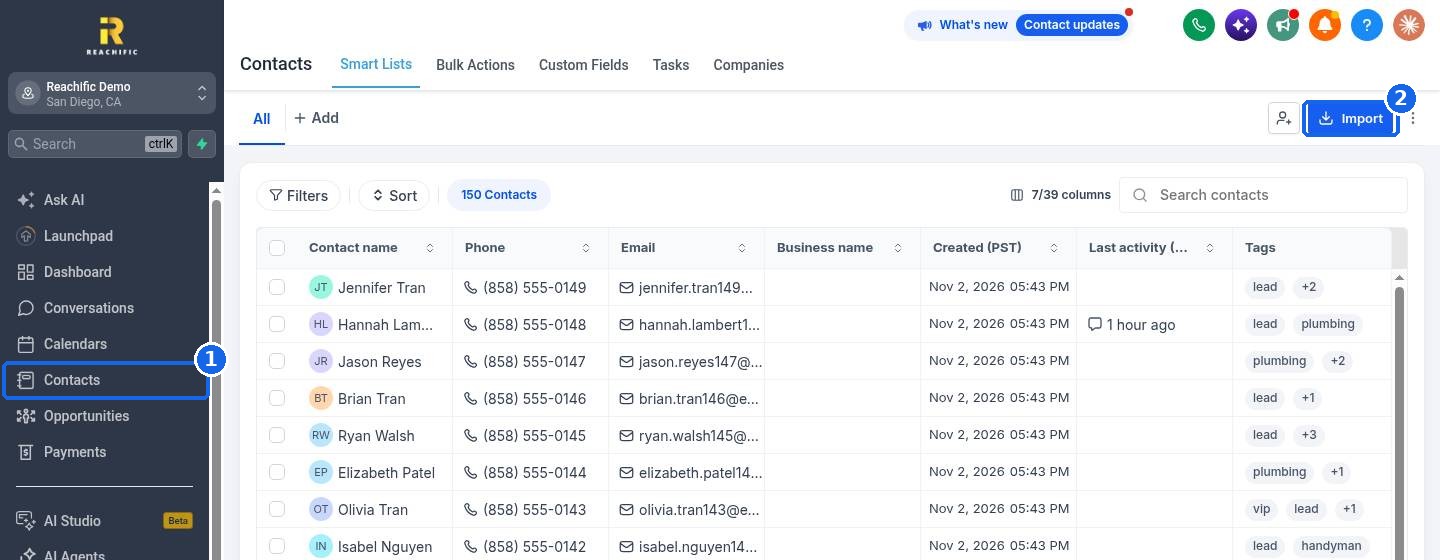
Click Contacts in the left menu (1), then click Import at the top right (2).
Step 2: Start a CSV import
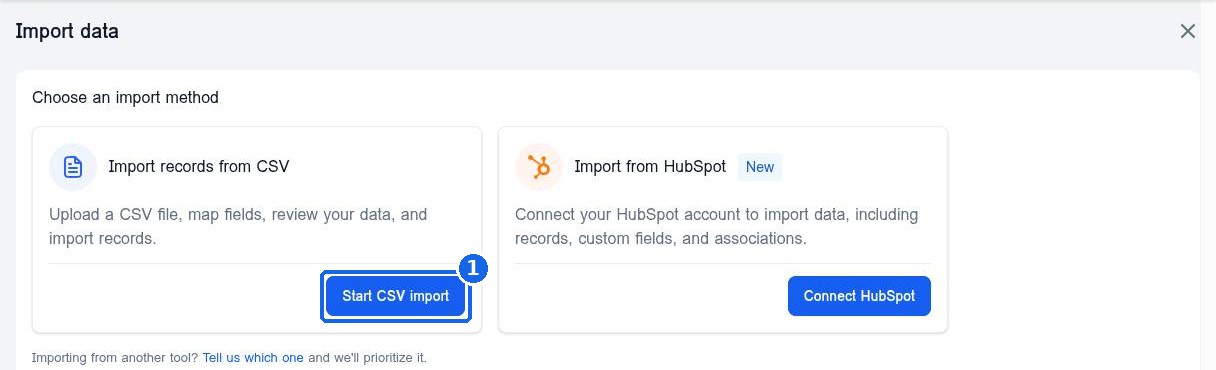
Under Choose an import method, click Start CSV import (1). Further down this page, Import history shows every past import with its status and any errors.
Step 3: Choose what you are importing
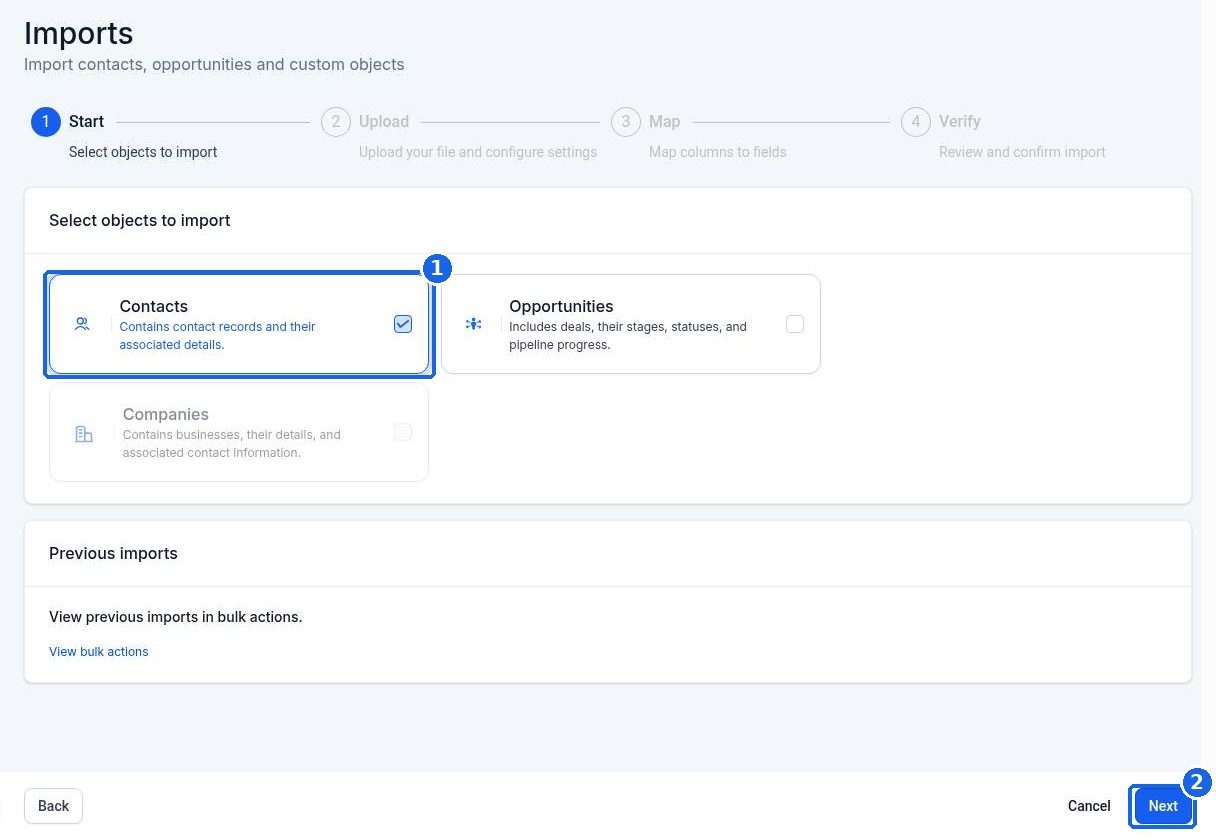
Check Contacts (1). If your file also has deals for your pipeline, you can check Opportunities too. Click Next (2).
Step 4: Upload your file
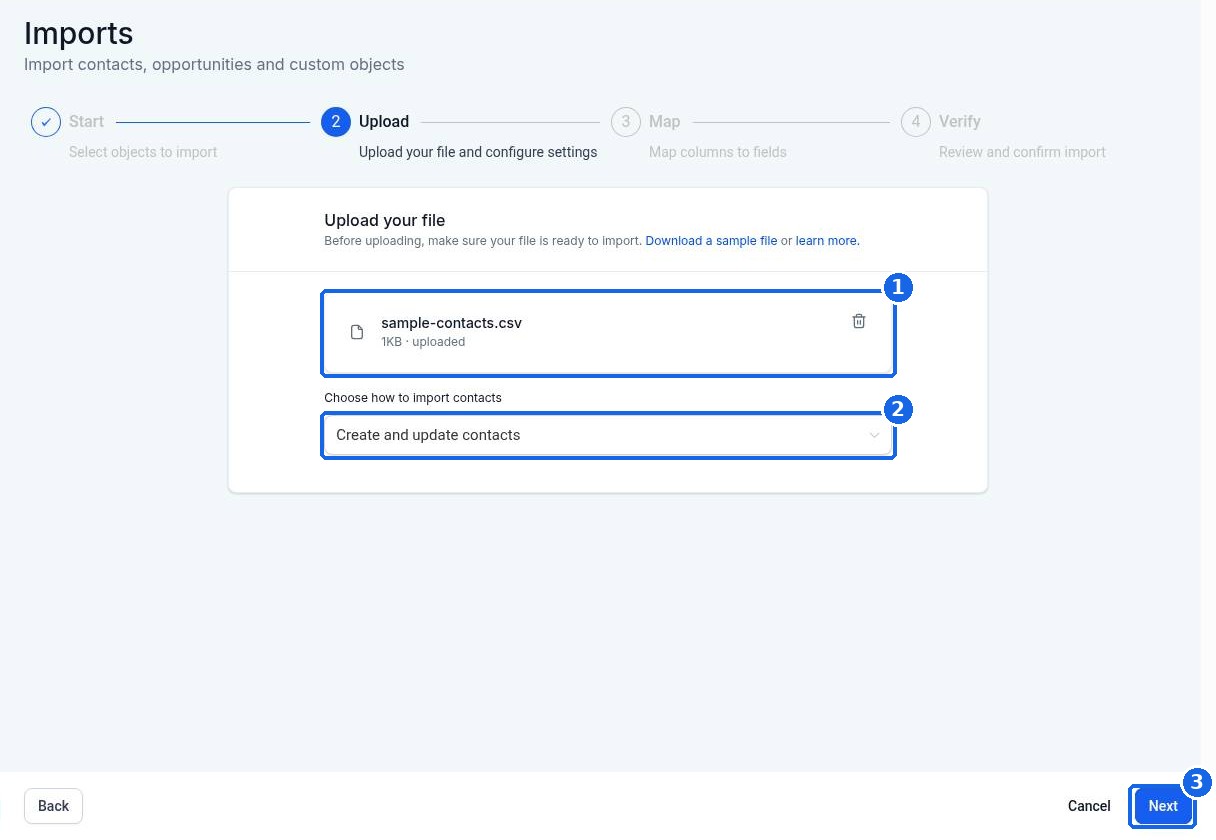
Click the upload box or drag your CSV into it (1). Not sure how to lay out your file? Click Download a sample file at the top of this box and copy its headers. Then choose how to import (2):
Create contacts adds new people only.
Create and update contacts adds new people and updates people already in your account. This is the best choice for most lists.
Update contacts only changes people who already exist.
Click Next (3).
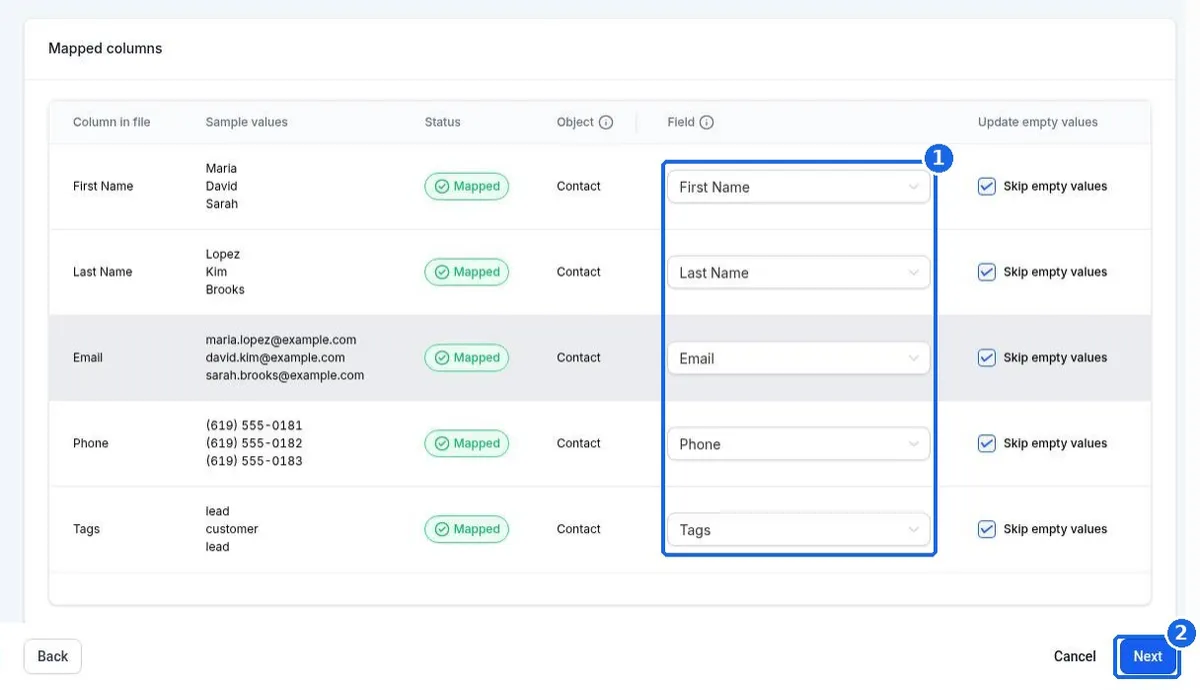
Step 5: Match your columns to fields
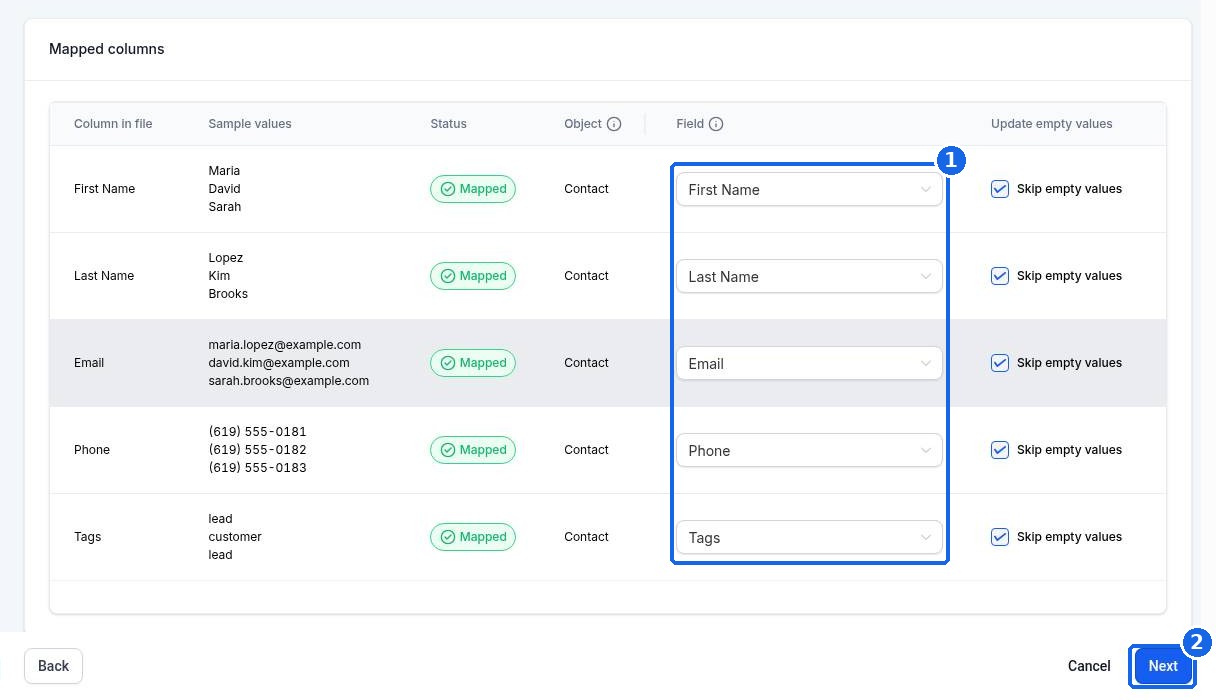
Reachific reads your headers and shows sample values from your file. Each column should show Mapped. Use the Field dropdown (1) to fix any column that landed on the wrong field, or to send it to one of your custom fields. Leave Skip empty values checked so blank cells do not erase details you already have. Click Next (2).
Step 6: Review and start the import
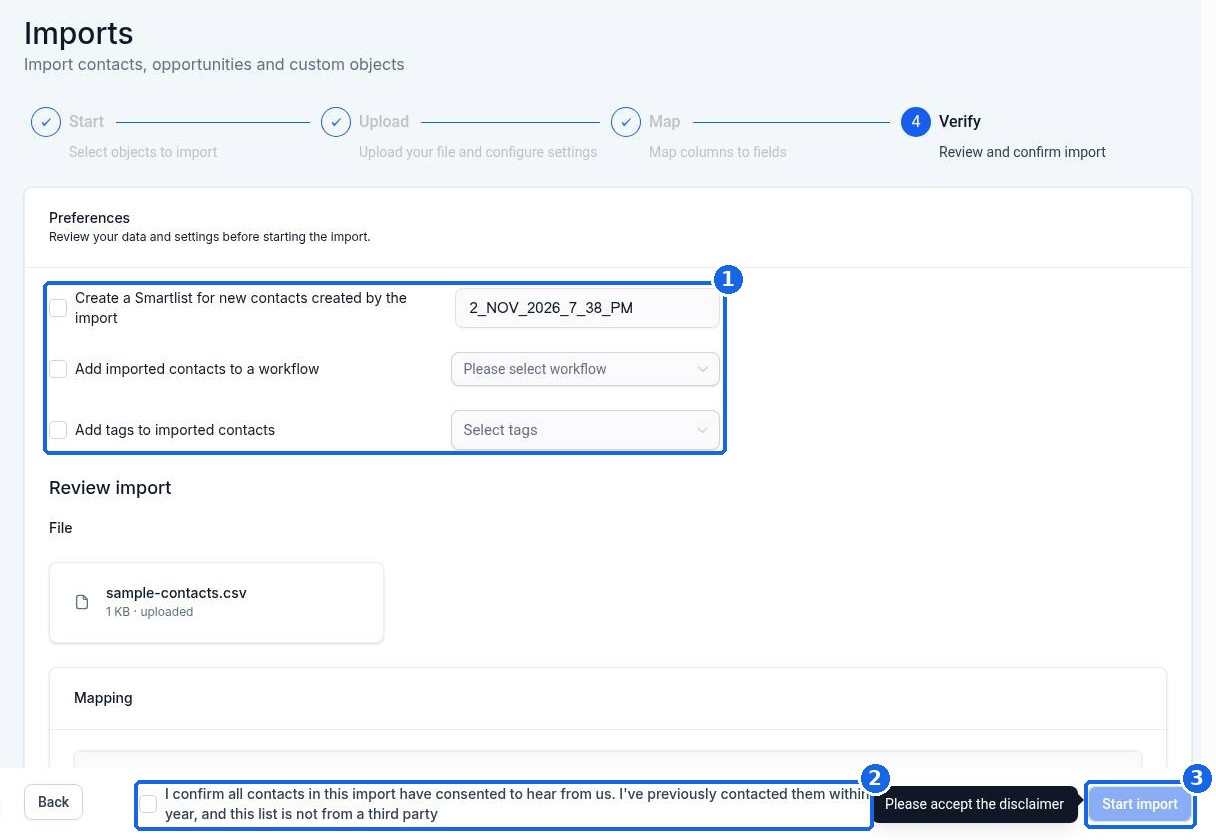
Under Preferences (1) you can create a smart list of the new contacts, add them to a workflow, or add tags to everyone in the file. A smart list makes it easy to find this batch later. Read the consent statement and check the box (2), then click Start import (3).
Step 7: Check the results
Go back to Contacts > Import and look at Import history. When the status says Completed, open your contact list (or the smart list you created) and spot check a few records.
FAQ
Why did some rows fail?
The most common causes are a missing email and phone, a badly formatted phone number or email, or a duplicate row. Open the import in Import history to see the errors, fix those rows in your file and import just them again.
Will importing send messages to my contacts?
Not by itself. Messages only go out if you add the contacts to a workflow or send a campaign. Double check the workflow option in Step 6 before you start.
Can I import tags?
Yes. Add a Tags column to your file, with several tags separated by commas, or use Add tags to imported contacts in Step 6 to tag the whole file.
Should I add a workflow during import?
Only if that workflow is ready and you want every person in the file to enter it. If you are not sure, import first and add the smart list to a workflow later.
Will the import check my email addresses?
Reachific can check new email addresses for deliverability. You control this in Settings > Business Profile under the email verification option.
Want us to handle it? Our team can clean up your old list, import it and build a reactivation campaign that turns past customers into new jobs. Book a free strategy call and get a free quote.
Related articles
Still stuck? Submit a ticket and our team will help. Need faster answers? See our support plans.
