
How do I set up a Conversation AI bot to answer texts and chats?
Quick answer: Go to AI Agents > Conversation AI and click Create Agent. Choose Prompt Based Agent, pick a starting point such as General Q&A or Appointment booking and click Continue. Add your business name, adjust the instructions, connect your knowledge, click Save and test it. When you are happy with the answers, set the Mode to Suggestive or Auto-Pilot.
Before you start
Write down the questions customers ask most, with your answers: services, service area, hours, how to book and what happens next.
For the best answers, build a knowledge base first in AI Agents > Knowledge Base (for example from your website and an FAQ list).
The bot can only reply on channels you have set up, such as a Reachific phone number for texts or the chat widget on your website.
Step 1: Open Conversation AI
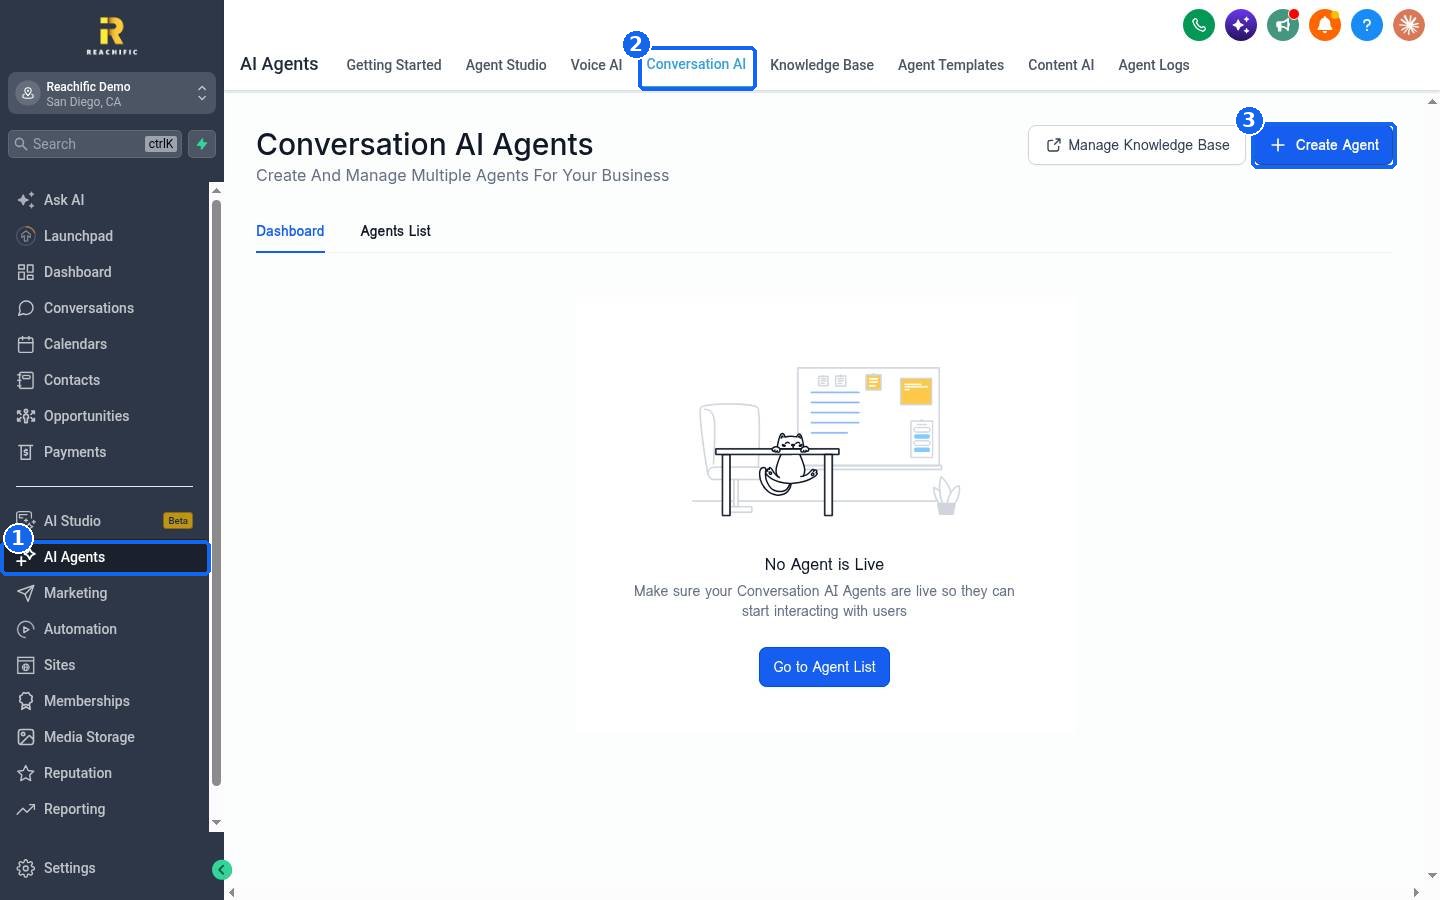
Click AI Agents in the left menu (1), then the Conversation AI tab (2). The Dashboard shows whether any agent is live. Click Create Agent (3).
Step 2: Choose how to build the agent
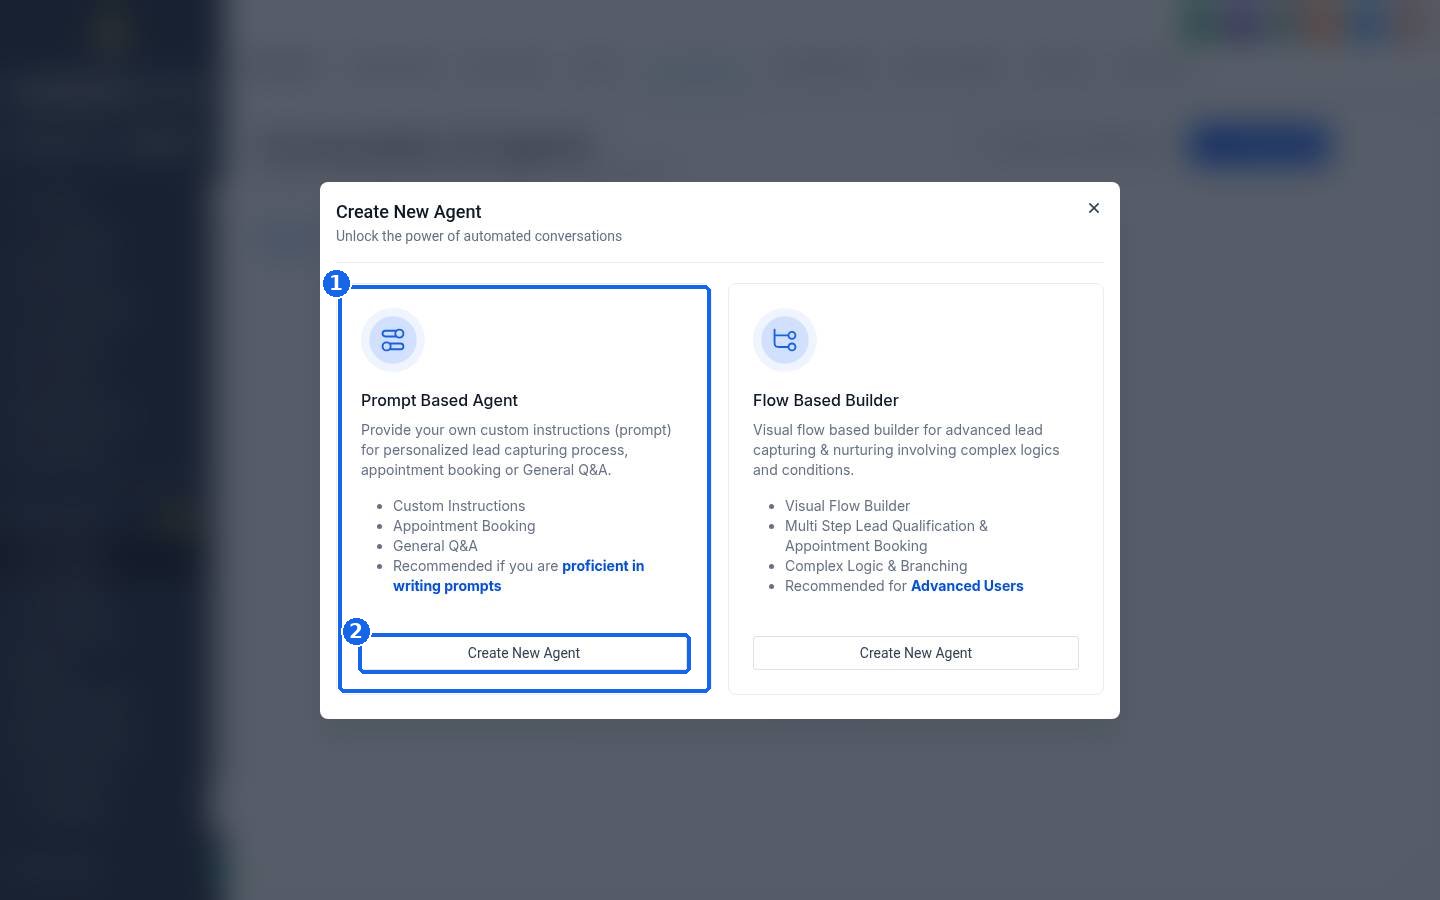
Pick Prompt Based Agent (1) and click its Create New Agent button (2). This is the simplest option: you describe in plain words how the bot should behave. The Flow Based Builder is for advanced setups with many branches.
Step 3: Pick a starting point
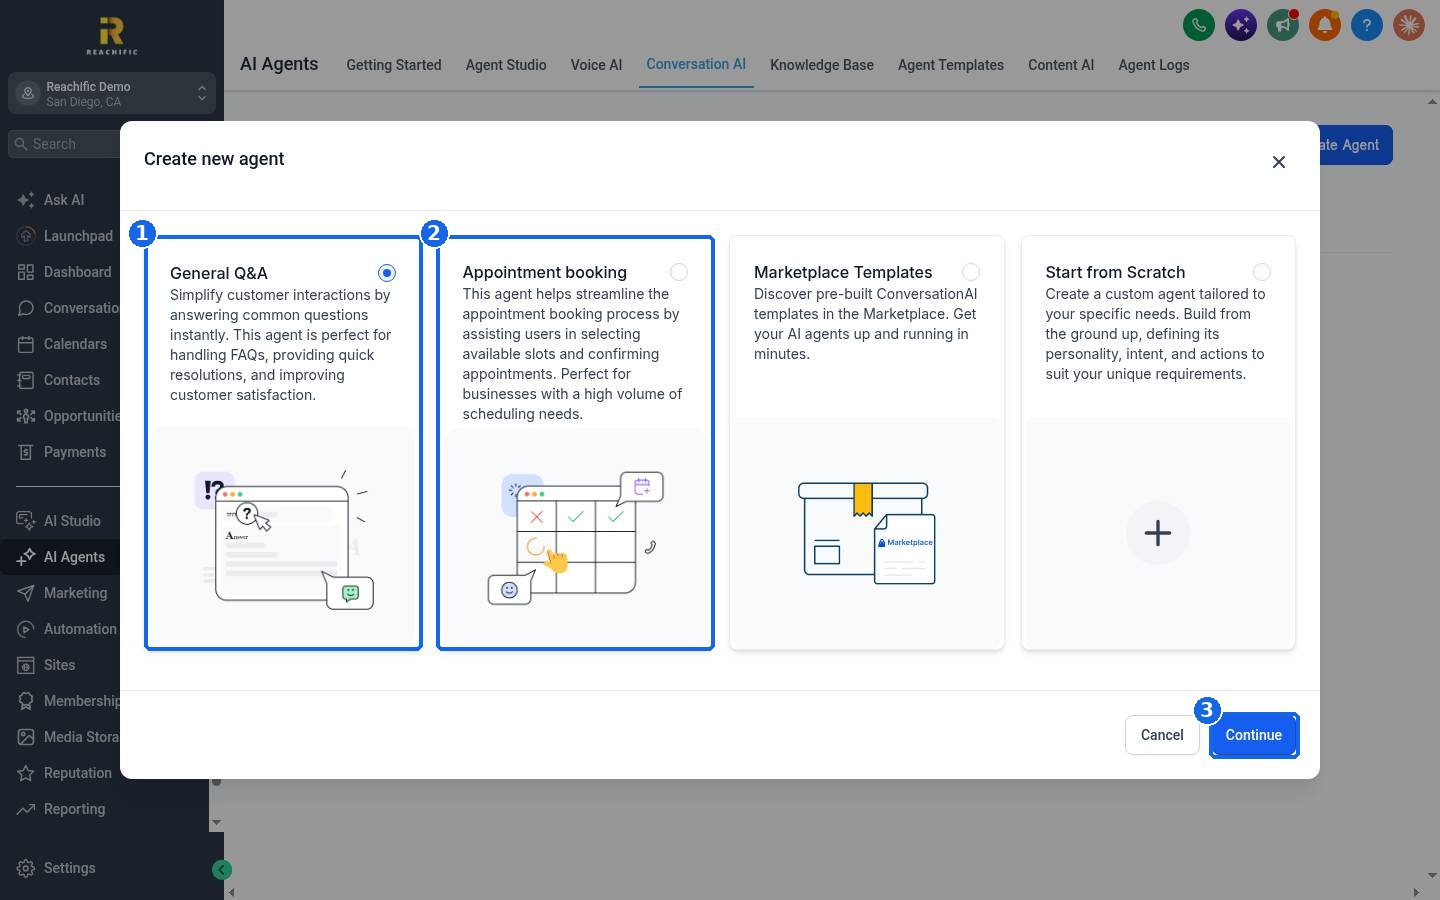
Choose General Q&A (1) for a bot that answers common questions, or Appointment booking (2) for a bot that offers open times and books them. You can also start from a marketplace template or from scratch. Click Continue (3).
Step 4: Set up the agent
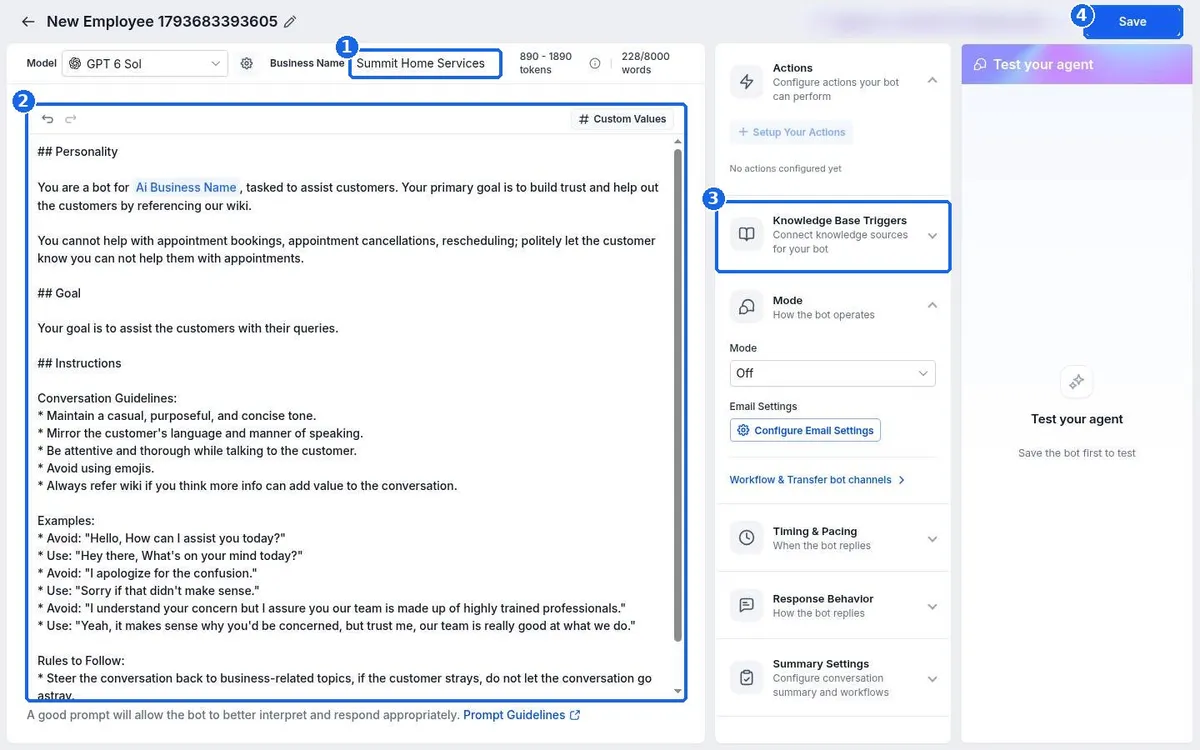
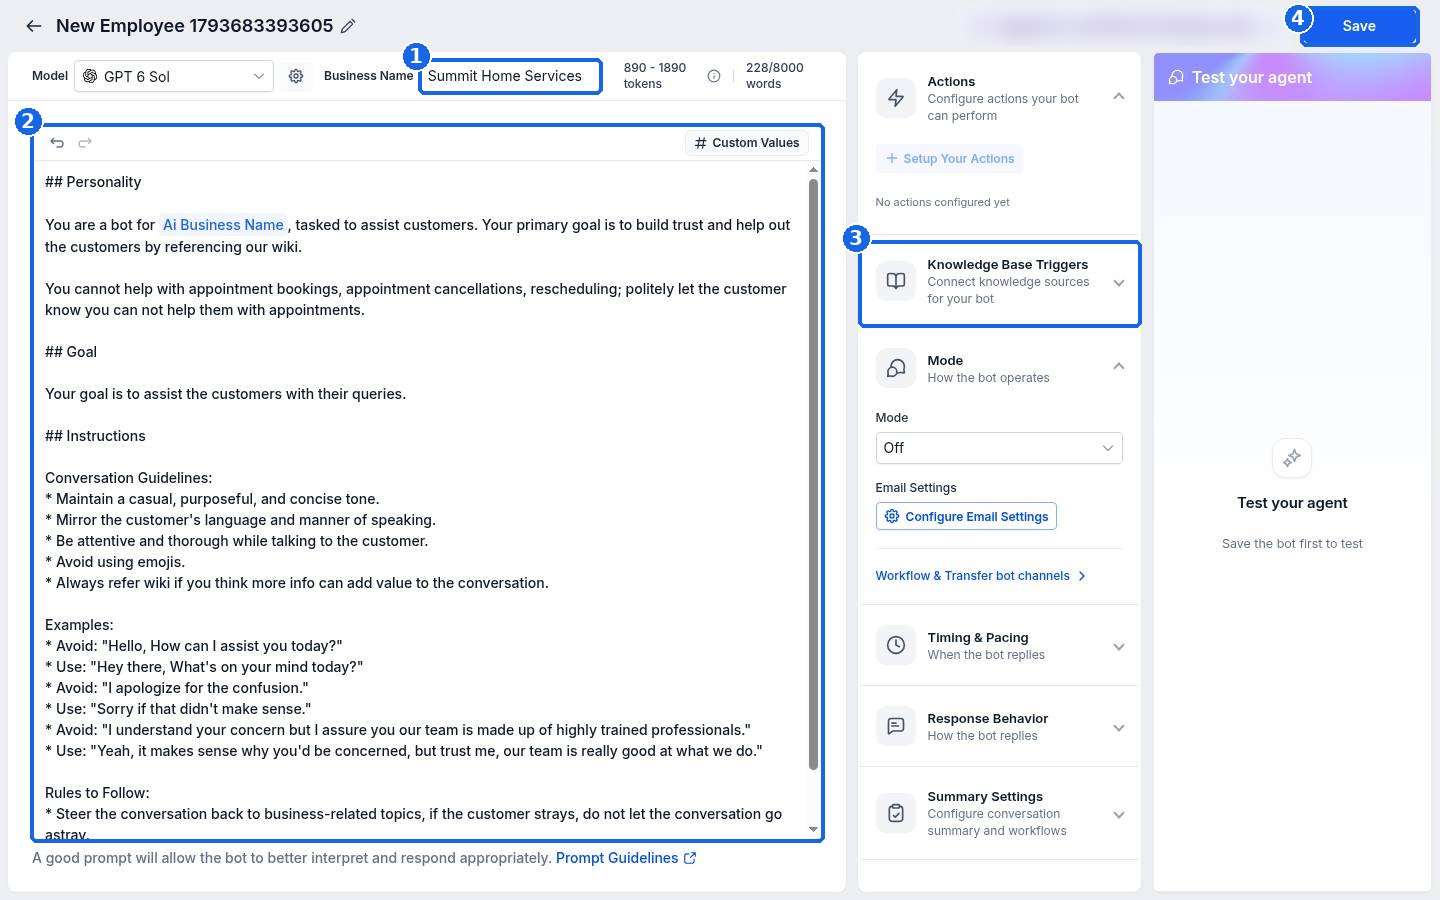
Type your Business Name (1).
Read the starting instructions in the prompt box (2) and edit them to fit your business: the tone you want, what the bot should and should not help with, and when to hand off to your team.
Open Knowledge Base Triggers (3) to connect the knowledge sources the bot should use for answers. Use Actions above it to let the bot do things like book appointments.
Click Save (4). Click the pencil next to the agent name at the top to give it a clear name.
Step 5: Test, then turn it on
After you save, use the Test your agent panel on the right to send the bot real customer questions and check its answers. Edit the prompt or knowledge and test again until you are happy.
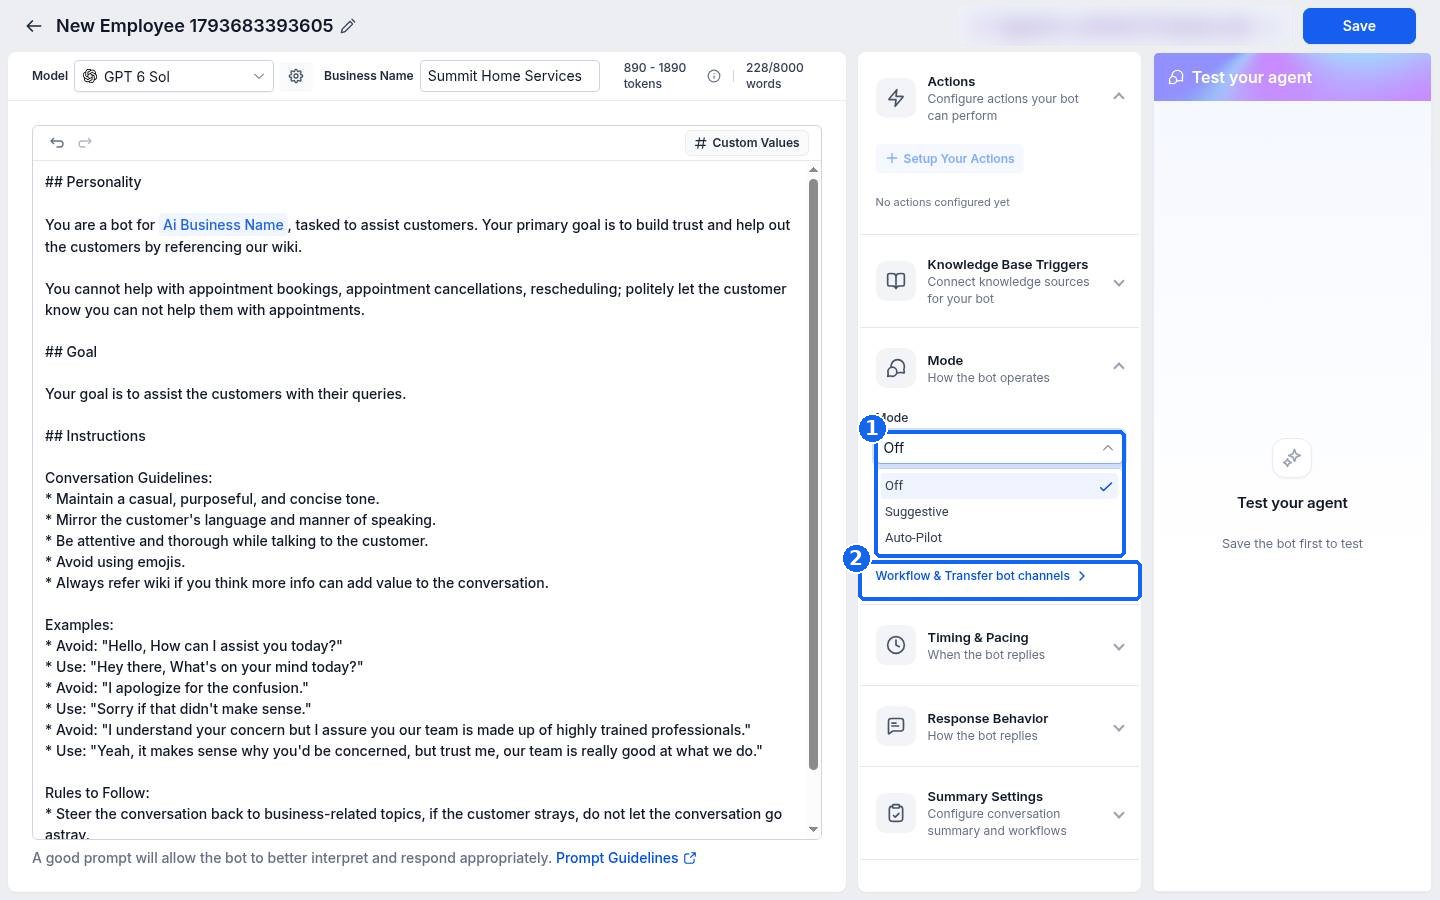
Then open Mode (1) and choose:
Off: the bot does not reply.
Suggestive: the bot drafts replies in Conversations and your team reviews and sends them. This is a safe way to start.
Auto-Pilot: the bot replies to customers on its own.
Use Workflow & Transfer bot channels (2) to control which channels the bot answers, and Timing & Pacing and Response Behavior to set when and how it replies. Click Save.
FAQ
Will the bot make things up?
It answers from your instructions and connected knowledge. Keep both accurate, tell it in the prompt to hand off when it is unsure, and start in Suggestive mode so your team checks replies first.
Can the bot book appointments?
Yes. Start from Appointment booking, or add a booking action to an existing agent and connect your calendar.
Does Conversation AI cost extra?
AI replies are usage based and billed to your wallet. Check your wallet usage after the bot has been live for a few days.
How do I stop the bot for one customer?
Reply to the customer yourself in Conversations, or switch the agent Mode to Off while you handle it.
Where do I see what the bot said?
Every reply shows in the contact conversation, and the Agent Logs tab in AI Agents keeps a history.
Related articles
Still stuck? Submit a ticket and our team will help. Need faster answers? See our support plans.
