
How do I change the dashboard date range?
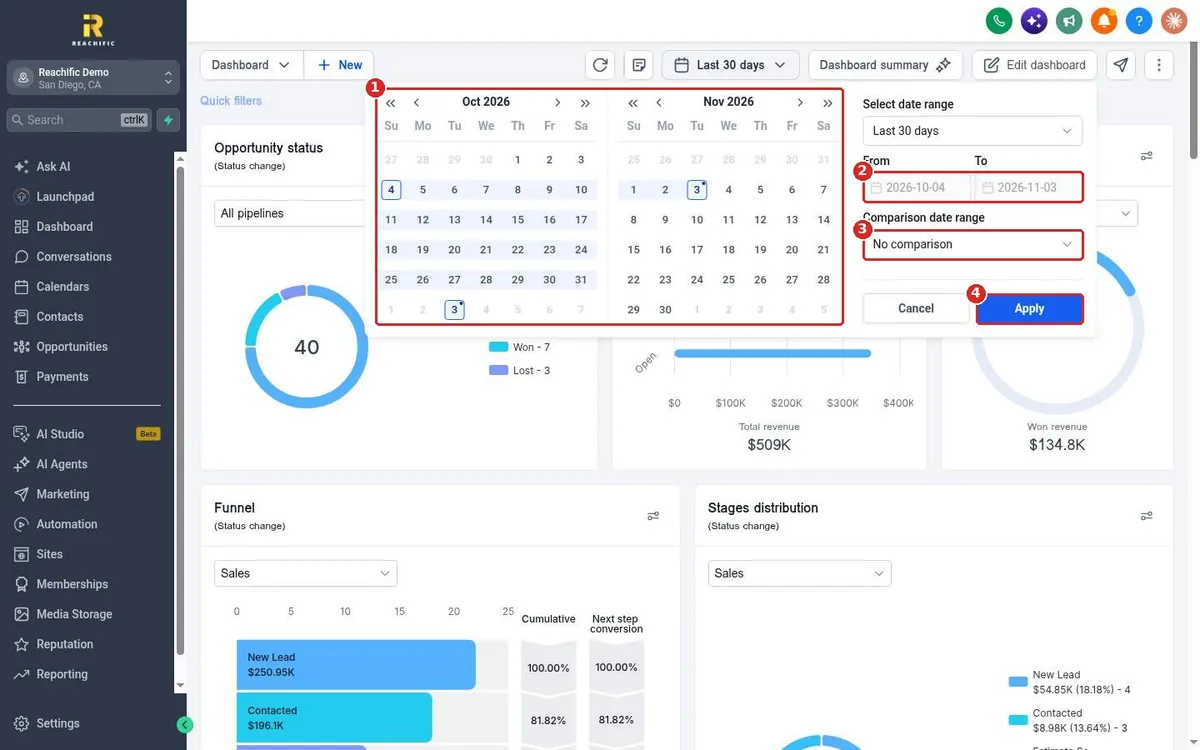
Quick answer: On your Dashboard, click the date button at the top (it shows Last 30 days by default). Pick a preset from Select date range, or click a start and end day on the calendar. Choose a Comparison date range if you want to compare periods, then click Apply.
Before you start
- The date range applies to every widget on the dashboard at once.
- Dates follow your business time zone. See How do I change my business time zone?
Step 1: Pick a preset
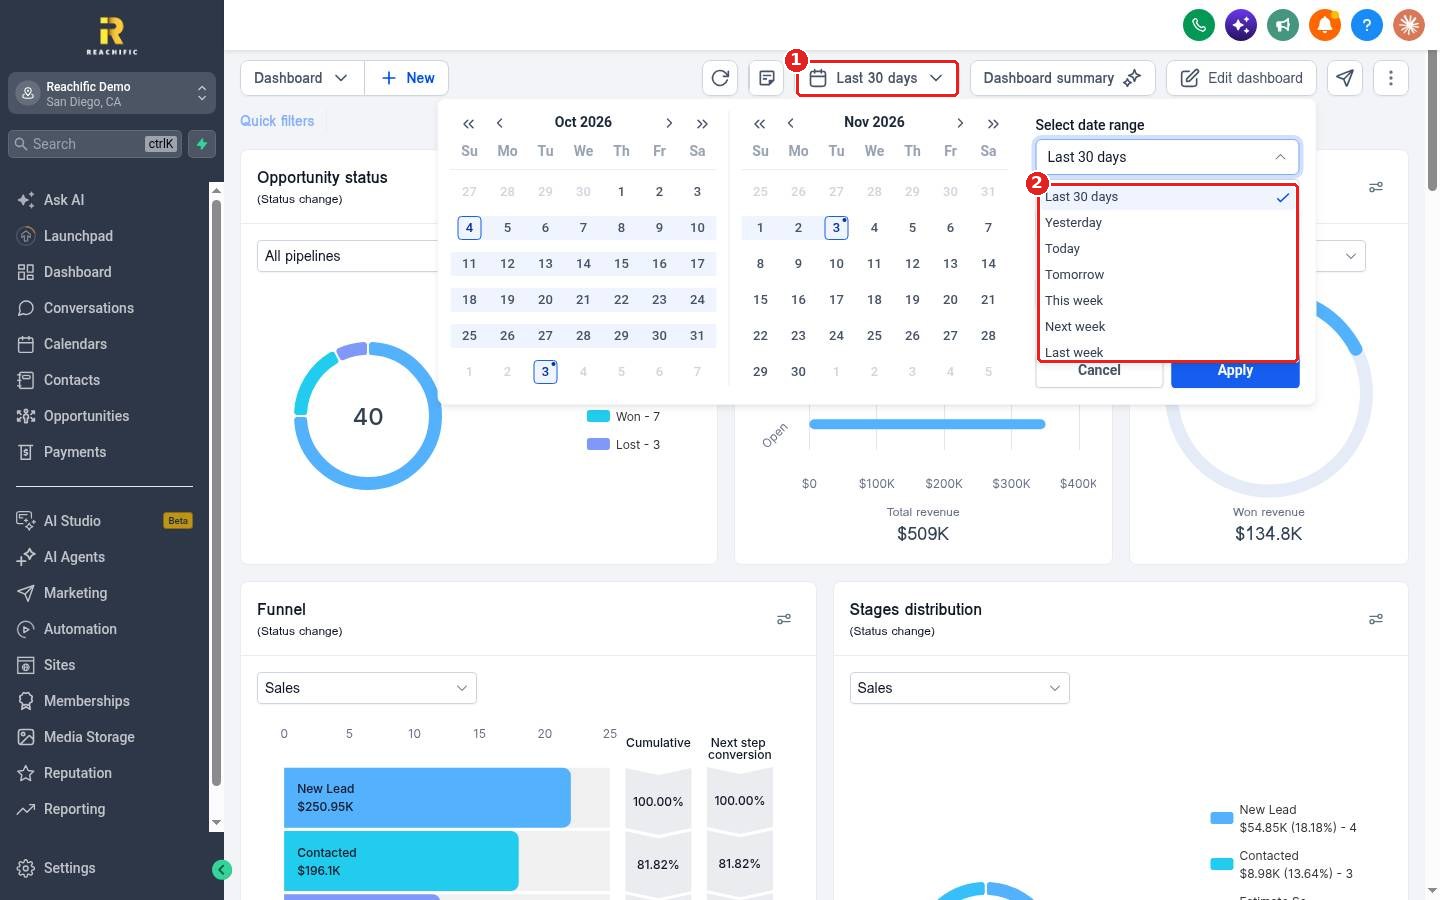
Click the date button (1). Open Select date range and choose a preset (2) such as Last 30 days, Yesterday, Today, This week or Last week.
Step 2: Or set your own dates and apply
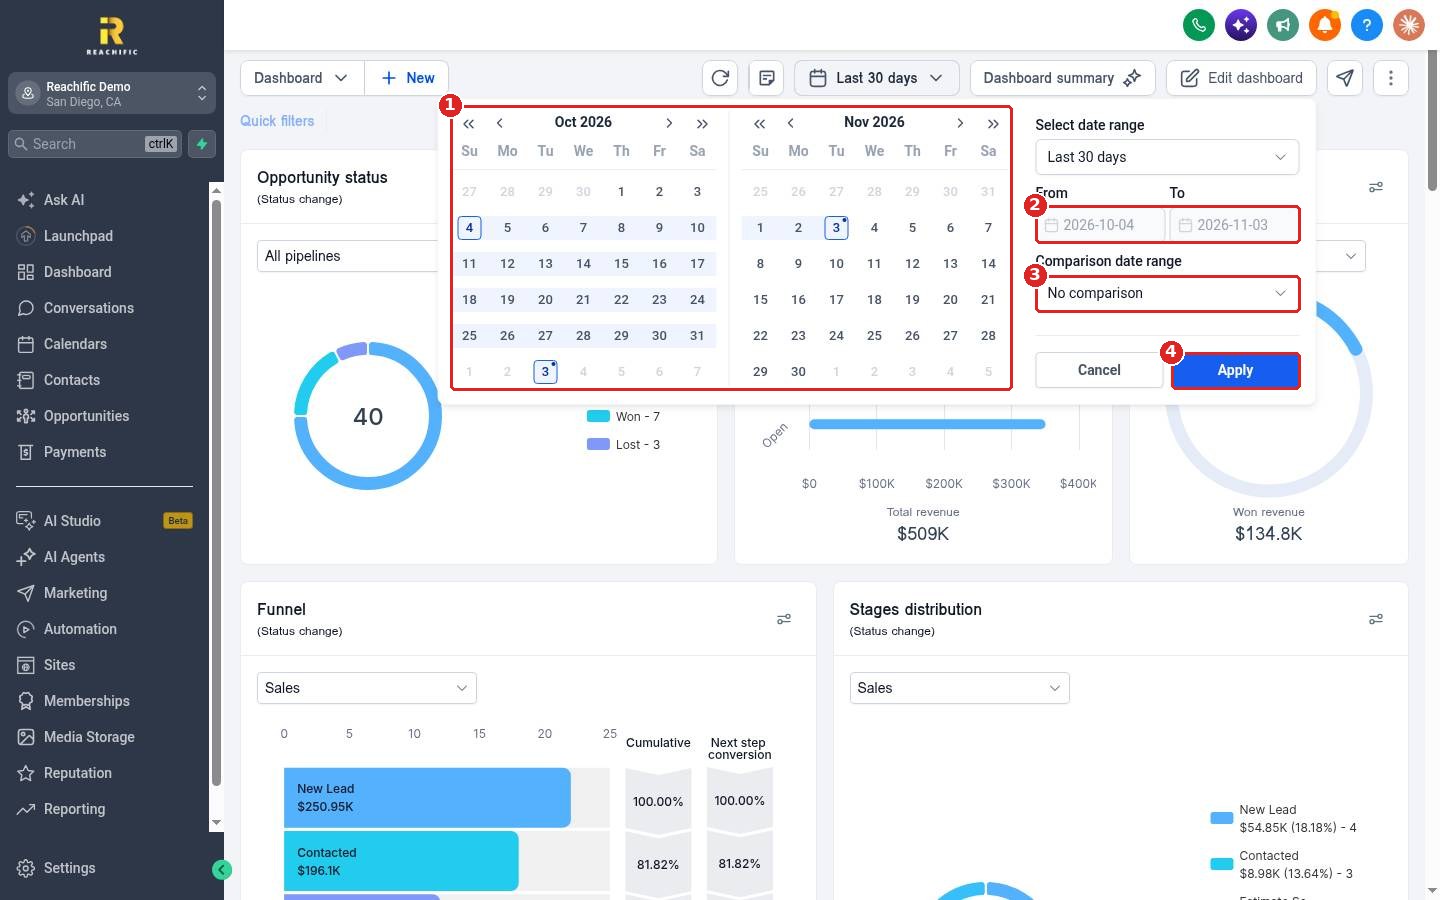
Click a start day and an end day on the calendar (1). The From and To boxes (2) update to match. To see how this period stacks up, pick a Comparison date range (3). Click Apply (4).
FAQ
Does the date range stay after I leave the page?
Check the date button each time you open the dashboard so you know which period you are looking at.
How do I compare this month to last month?
Set the main range to this month, then pick the previous period under Comparison date range and click Apply.
Why did my numbers change when I switched ranges?
Widgets only count activity inside the selected dates. A longer range usually shows bigger totals.
Want us to handle it? Our team can set up reporting that shows how your business is trending week over week. Book a free strategy call and get a free quote.
Related articles
- How do I read my Reachific dashboard?
- How do I add, remove or move dashboard widgets?
- How do I create a second dashboard for my team?
Still stuck? Submit a ticket and our team will help. Need faster answers? See our support plans.
