
How do I set up a dedicated sending domain for email?
Quick answer: Go to Settings > Email Services and click Dedicated Domain And IP. Click Add Domain, type a subdomain such as mg.yourdomain.com and click Add & Verify. Copy the DNS records shown, add them at your domain provider, then verify.
Before you start
- A dedicated domain helps your emails land in the inbox instead of spam.
- Use a subdomain so your main inbox email keeps working.
- You need login access to the company that hosts your domain DNS.
Step 1: Open Email Services
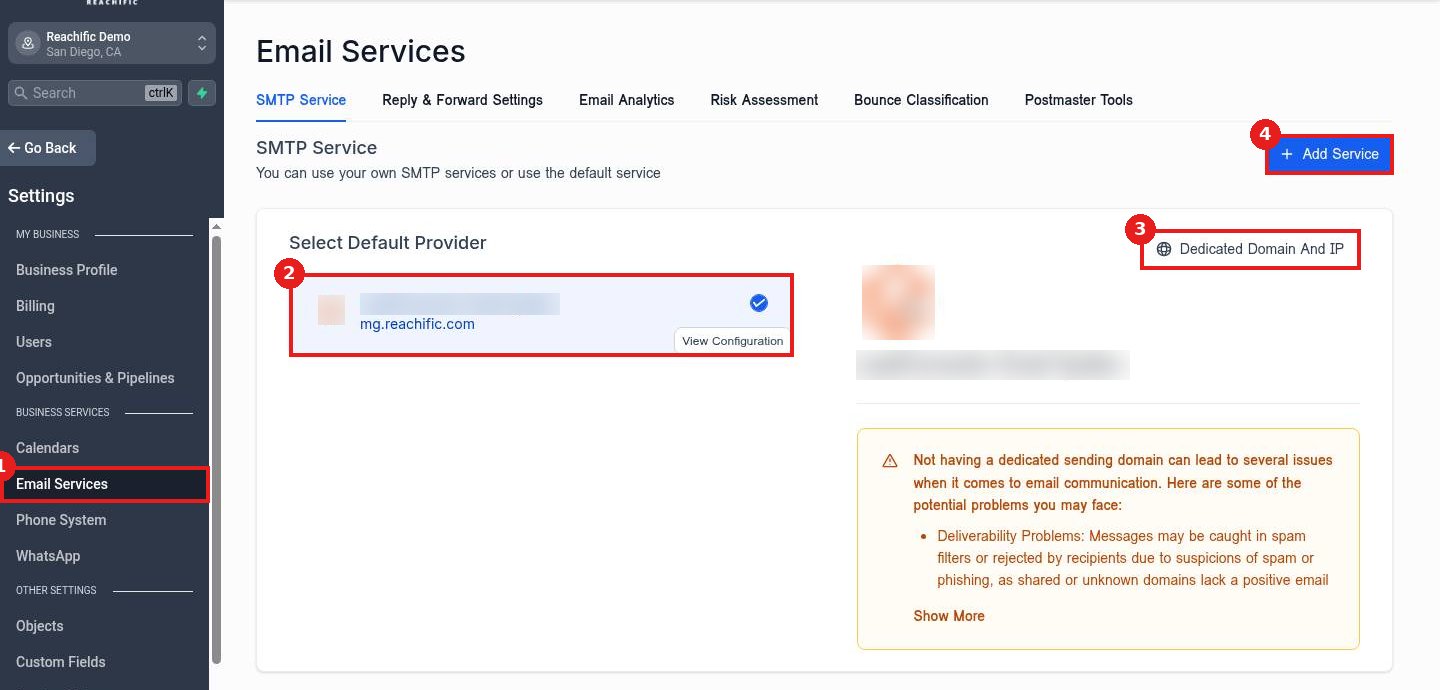
Click Email Services (1). Your current provider shows under Select Default Provider (2). Click Dedicated Domain And IP (3). Add Service (4) is for your own SMTP provider.
Step 2: Add a domain
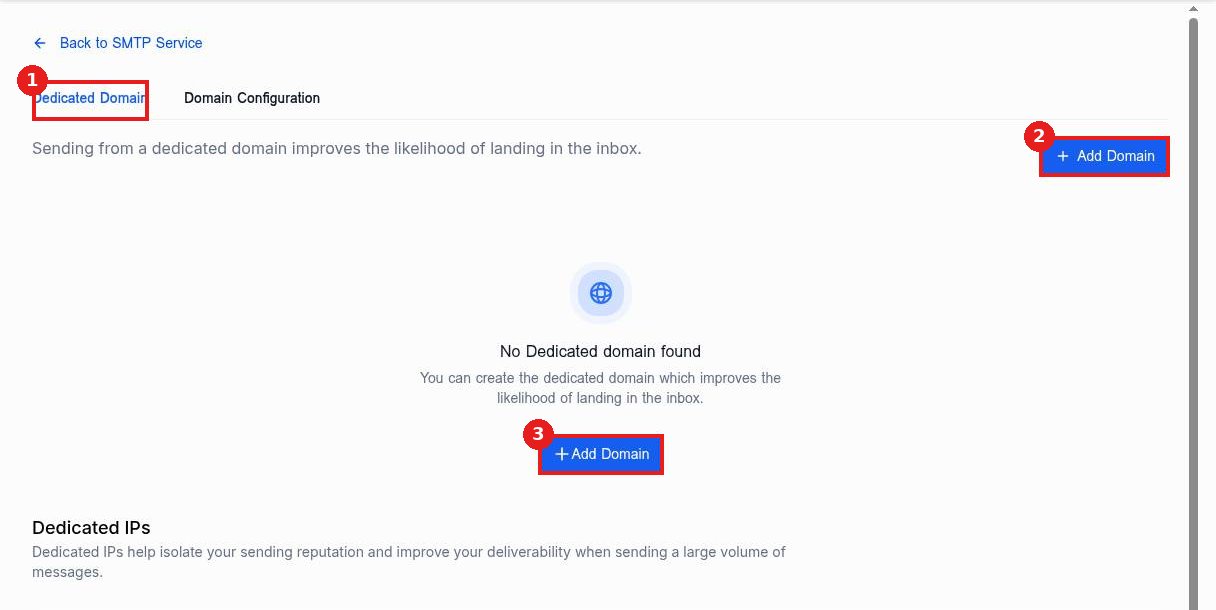
On the Dedicated Domain tab (1), click Add Domain (2 or 3).
Step 3: Enter the subdomain and verify
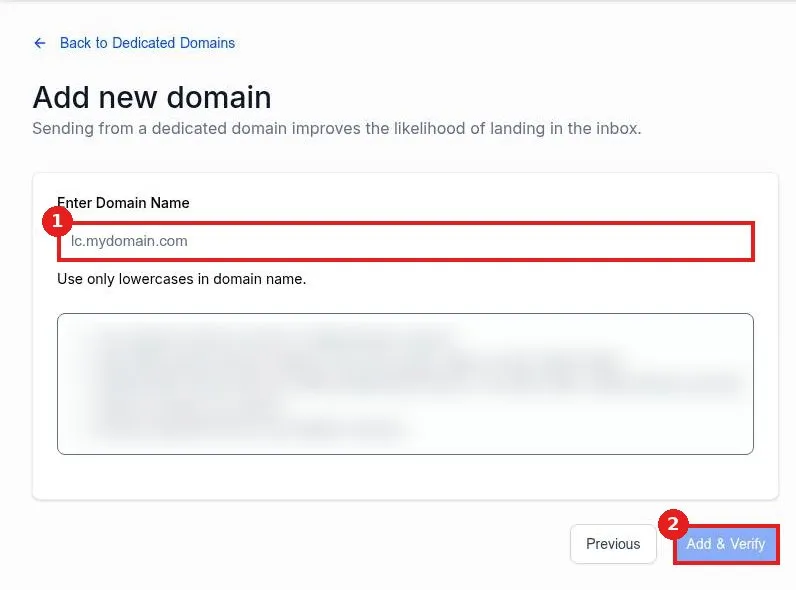
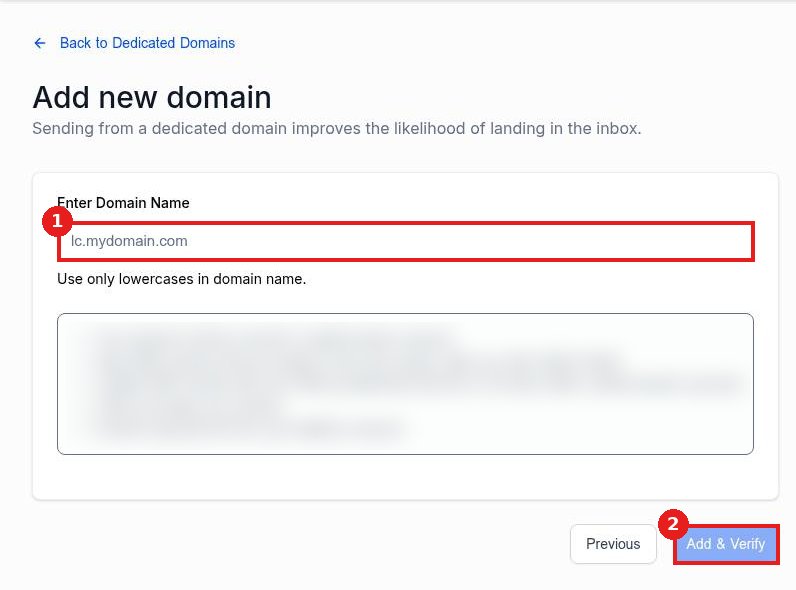
Type the subdomain in lowercase (1) and click Add & Verify (2). Add the DNS records you are given at your domain provider, then come back and verify.
FAQ
How long does verification take?
DNS changes usually show within an hour but can take up to 48 hours.
Should I warm up a new domain?
Yes. For the first 2 to 4 weeks, send mainly to engaged contacts so the domain builds a good reputation.
Can I use my own SMTP instead?
Yes. Click Add Service and pick your provider, such as Outlook or Gsuite.
Want us to handle it? Our team handles phone numbers, texting registration and email setup so your messages reach customers. Book a free strategy call and get a free quote.
Related articles
- How do I send an email campaign to a list?
- How do I see email open and click stats?
- How do I connect my domain to my Reachific website?
Still stuck? Submit a ticket and our team will help. Need faster answers? See our support plans.
