
How do I create a booking calendar?
Quick answer: Go to Settings > Calendars and click New calendar. Pick a calendar type (most businesses start with Personal booking), give the calendar a name, choose the team member who takes the appointments, set the booking link and meeting length, then click Confirm. Open the calendar to set your available hours, click Save changes, and copy your booking link from the share button.
Before you start
Add the person who will take the appointments as a user in Settings > Users. A calendar needs at least one team member.
Know how long each appointment should be (for example 15 minutes for a phone call or 1 hour for an in home estimate).
Know the days and hours you want customers to be able to book.
Step 1: Open your calendar settings
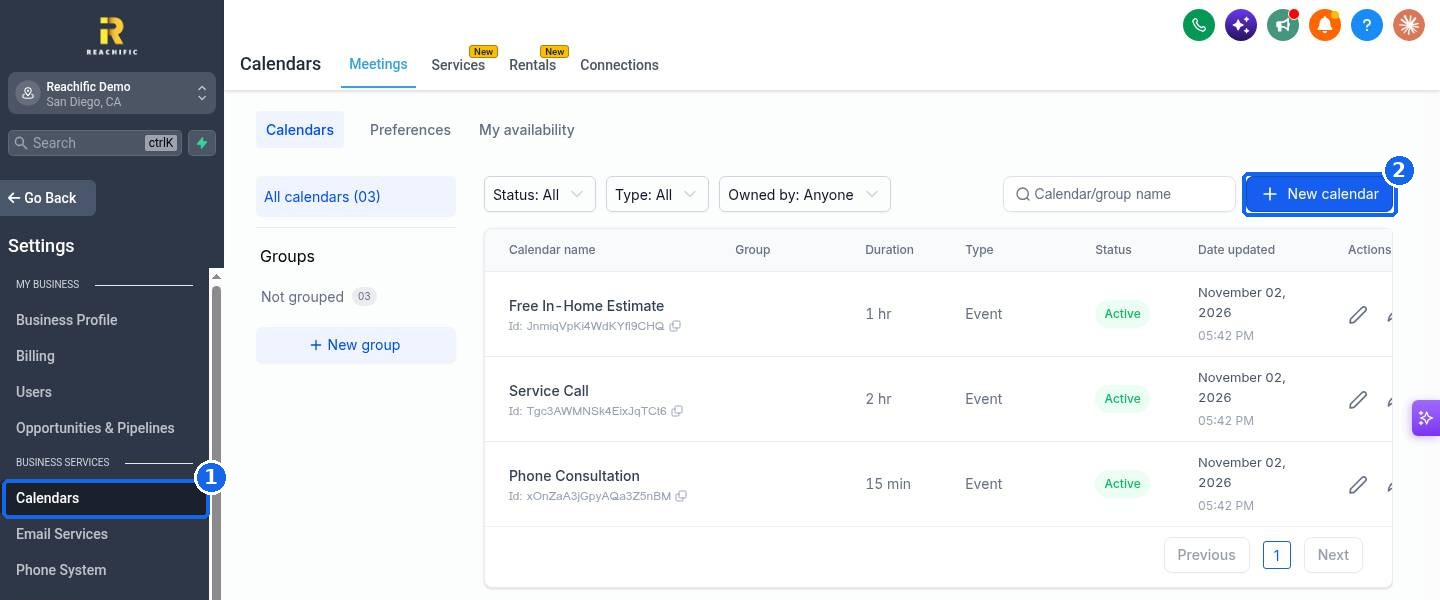
Click Settings at the bottom of the left menu, then click Calendars (1). You will see every calendar in your account. Click New calendar (2).
Step 2: Choose a calendar type
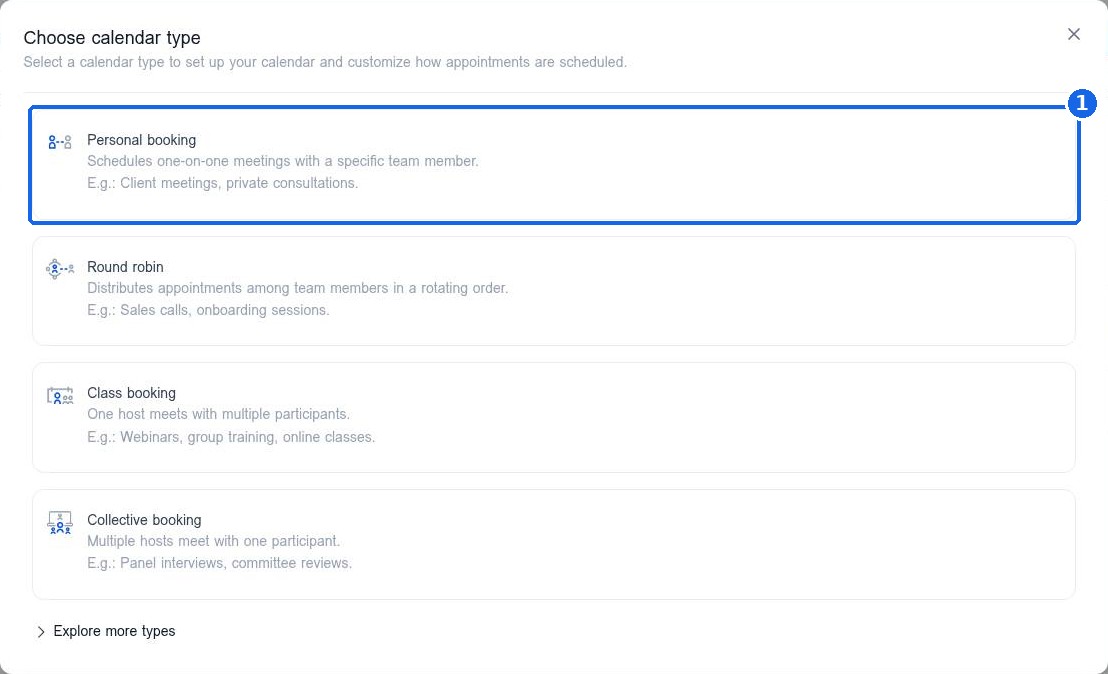
Reachific asks how appointments should be scheduled. For one person meeting one customer at a time, click Personal booking (1). Other options:
Round robin spreads bookings across several team members in turn.
Class booking lets one host meet many people at once, like a class or group session.
Collective booking books several hosts into the same meeting with one customer.
Step 3: Fill in the basics and confirm
In the New calendar window:
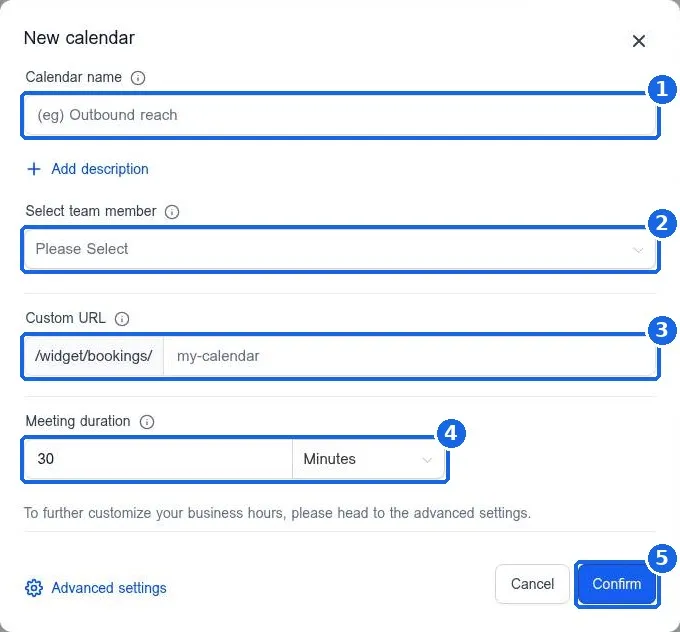
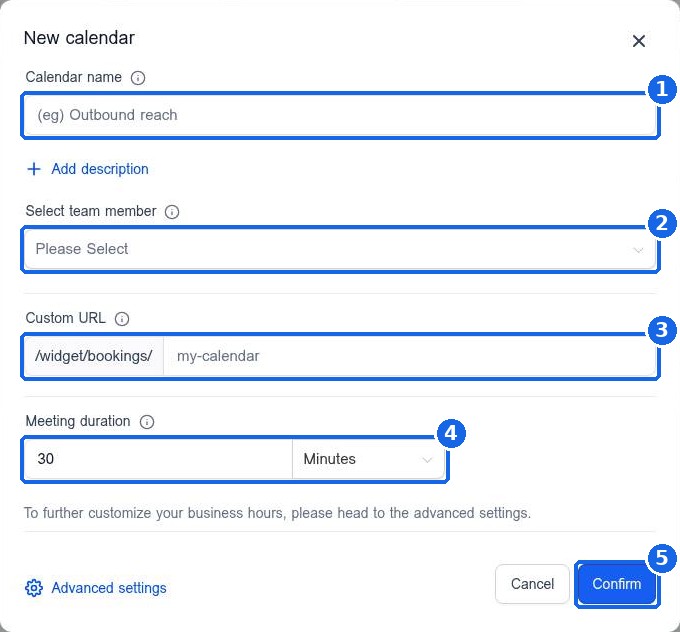
Type a clear Calendar name (1) that customers will understand, such as Free Estimate or Phone Consultation.
Under Select team member (2), pick the person who takes these appointments.
Set the Custom URL (3). This becomes the end of your booking link, so keep it short, for example free-estimate. It must be unique, so add your business name if it is already taken.
Set the Meeting duration (4) in minutes or hours.
Click Confirm (5).
Step 4: Set your available hours
Back on the calendar list, click the pencil icon next to your new calendar. Click Availability (1) in the left menu. Under Weekly available hours (2), check each day you take appointments and set the start and end time. Use the plus icon to add a second time block on the same day, for example a lunch break. Make sure the time zone at the top right (3) matches your business. Click Save changes.
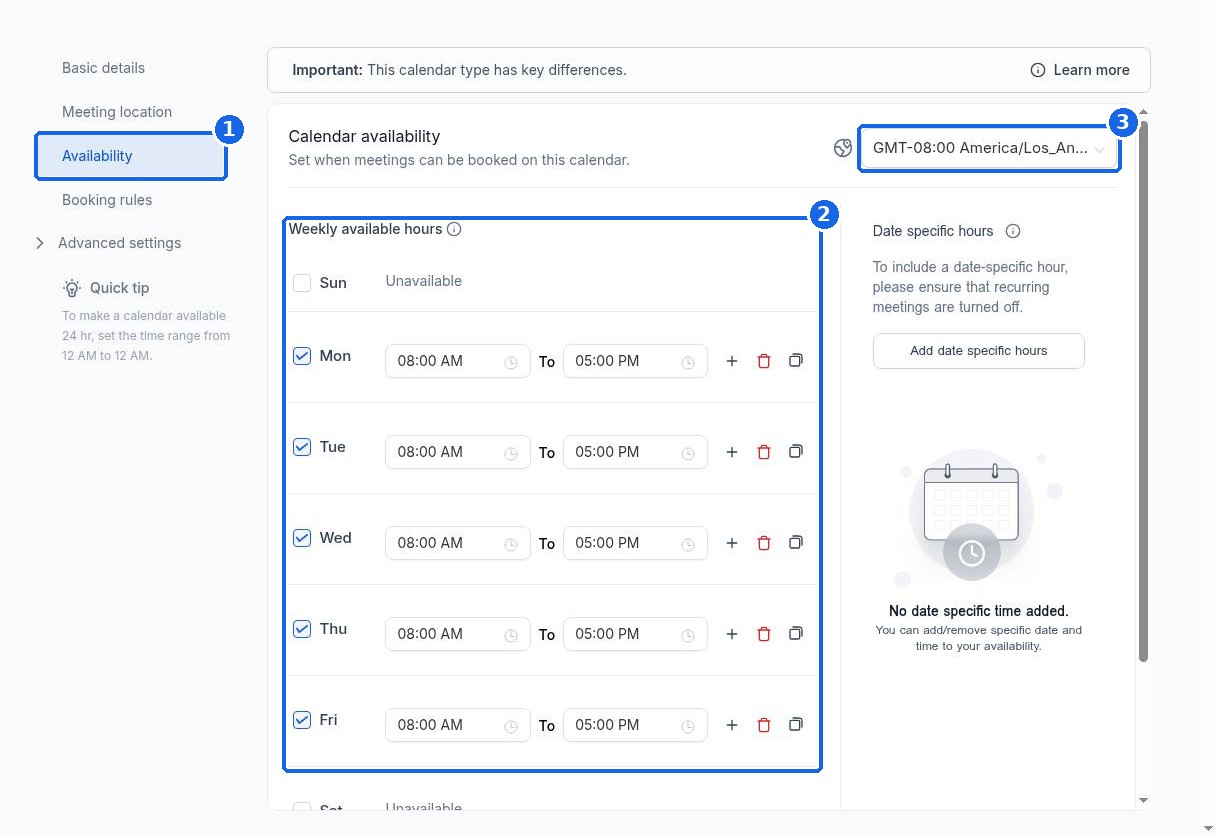
While you are here, look at Meeting location (phone, video or an address) and Booking rules (how far ahead people can book and how many bookings you accept per day).
Step 5: Copy your booking link
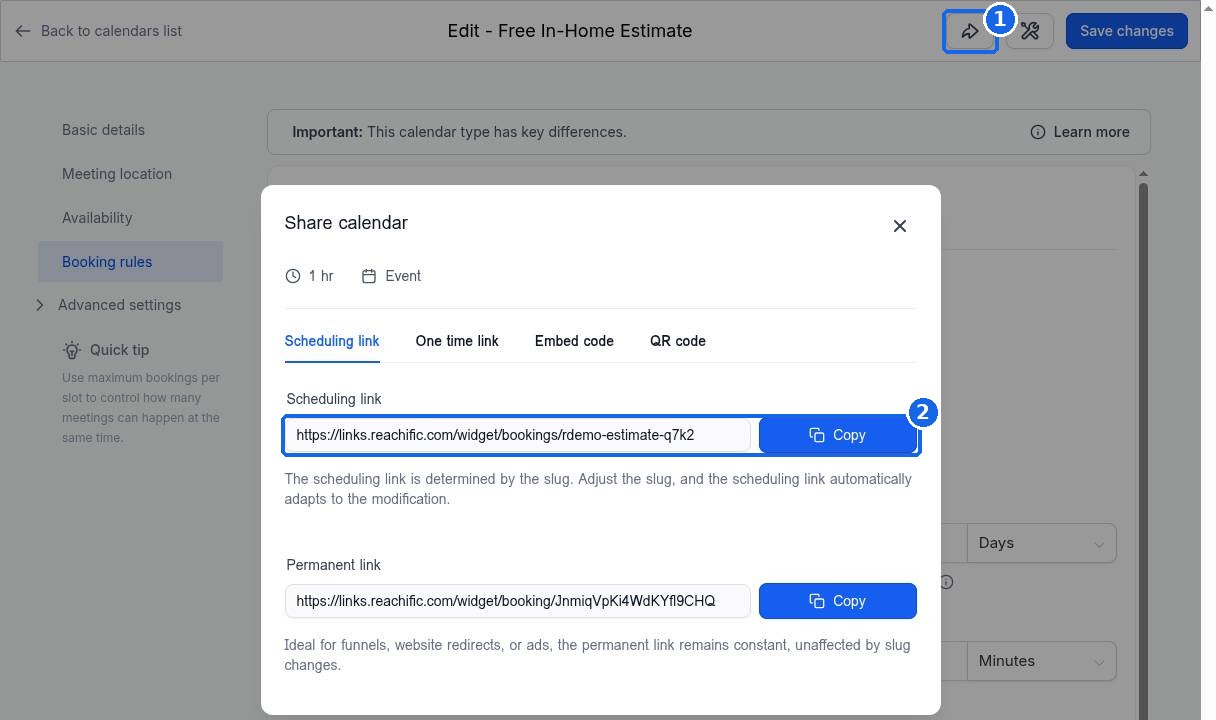
Click the share icon at the top of the calendar editor (1). On the Scheduling link tab, click Copy (2) and paste the link into your website button, email signature, text replies or social profiles. The Permanent link below it never changes, even if you edit the custom URL, so it is the best choice for ads and funnels. The Embed code tab gives you code to show the calendar right on a web page.
Step 6: Test it
Open your booking link in a private browser window and book a test appointment with your own email. Check that it shows up on your calendar, then cancel it.
FAQ
Why can I not pick a team member?
The list only shows users in your account. Add the person first in Settings > Users, then come back to the calendar.
It says my custom URL is already taken. What do I do?
Each booking link must be unique, so short common words are often taken. Add your business name or city, for example smith-plumbing-estimate.
Can I have more than one calendar?
Yes. Create one calendar for each type of appointment, such as a 15 minute call and a 1 hour on site visit, each with its own length and hours.
Can customers pay when they book?
Yes. After you connect a payment provider, open the calendar settings to collect a payment when someone books.
How do I stop people booking at the last minute?
Open the calendar, click Booking rules and set a minimum scheduling notice, such as 24 hours.
Related articles
Still stuck? Submit a ticket and our team will help. Need faster answers? See our support plans.
