
How do I set up my client portal?
Quick answer: Go to Memberships > Client Portal > Dashboard. Copy your Client portal URL, then open Client Portal > Settings to set your domain, branding, app permissions and emails. Finish by inviting your first client.
Before you start
The client portal is where your customers log in to see courses, communities and their account in one place.
Every account comes with a portal URL you can use right away. A custom domain is optional.
Step 1: Open the client portal dashboard
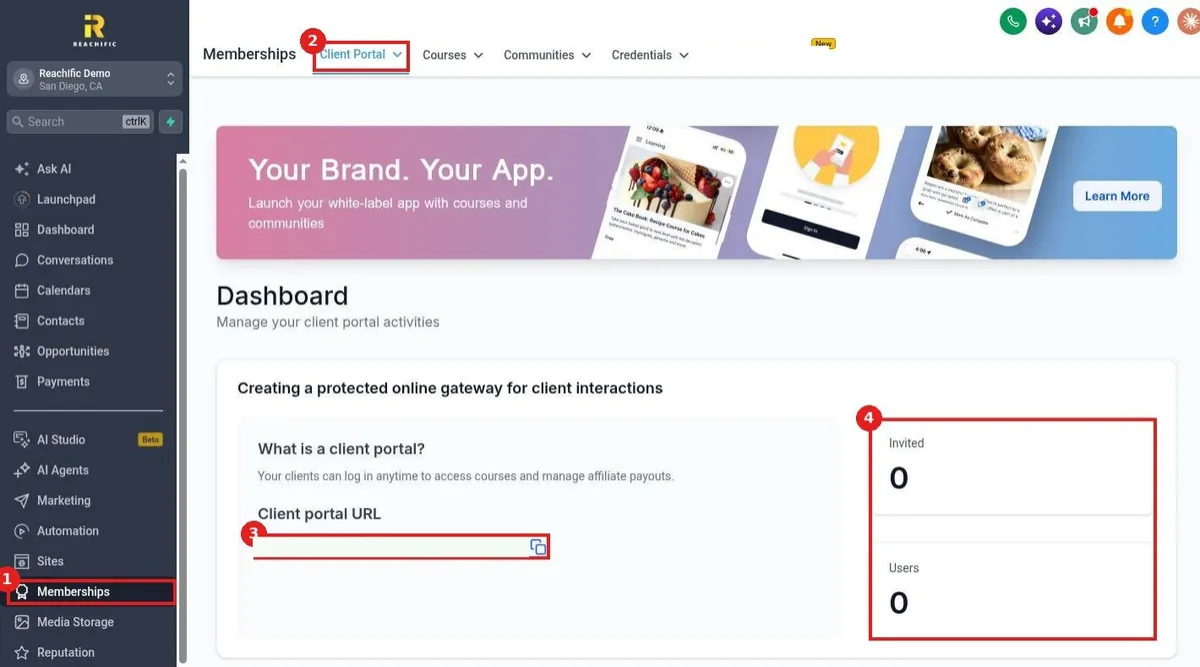
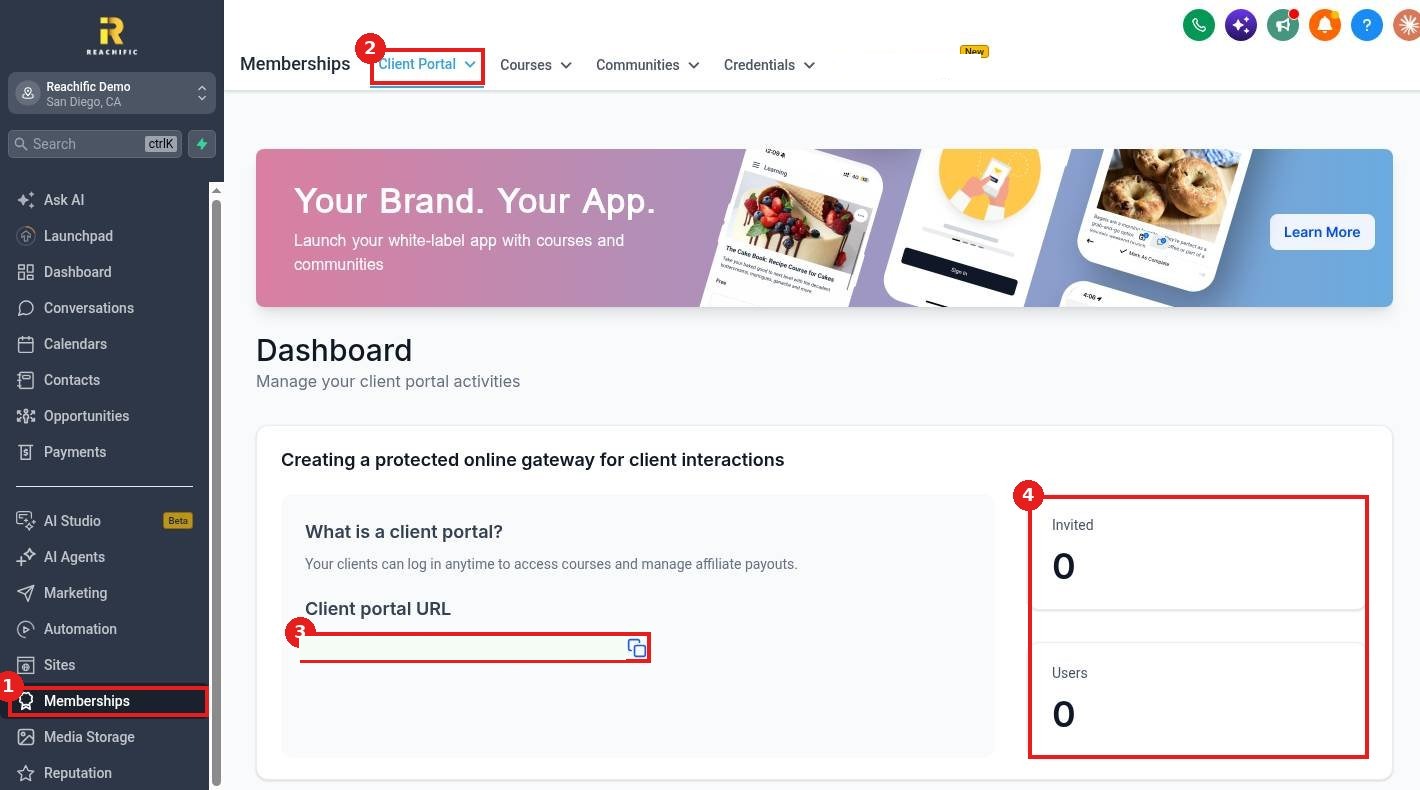
Click Memberships (1) in the left menu, then Client Portal (2). The dashboard shows your Client portal URL (3) with a copy button, plus how many people are Invited and how many are Users (4).
Step 2: Review the quick actions
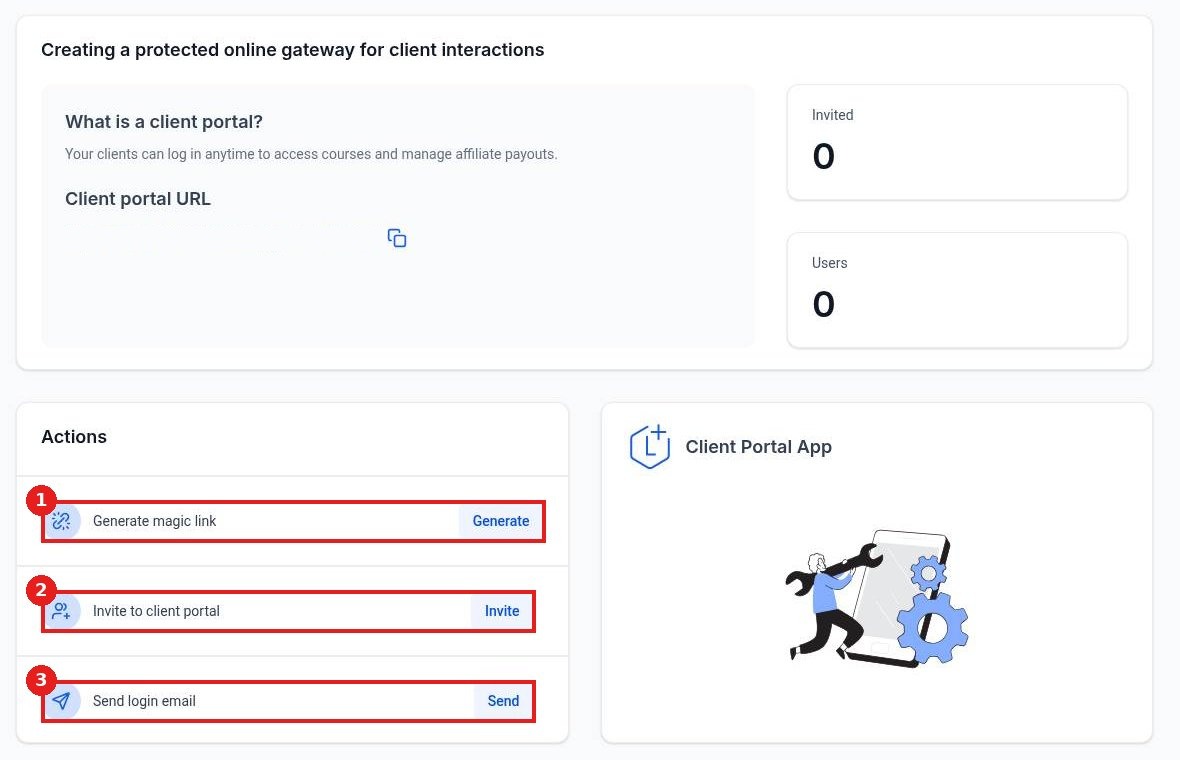
Scroll down to Actions. Use Generate magic link (1) for one click logins, Invite to client portal (2) to add someone, and Send login email (3) to resend login details.
Step 3: Configure portal settings
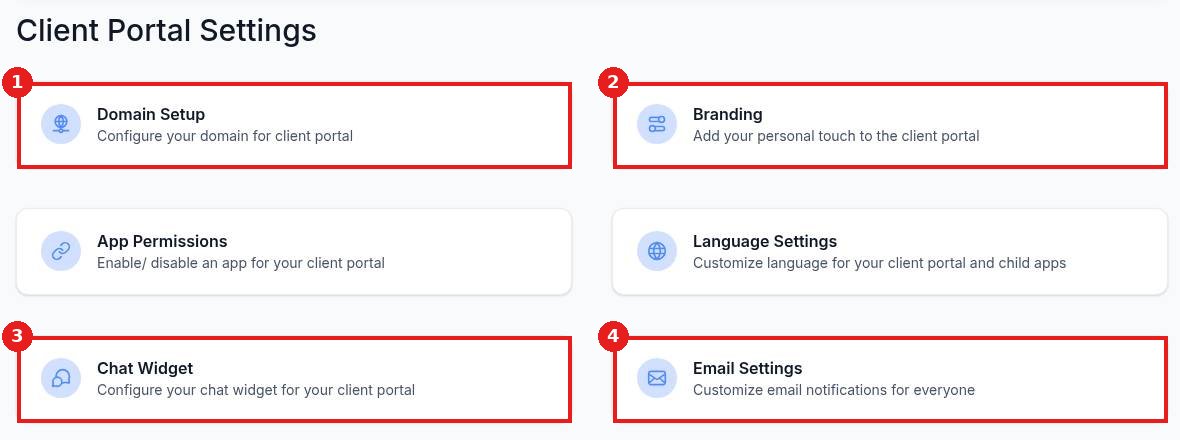
Open Client Portal > Settings. Use Domain Setup (1) to put the portal on your own domain, Branding (2) for name, colors and logo, Chat Widget (3) to offer chat inside the portal, and Email Settings (4) to customize login and notification emails. App Permissions and Language Settings are on the same page.
Step 4: Invite your first client
Back on the dashboard, click Invite and pick a contact or type an email. They get an email to set up their login. See the related article below for the full steps.
FAQ
Do I need a custom domain?
No. The portal works on the URL shown on the dashboard. Add your own domain later in Domain Setup if you want it to match your brand.
What can clients see in the portal?
They see the courses, communities and other apps you turn on in App Permissions.
Can I use the portal as a mobile app?
Yes. Clients can use the portal in a phone browser, and a branded mobile app option is under Client Portal in the menu.
Related articles
Still stuck? Submit a ticket and our team will help. Need faster answers? See our support plans.
