
How do I brand my client portal?
Quick answer: Go to Memberships > Client Portal > Settings > Branding. Enter a portal name and description, pick your brand colors, upload a favicon and logo, add a support email and copyright, then click Save Settings.
Before you start
Have a square logo ready (SVG, PNG or JPG, up to 200 by 200 px) and a small square favicon.
Know your two brand colors as hex codes.
Step 1: Open Client Portal Settings
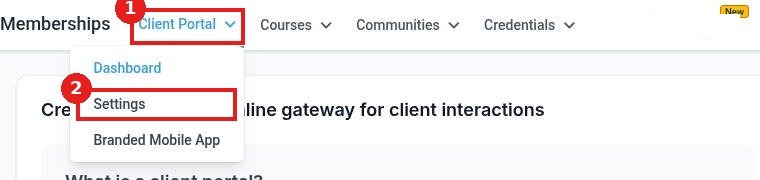
In Memberships, open the Client Portal menu (1) and click Settings (2).
Step 2: Open Branding
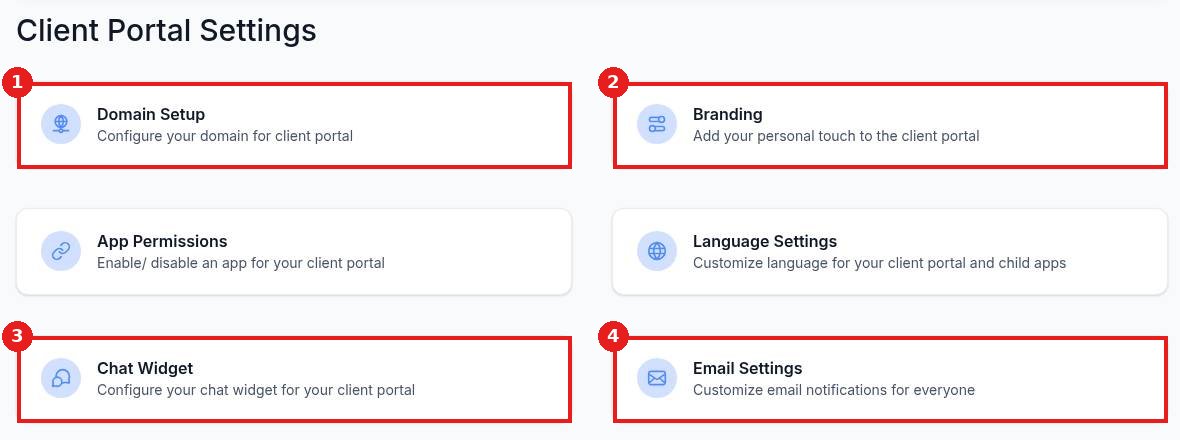
On the Client Portal Settings page, click the Branding tile (2).
Step 3: Add your name, description and colors
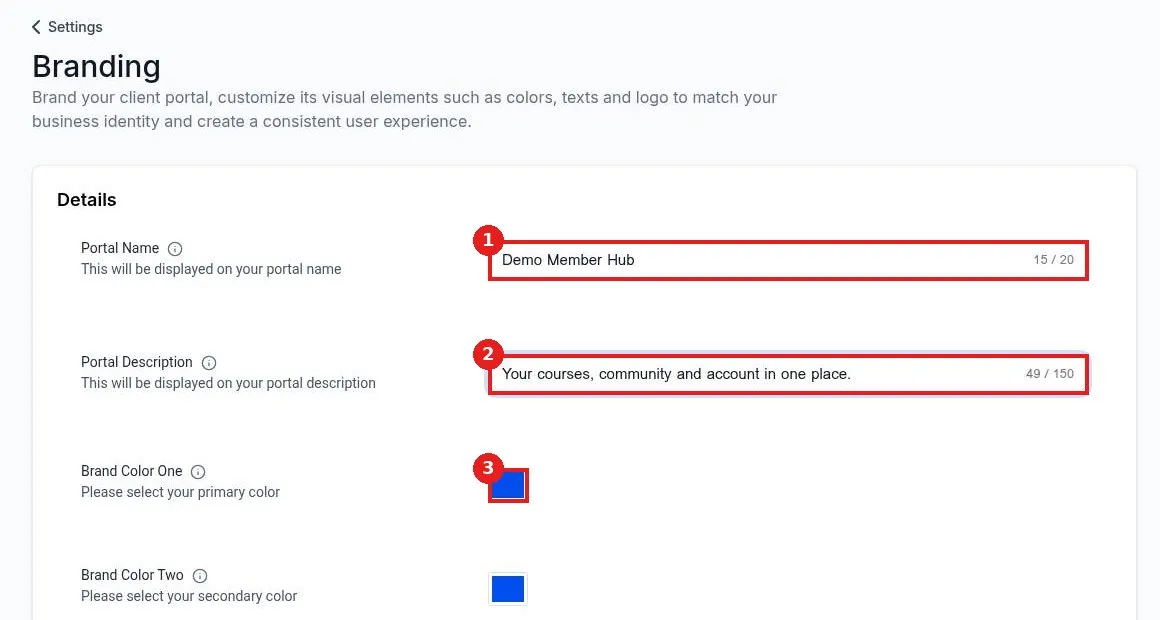
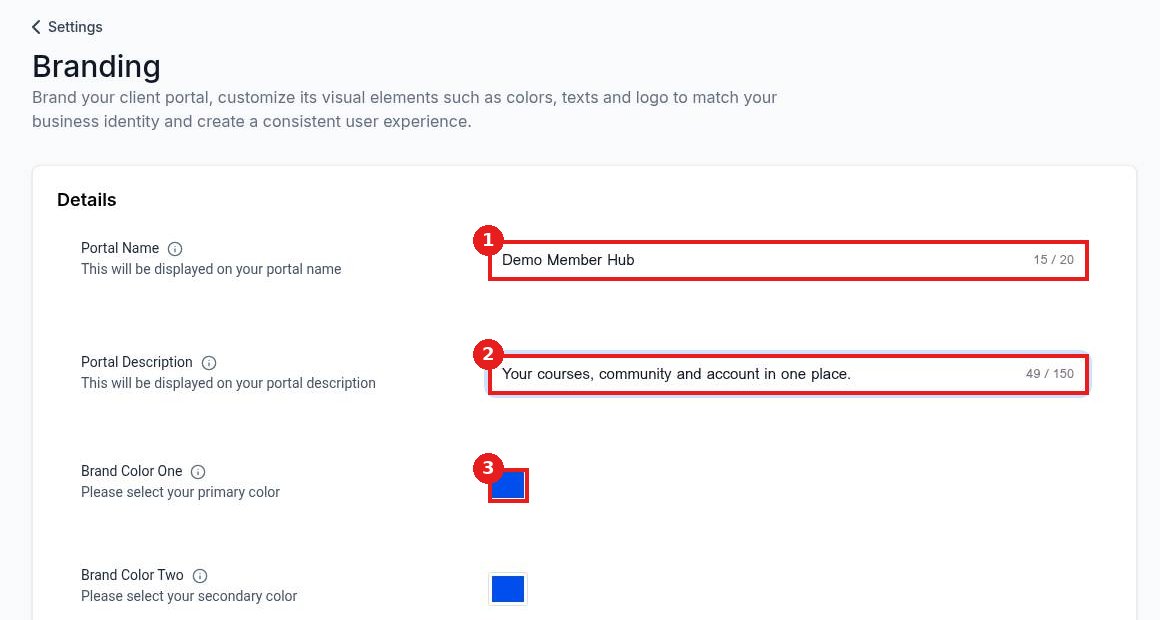
Type a Portal Name (1), up to 20 characters, and a short Portal Description (2). Click the color swatch for Brand Color One (3) and set your primary color, then do the same for Brand Color Two.
Step 4: Upload your logo and add contact details, then save
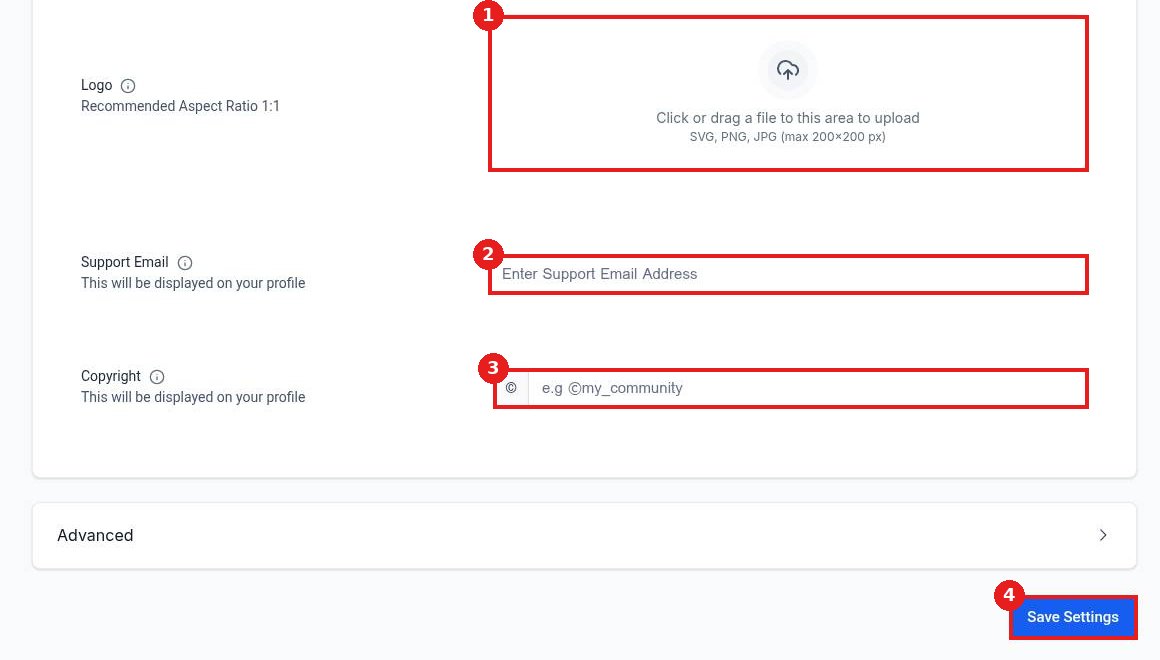
Upload your Logo (1) and favicon. Enter a Support Email (2) clients can reach and your Copyright line (3). Click Save Settings (4).
FAQ
Where does the branding show up?
On the portal login page, the portal header and the browser tab, using your name, logo, favicon and colors.
Can I put the portal on my own domain?
Yes. Use Domain Setup on the same Settings page.
My logo looks blurry. Why?
Upload a square image close to 200 by 200 px. SVG gives the sharpest result.
Related articles
Still stuck? Submit a ticket and our team will help. Need faster answers? See our support plans.
