
How do I set my payment and tax settings?
Quick answer: Go to Payments > Settings. Under Taxes, choose whether your prices include tax in Tax display settings, then add your rates in Manual taxes > Tax rates with Add Tax. Under Receipts, turn on automatic sales receipts and set the receipt prefix and start number. The same menu also holds payment notifications, shipping, subscriptions and payment link options.
Before you start
- Know the sales tax rate or rates you need to charge. Your accountant or local tax agency can confirm them.
- Connect a payment provider so customers can pay online. See How do I connect Stripe to take payments?
Step 1: Choose if your prices include tax
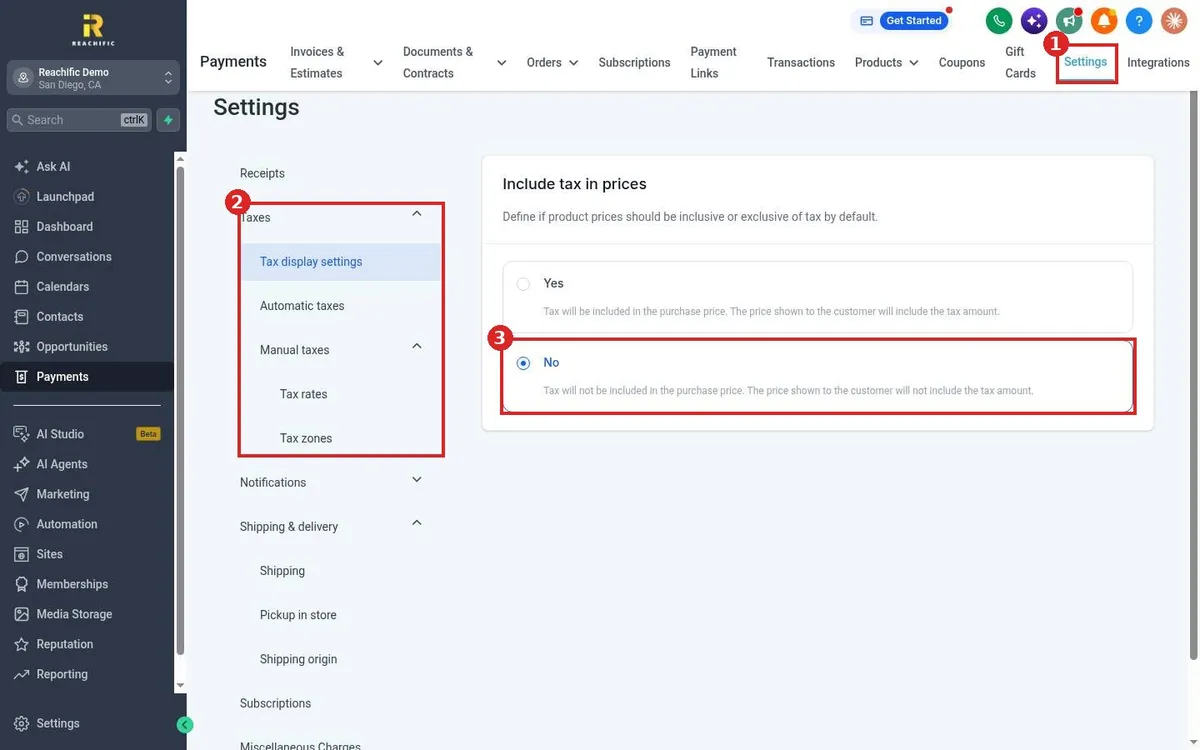
Click Payments in the left menu, then the Settings tab at the top (1). In the left list, open Taxes (2) and click Tax display settings. Under Include tax in prices (3):
- Pick Yes if your product prices already include tax. The price your customer sees includes the tax amount.
- Pick No if tax should be added on top of your prices. Most service businesses in the US use this.
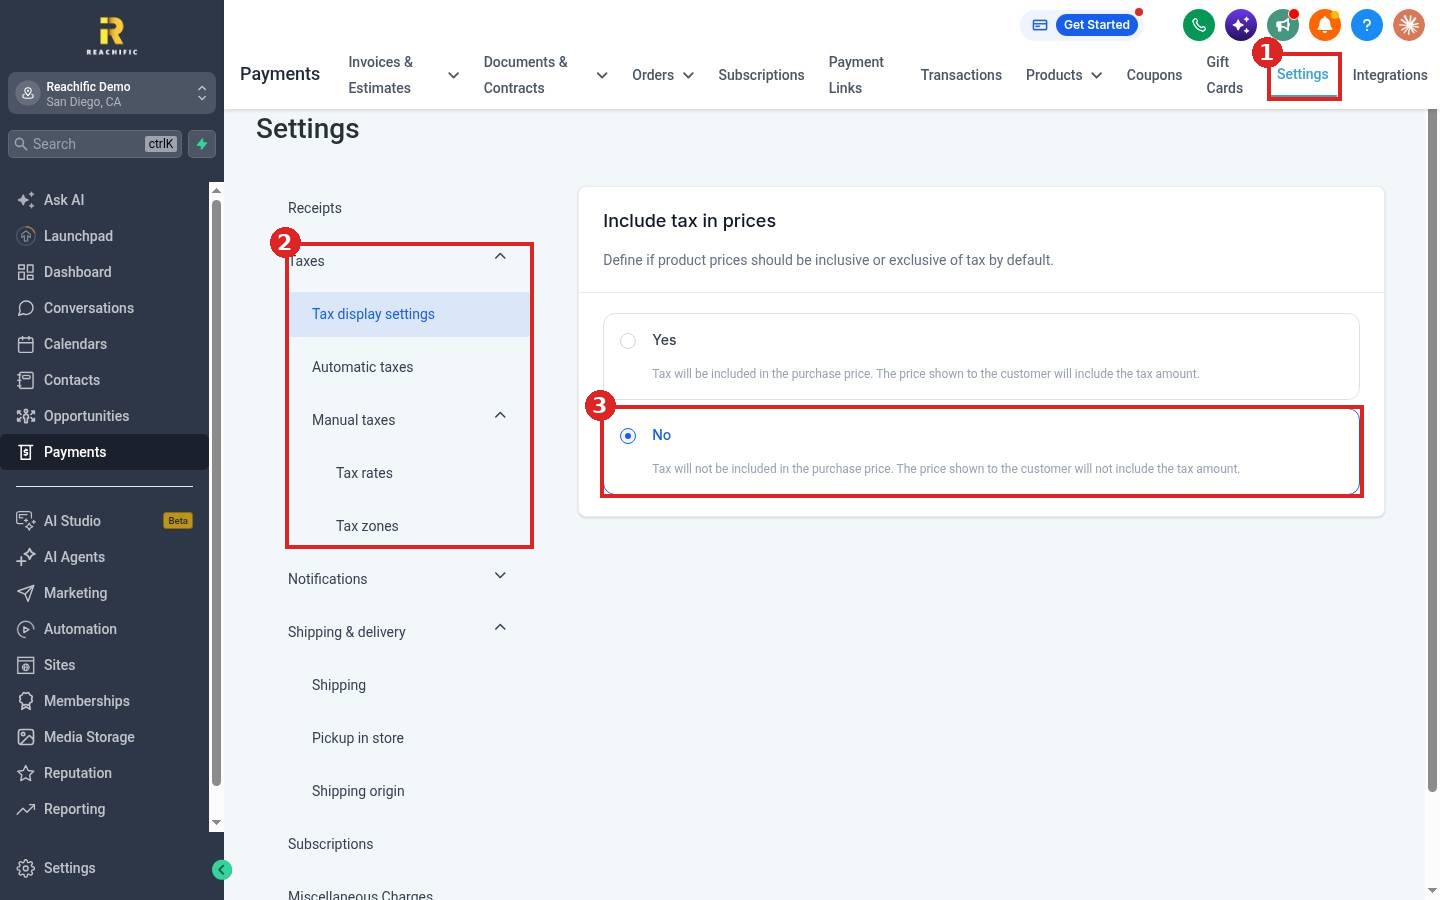
The Taxes menu also has Automatic taxes, which works out tax for you, and Manual taxes, where you set your own rates and Tax zones.
Step 2: Add a tax rate
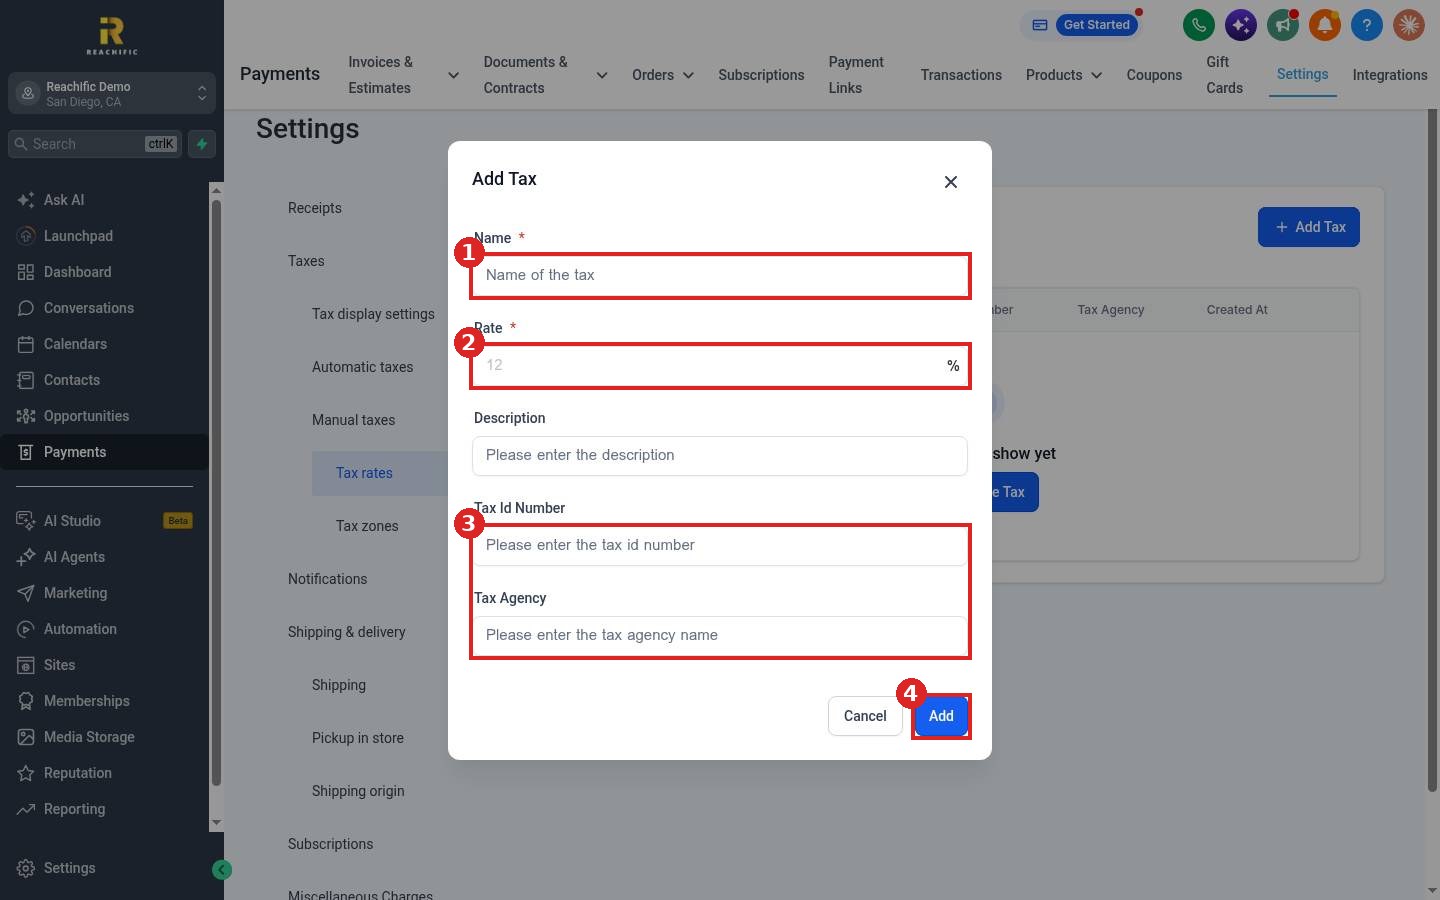
Click Manual taxes > Tax rates, then Add Tax. In the Add Tax window:
- Enter a Name (1) your customers will recognize, such as San Diego Sales Tax.
- Enter the Rate as a percent (2).
- Optional: add a Description, your Tax Id Number and the Tax Agency (3) so they print on your records.
- Click Add (4).
Your new rate now shows in the Tax Rates list and you can pick it with Add Tax on any invoice or estimate line.
Step 3: Set up receipts
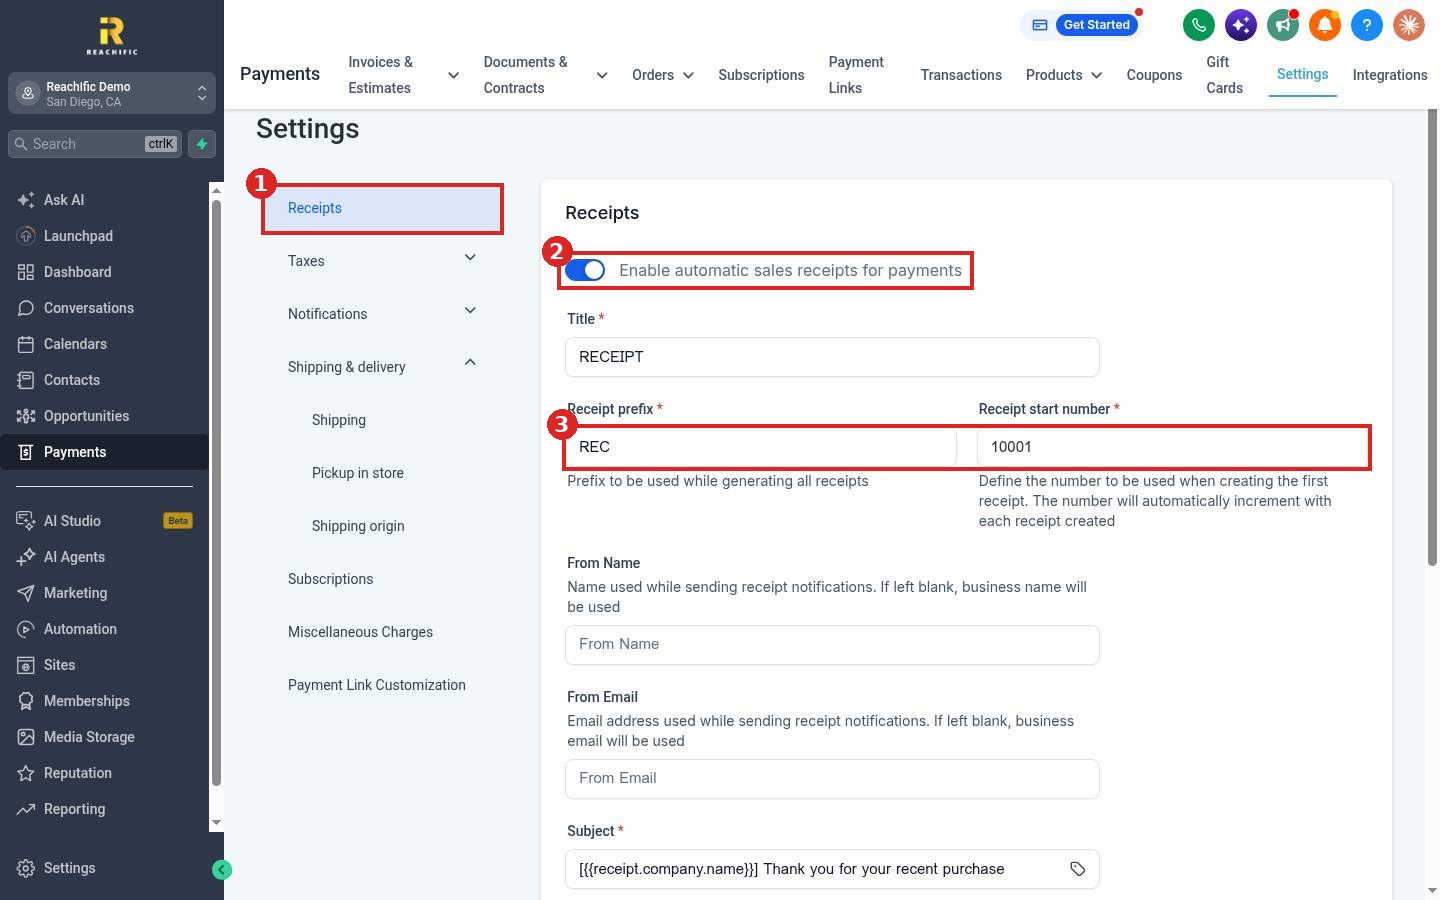
Click Receipts in the Settings list (1). Turn on Enable automatic sales receipts for payments (2) so customers get a receipt each time they pay. Set the Receipt prefix and Receipt start number (3). Each new receipt counts up from that number. You can also set a From Name, From Email, subject, email template and notes. Click Save at the bottom.
Step 4: Check the other settings
- Notifications: choose which payment emails go out.
- Shipping & delivery: set shipping rates, pickup in store and your shipping origin if you sell physical products.
- Subscriptions, Miscellaneous Charges and Payment Link Customization: fine tune recurring payments, extra charges and the look of your payment links.
FAQ
Do my tax settings change invoices I already sent?
Set your taxes before you send. To fix a sent invoice with the wrong tax, void it and send a corrected one.
Can I charge different rates in different areas?
Yes. Add one rate per area in Tax rates, and use Tax zones to group where each rate applies.
Is Reachific responsible for filing my sales tax?
No. Reachific helps you charge and track tax. Filing and paying it stays with your business and your accountant.
Want us to handle it? Our team can set up your taxes, receipts and payment settings so every invoice goes out right the first time. Book a free strategy call and get a free quote.
Related articles
- How do I create and send an invoice?
- How do I connect other payment providers?
- How do I connect Stripe to take payments?
Still stuck? Submit a ticket and our team will help. Need faster answers? See our support plans.
