
How do I connect other payment providers?
Quick answer: Go to Payments > Integrations, find the provider you use (PayPal, Square, Authorize.net, NMI, Adyen, Mercado Pago or Stripe) and click Connect. Sign in to that provider when asked. Once it shows under Connected, your invoices, payment links, forms and checkouts can take payments through it.
Before you start
- Have the login for your payment provider account ready. You connect your own account, so the money goes straight to you.
- Using Stripe? It has its own guide: How do I connect Stripe to take payments?
- Only want to accept cash, check or another offline method? You can turn on Manual Payment Methods from the same page.
Step 1: Open Payment Integrations
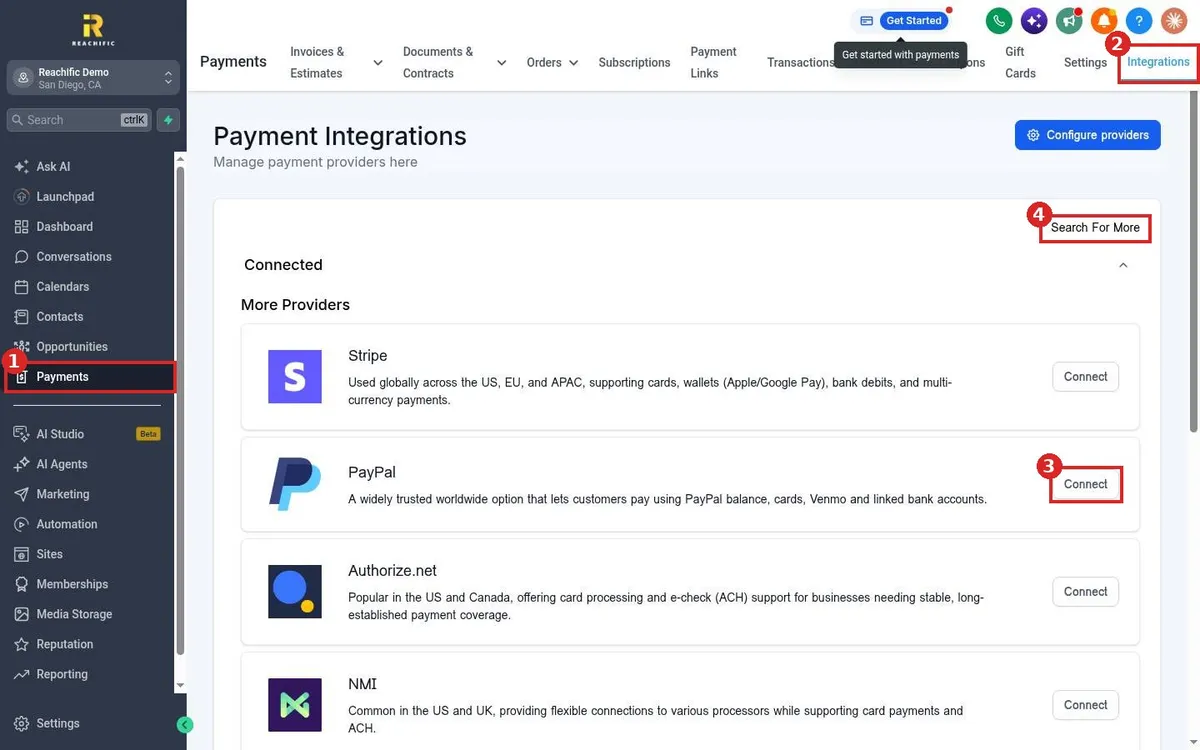
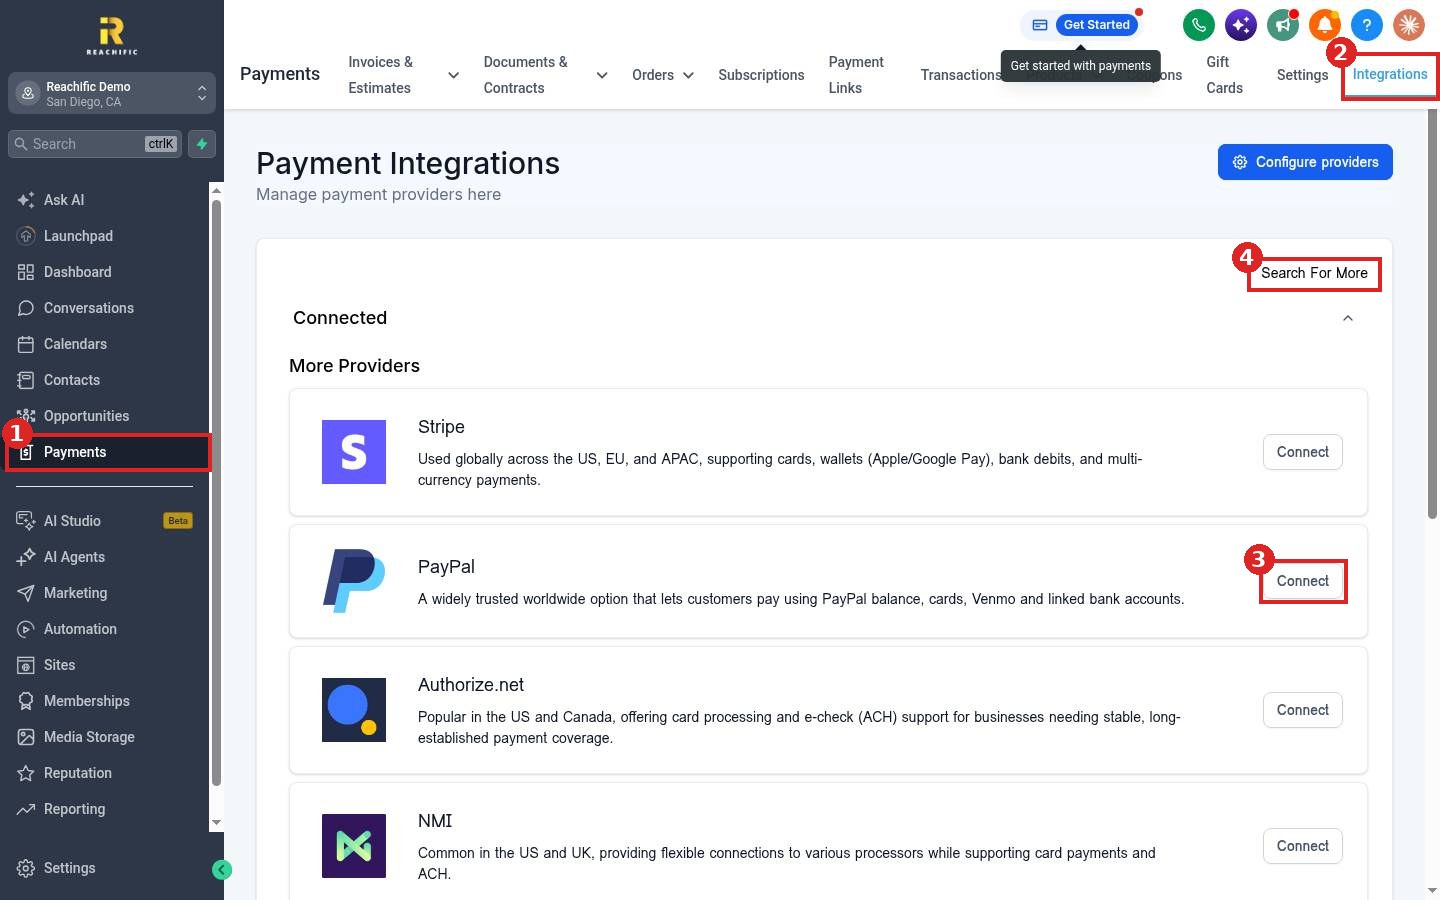
Click Payments in the left menu (1), then the Integrations tab at the top right (2). The Connected section lists any provider you already linked. Under More Providers you see every provider you can add, each with a short note on where it works best. Click Connect next to the one you want (3). If you do not see your provider, click Search For More (4).
Step 2: Pick your provider
Scroll the list to find the right fit:
- PayPal lets customers pay with their PayPal balance, cards, Venmo and linked bank accounts.
- Square is a good pick if you already use Square at a counter or on the go.
- Authorize.net and NMI work with many merchant accounts and support card and ACH payments.
- Adyen and Mercado Pago serve Europe, the Middle East and Latin America.
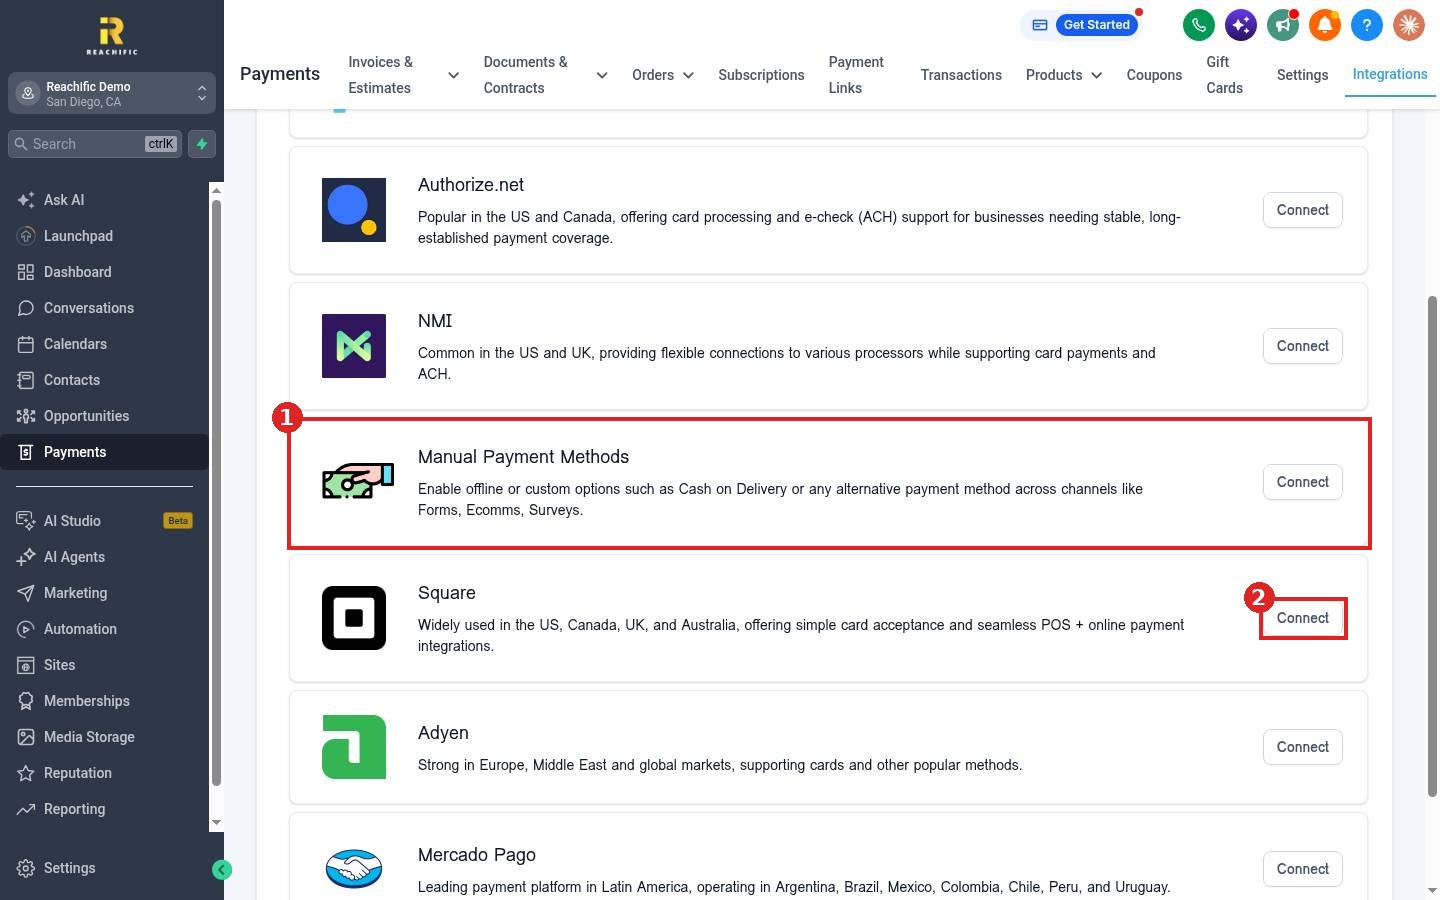
- Manual Payment Methods (1) adds offline options like cash on delivery to your forms, store and surveys.
Click Connect on the provider card (2), for example Square.
Step 3: Sign in and approve
Follow the prompts to sign in to your provider account and approve the connection. Some providers ask for keys or IDs from their own dashboard instead of a sign in. Copy them exactly as shown there. When you are done you return to Reachific and the provider moves to the Connected section.
Step 4: Test it
Create a small invoice or payment link to yourself and open it. You should see the payment option for the provider you connected. See How do I create and send an invoice?
FAQ
Can I connect more than one provider?
Yes. You can connect several providers from the same page. Click Configure providers at the top of the page to manage how they are used.
Who charges the processing fees?
Your payment provider sets its own processing fees under your agreement with them. Check your provider account for the exact rates.
My provider is not in the list. What now?
Click Search For More to look for it. If you still cannot find it, submit a ticket and our team will check what is possible.
Where does the money go?
Payments go to the provider account you connected, then pay out to your bank on that provider's schedule.
Want us to handle it? Our team can connect your payment provider, set up your products and test your checkout so you are ready to get paid. Book a free strategy call and get a free quote.
Related articles
- How do I connect Stripe to take payments?
- How do I create and send an invoice?
- How do I set my payment and tax settings?
Still stuck? Submit a ticket and our team will help. Need faster answers? See our support plans.
