
How do I send appointment confirmation and reminder messages?
Quick answer: Go to Settings, Calendars, click the pencil on your calendar, open Advanced settings, then Notifications & policies. Click the pencil on Appointment booked or Reminder, pick a channel tab, switch it on, choose who receives it and click Save changes.
Before you start
Text reminders need a business phone number with texting set up. See How do I get a business phone number?
Reminders only go out for appointments that are Unconfirmed or Confirmed, not cancelled ones.
Step 1: Open Notifications
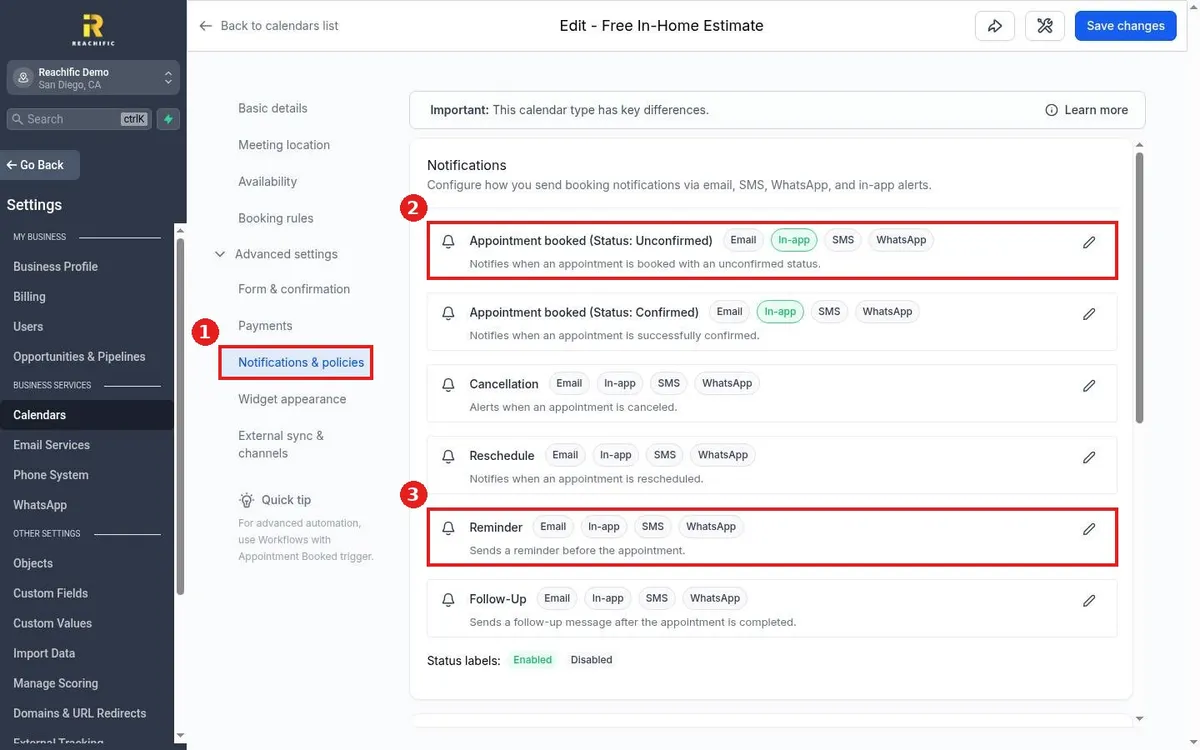
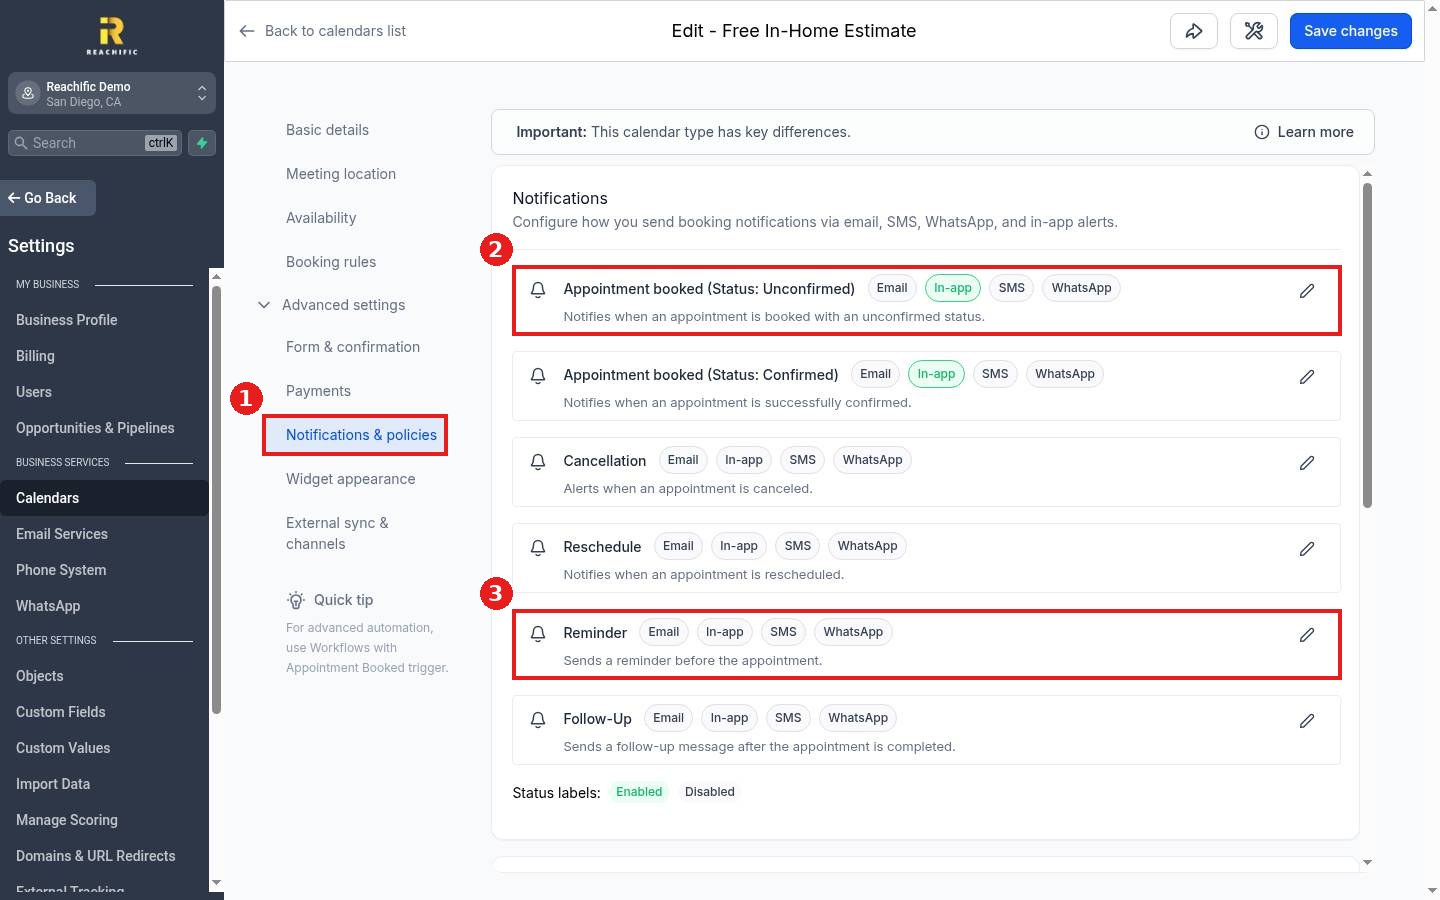
In the calendar editor, click Notifications & policies (1). You will see one row per message type: booked (2), cancellation, reschedule, reminder (3) and follow up. Green channel tags are already on.
Step 2: Turn on a channel and pick recipients
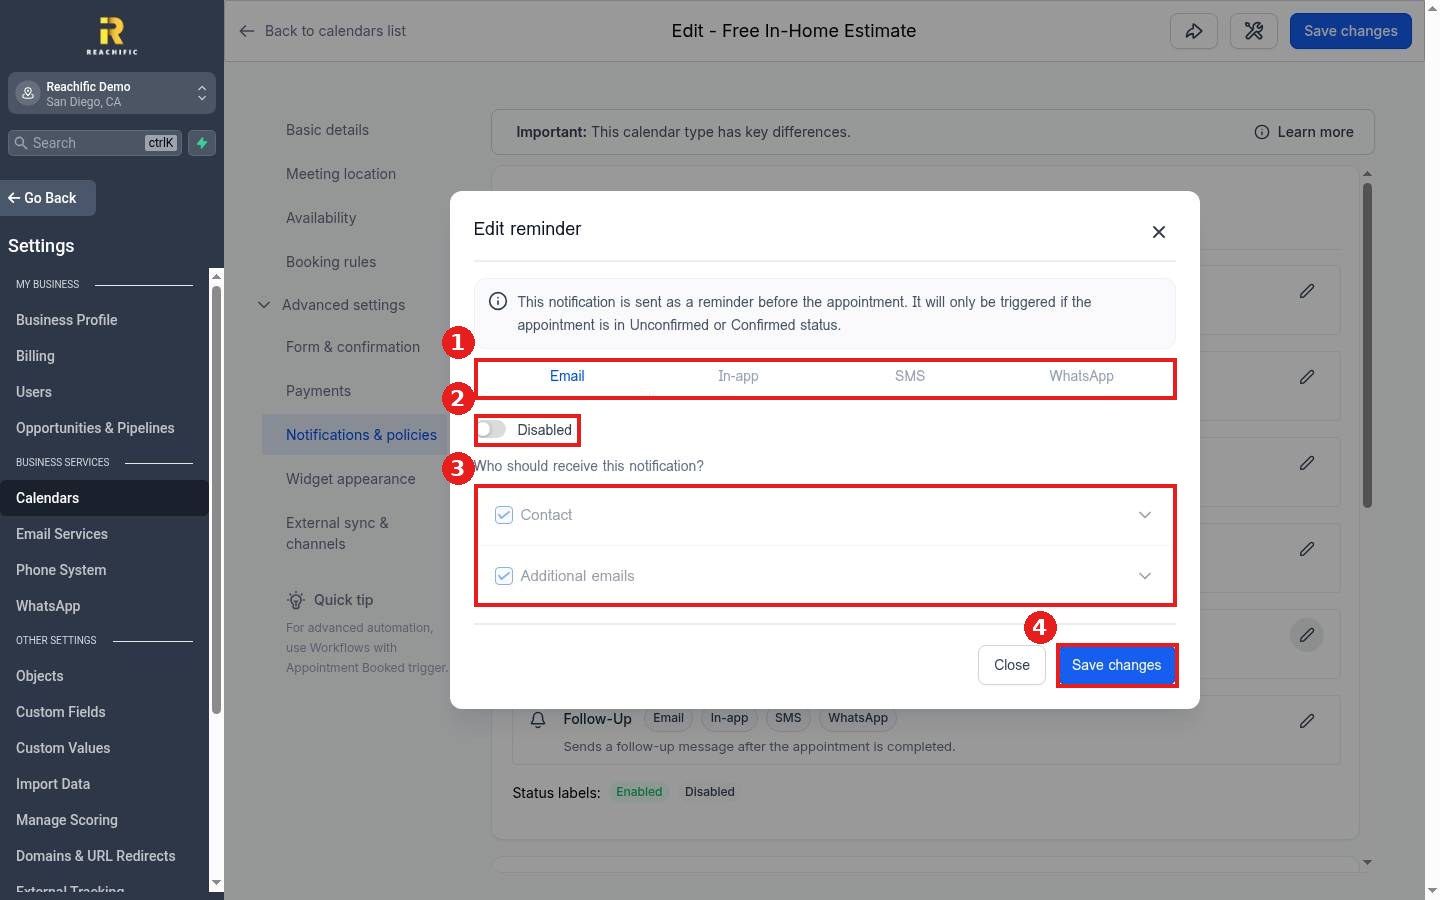
Click the pencil on a row. Pick the channel tab (1): Email, In app, SMS or WhatsApp. Flip the switch to enabled (2), choose who gets it, the contact and any extra emails (3), and edit the message if you like. Click Save changes (4).
Step 3: Repeat and save the calendar
Do the same for Appointment booked so customers get a confirmation right away. Then click Save changes at the top of the calendar editor.
FAQ
Should I use SMS or email?
Use both when you can. Texts get read fast, and emails give the customer a record with the details.
Can I send more than one reminder?
Yes. For more control, such as a reminder the day before and another an hour before, build a workflow with the Appointment booked trigger.
Will my team get notified too?
Yes. Turn on the In app channel, or add your team's emails as extra recipients.
Related articles
Still stuck? Submit a ticket and our team will help. Need faster answers? See our support plans.
