
How do I create a sales pipeline with stages?
Quick answer: Open Opportunities, click the Pipelines tab and click Create pipeline. Name the pipeline, rename the stages or click Add stage, drag them into order and click Create.
Before you start
- Plan your stages on paper first. Use the real steps a job goes through, like New Lead, Contacted, Estimate Sent, Negotiating, Won.
- Keep it to 4 to 7 stages so the board stays easy to read.
Step 1: Open Pipelines
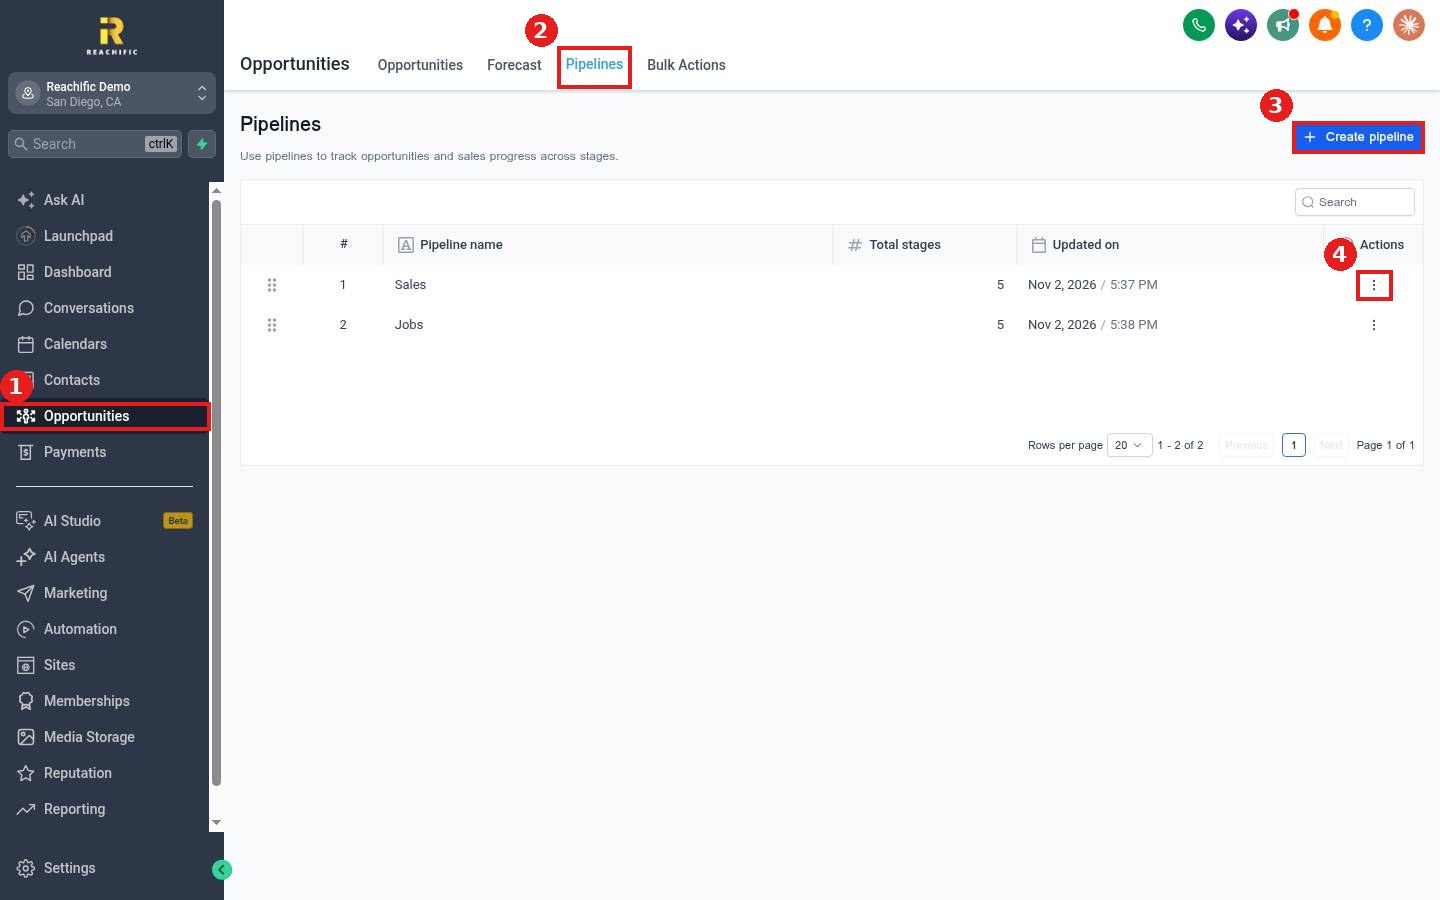
Click Opportunities in the left menu (1), then the Pipelines tab (2). Click Create pipeline (3). To change an existing pipeline, use the three dots on its row (4).
Step 2: Name it and set your stages
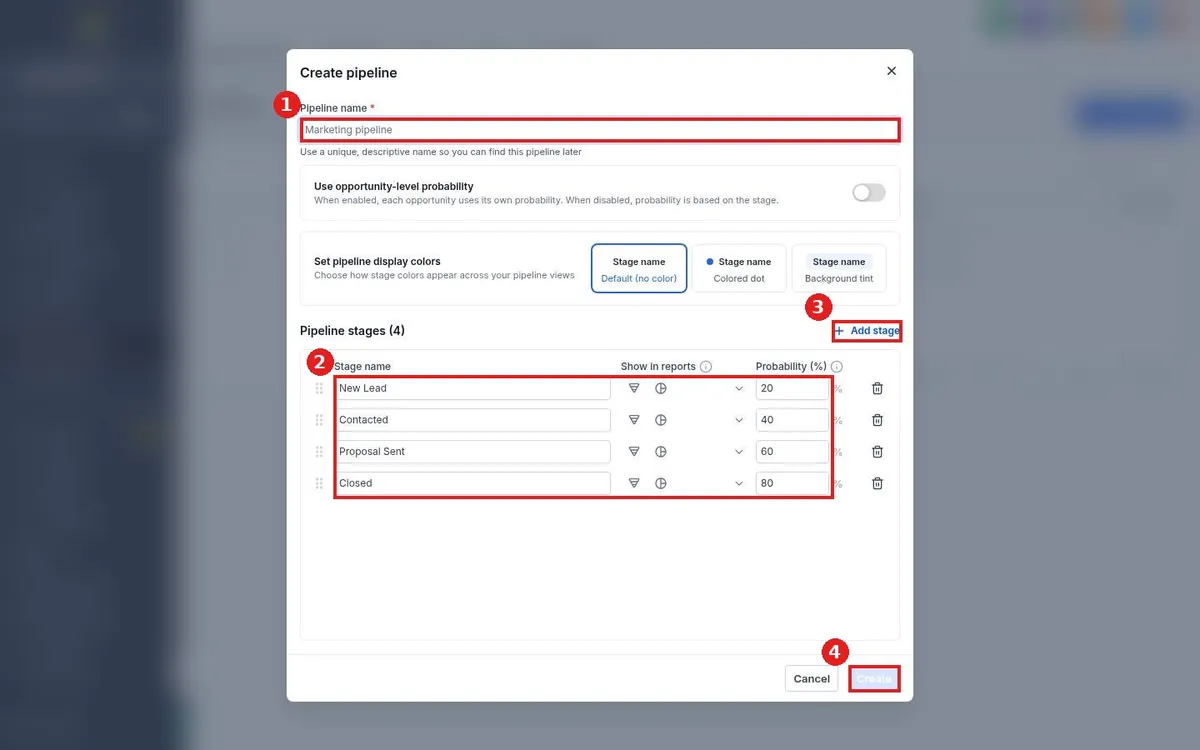
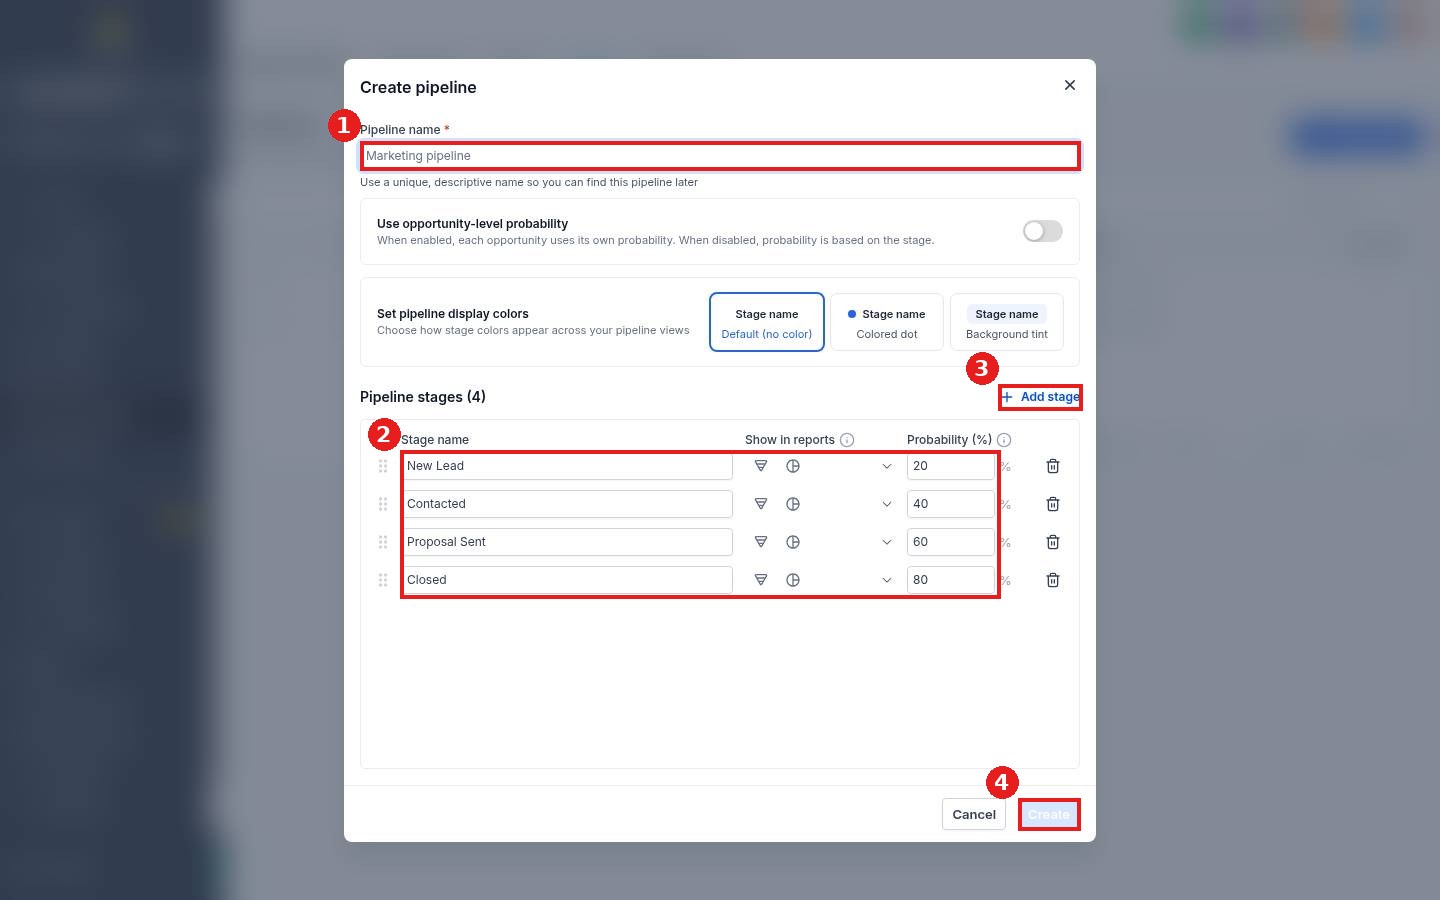
Type a Pipeline name (1), like Sales or Jobs. Edit each Stage name and drag the handles to reorder (2). Click Add stage for more (3). The probability column helps your forecast guess how likely deals in each stage are to close.
Step 3: Create
Click Create (4). Your new pipeline appears in the dropdown at the top of the Opportunities board.
FAQ
Can I have more than one pipeline?
Yes. Many businesses keep one for Sales and one for Jobs in progress.
What do the icons under Show in reports do?
They choose whether a stage shows in the funnel and pie charts on your dashboard and reports.
Can I rename a stage later?
Yes. Use the three dots on the pipeline row and edit. Cards stay in the renamed stage.
Want us to handle it? Our team can map your sales process into a pipeline with automations at every stage. Book a free strategy call and get a free quote.
Related articles
- How do I add an opportunity to a pipeline?
- How do I move a card to the next stage?
- How do I create my first workflow?
Still stuck? Submit a ticket and our team will help. Need faster answers? See our support plans.
