
How do I bulk schedule posts from a CSV?
Quick answer: In Marketing > Social Planner, choose Bulk Scheduling with CSV. Pick Basic Format or Advance Format, download the sample CSV or XLSX, fill it in, upload it, click Next, select your social accounts and review the posts before scheduling.
Before you start
- Connect your social accounts first. See How do I connect my social media accounts?
- Plan your posts in a spreadsheet: date, time, text, link and image for each.
Step 1: Open bulk upload
Click Marketing, then Social Planner. Under Everything you need to manage social, click Bulk Scheduling with CSV. The same section offers Evergreen Queue Post, Recurring Post and Generate Feed from RSS Post.
Step 2: Upload your file
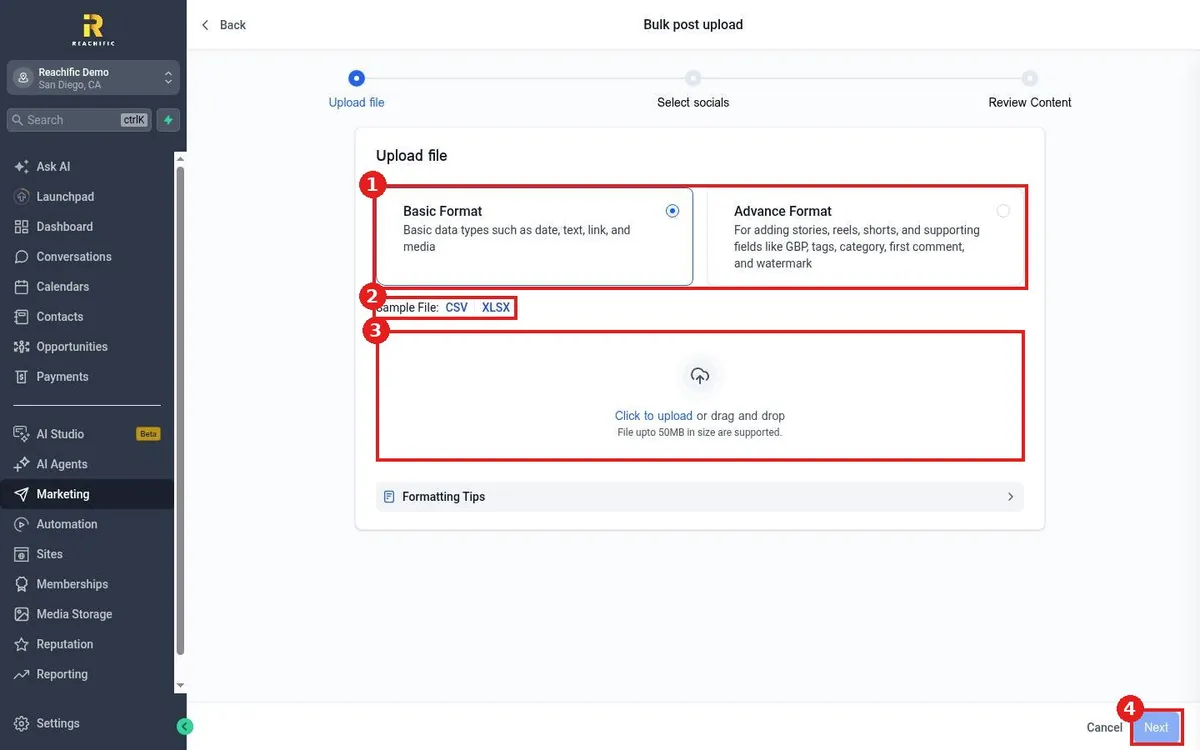
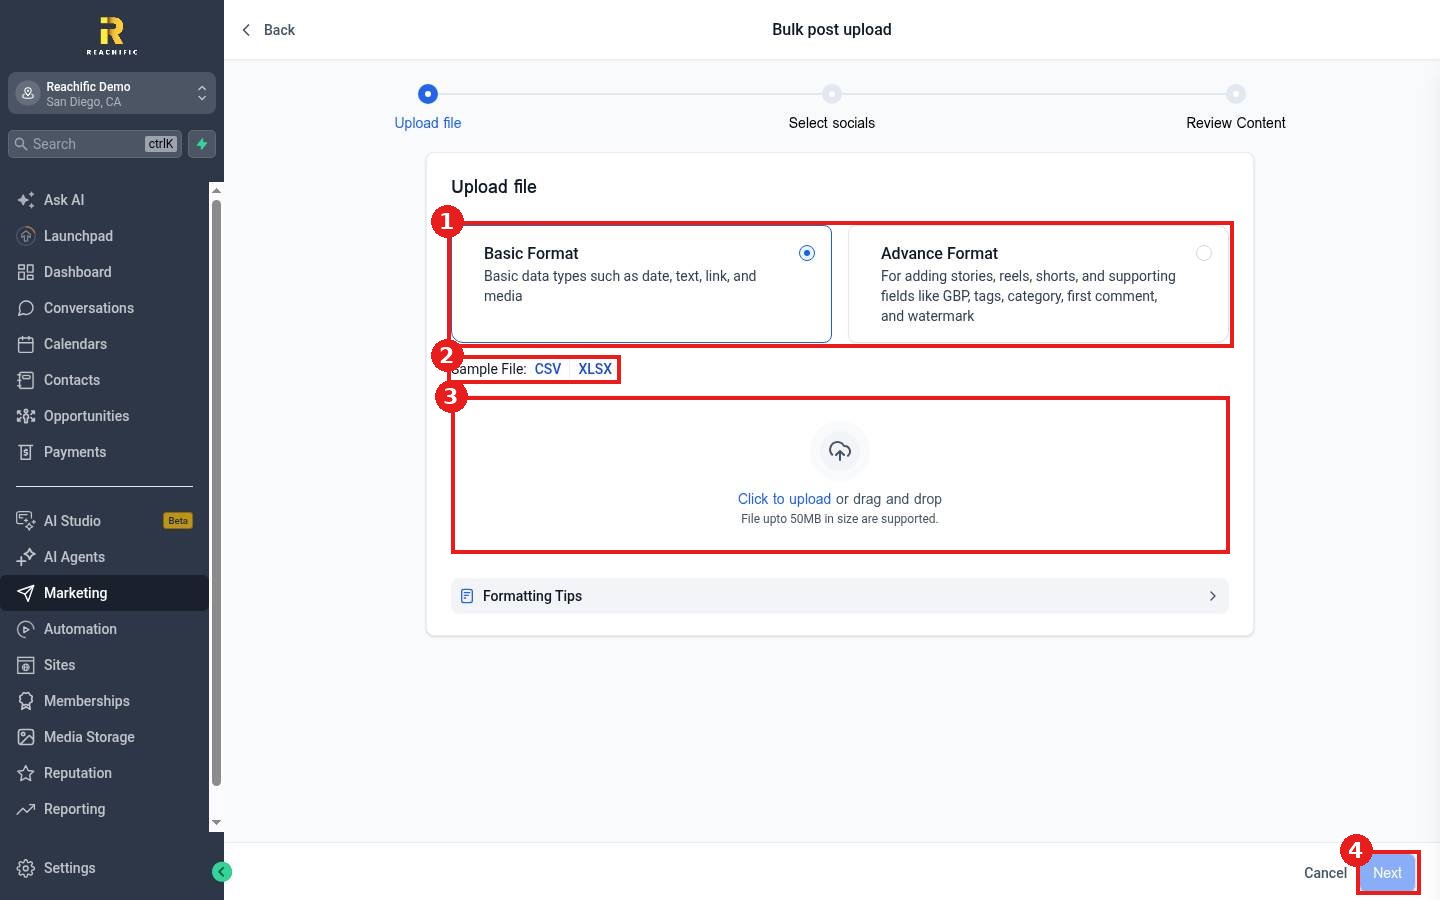
- Pick a format (1). Basic Format covers date, text, link and media. Advance Format adds stories, reels, shorts, Google Business Profile fields, tags, category, first comment and watermark.
- Download the matching sample file (2), CSV or XLSX, and fill it in.
- Click Click to upload or drag the file into the box (3). Files up to 50MB are supported.
- Click Next (4).
Step 3: Select socials and review
On Select socials, pick the accounts. On Review Content, check each post, fix any errors, then confirm to schedule them.
FAQ
My upload shows errors. What do I check?
Open Formatting Tips on the upload screen. Most errors are date formats or missing columns from the sample file.
Can I recycle my best posts?
Yes. Use Evergreen Queue Post to keep a library of posts that repeat automatically.
Want us to handle it? Our team can write and bulk load your social calendar every month. Book a free strategy call and get a free quote.
Related articles
- How do I schedule a social media post?
- How do I connect my social media accounts?
- How do I import contacts from a CSV file?
Still stuck? Submit a ticket and our team will help. Need faster answers? See our support plans.
