
How do I start a community group?
Quick answer: Go to Memberships > Communities > Groups and click Create a Community. Enter a group name, URL and description, choose whether it can be discovered, add a cover image and logo, then click Create Group.
Before you start
Have a 16:9 cover image and a square logo ready.
Decide whether the group is open to anyone or only to paying members.
Step 1: Open Communities
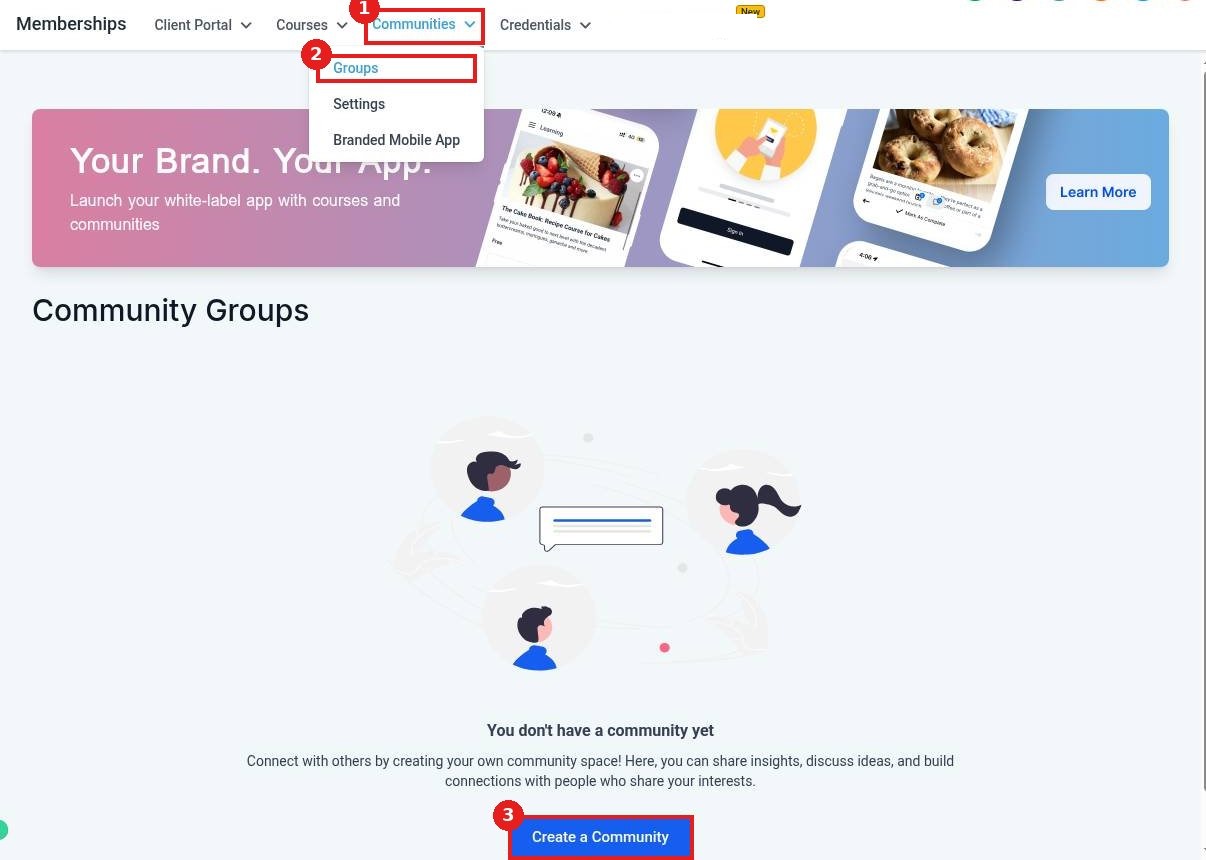
In Memberships, open the Communities menu (1) and click Groups (2). Click Create a Community (3).
Step 2: Add the group details
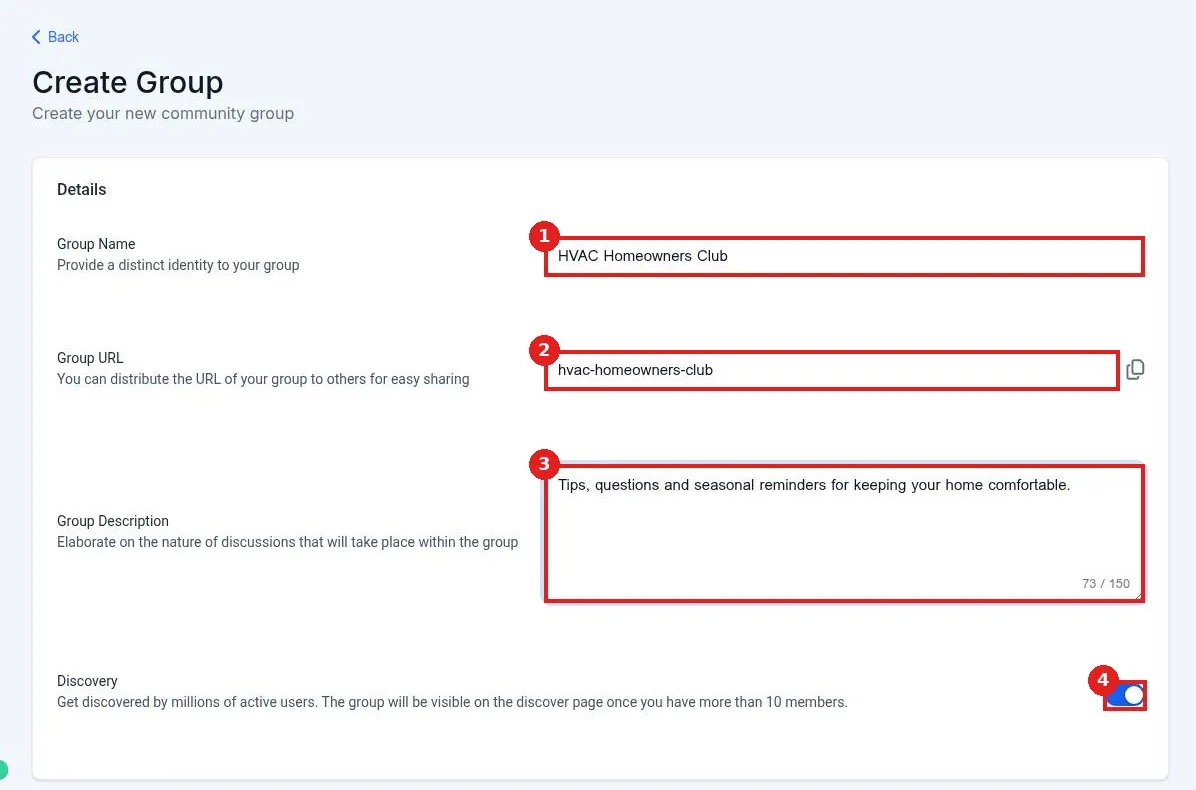
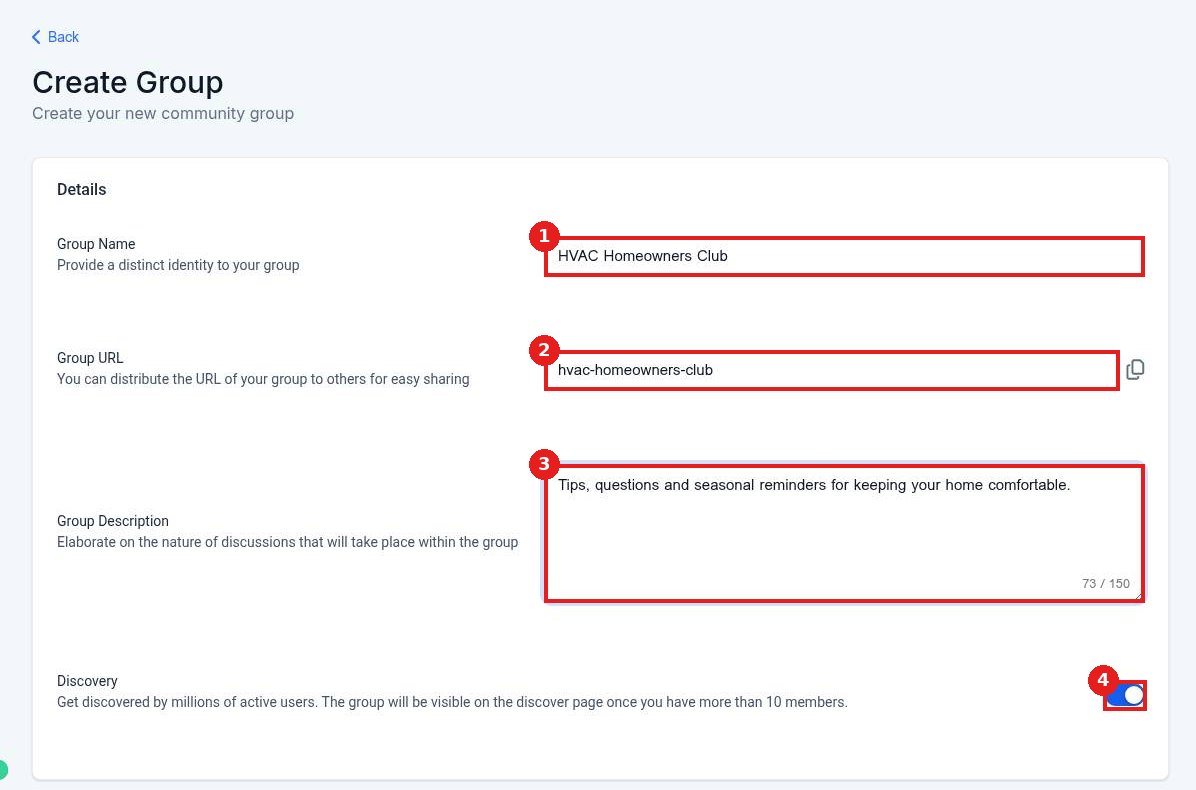
Type the Group Name (1). The Group URL (2) fills in for you and has a copy button. Add a short Group Description (3). Leave Discovery (4) on to let new people find the group once it has more than 10 members, or turn it off to keep it private.
Step 3: Add images and create the group
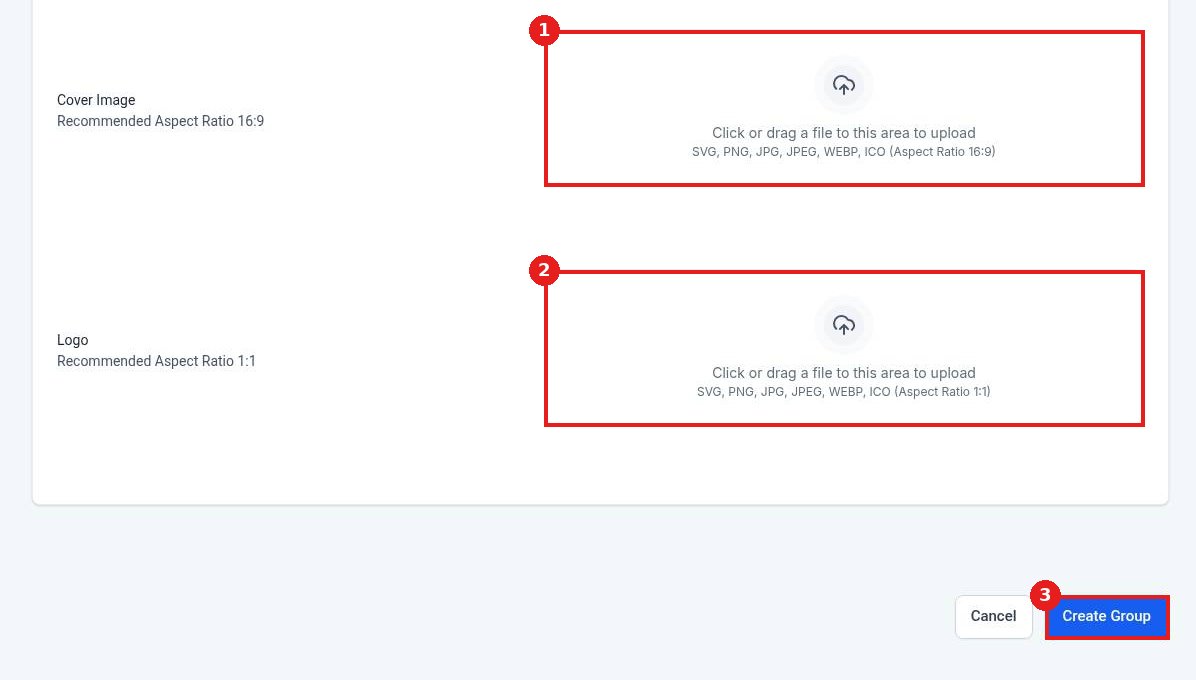
Upload a Cover Image (1) and a Logo (2). Click Create Group (3).
Step 4: Invite members
Open the group to post a welcome message, set up channels and invite members. You can also link the group to a course so buyers join automatically.
FAQ
Can I charge for my community?
Yes. Make the group paid in its settings, or include it with a course offer.
Where do members see the group?
In your client portal, next to their courses.
Can I change the group URL later?
Yes, but share the new link since old links will stop working.
Related articles
Still stuck? Submit a ticket and our team will help. Need faster answers? See our support plans.
