
How do I set a course thumbnail?
Quick answer: Go to Memberships > Courses > Products and open the course. Click Details, scroll to Product Thumbnail, click Select Image > Upload a New File, then click Save.
Before you start
- Use a 1280 by 720 px image (16:9). Keep text large so it reads at small sizes.
Step 1: Open the course Details
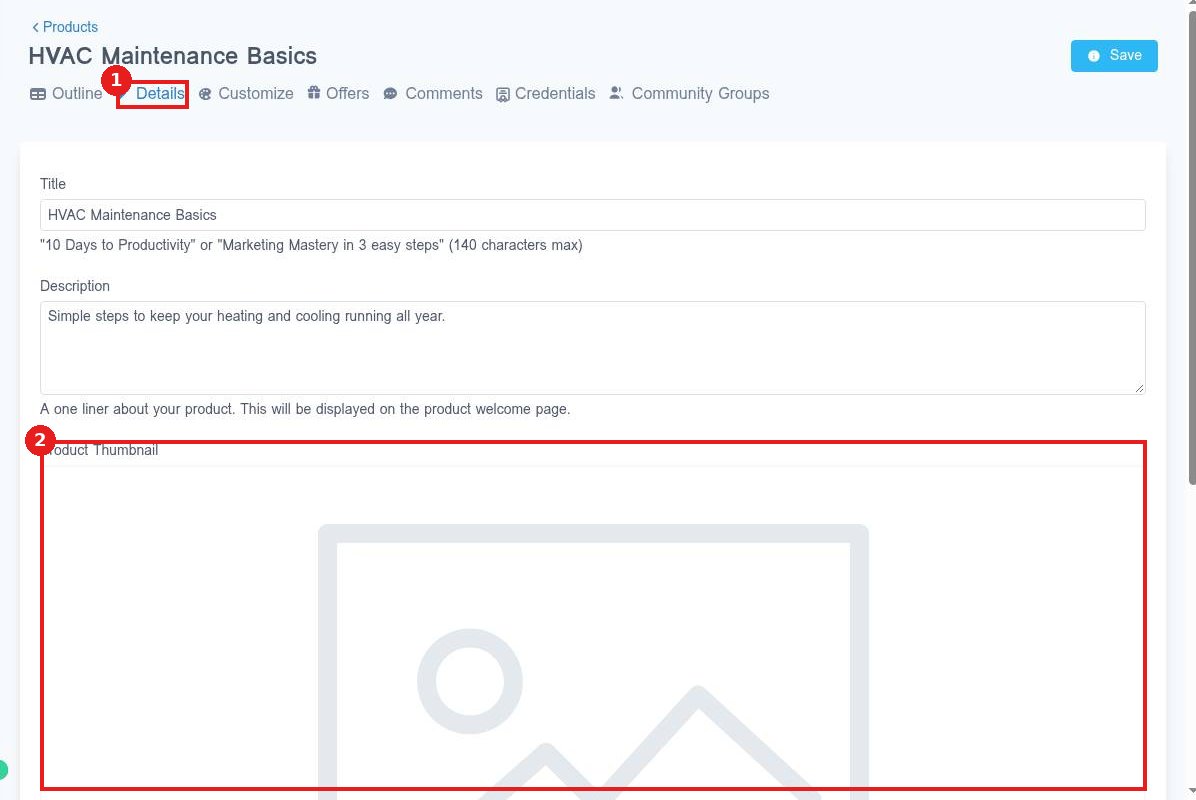
Open your course from Courses > Products and click the Details tab (1). The Product Thumbnail area (2) shows the current image or a placeholder.
Step 2: Upload the image and save
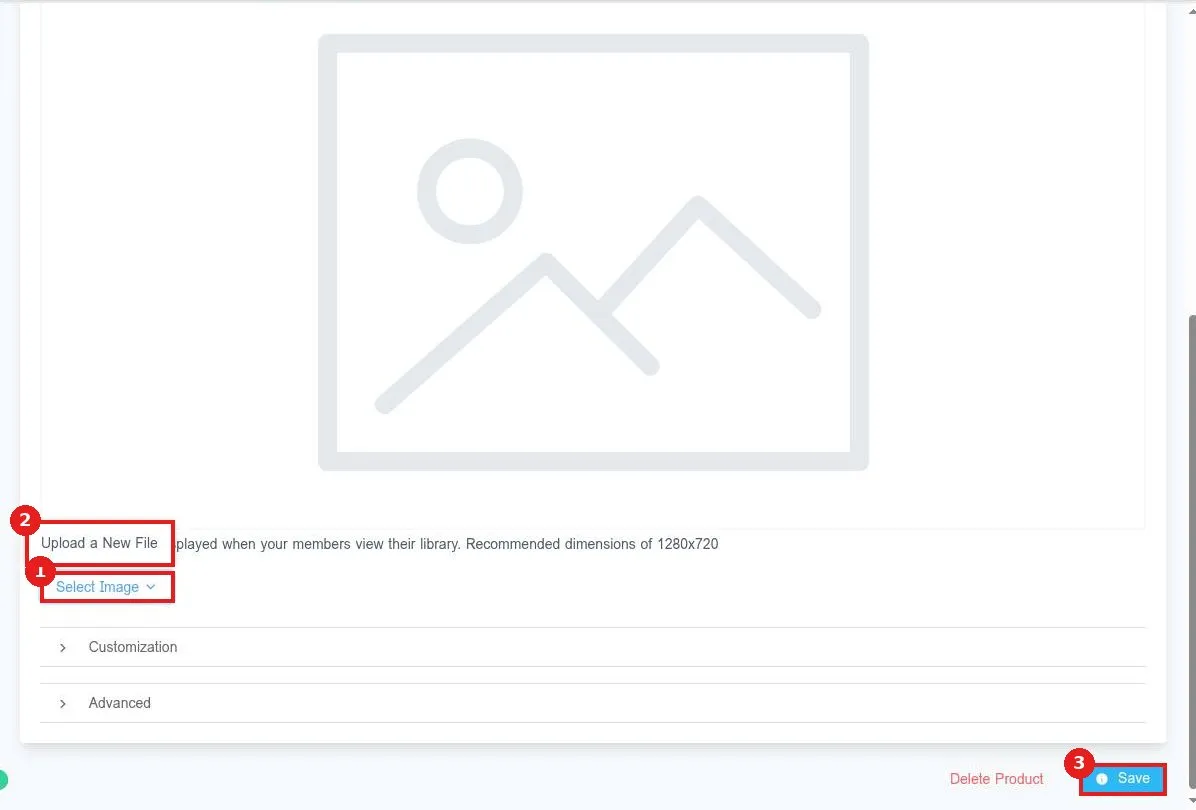
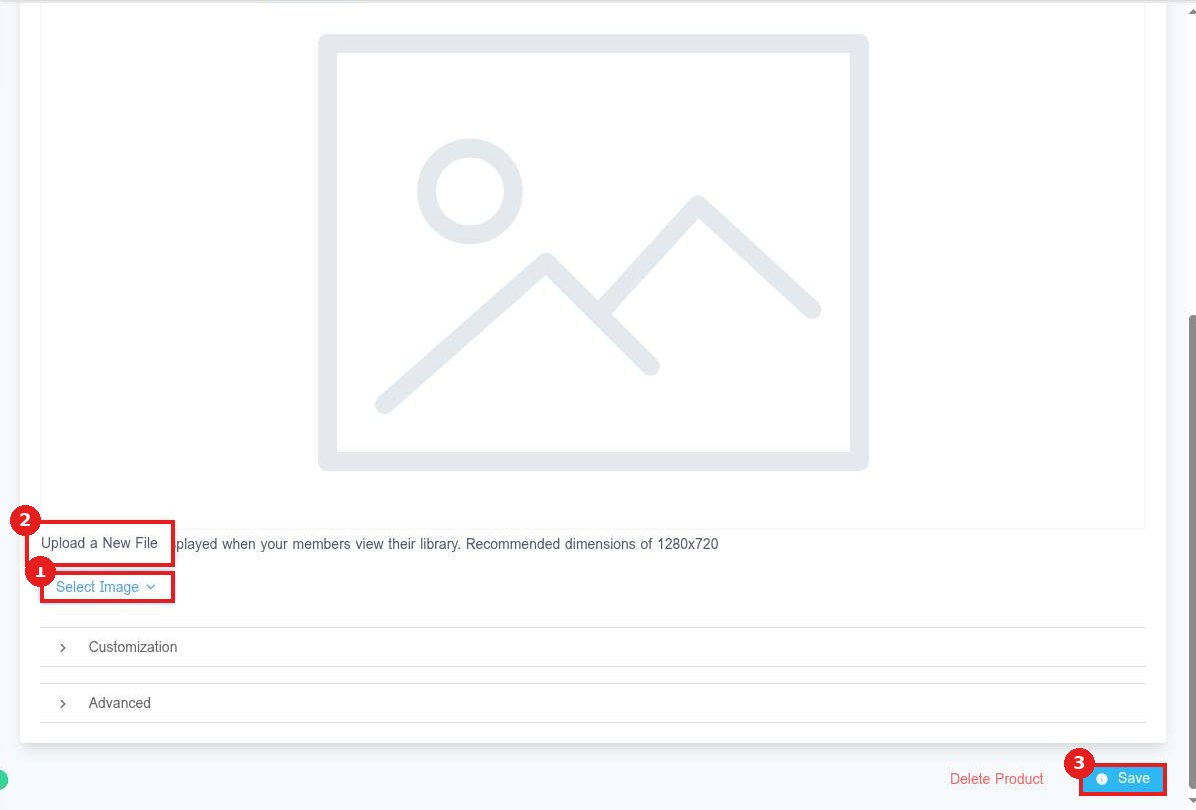
Scroll down and click Select Image (1), then Upload a New File (2) and pick your image. Click Save (3).
Step 3: Check it in the library
Click Preview on the Outline tab or log in to your client portal. The thumbnail shows on the course card in the member library.
FAQ
What size should the thumbnail be?
1280 by 720 px works best. Other 16:9 sizes also look fine.
Can offers have their own image?
Yes. Each offer has an Offer Thumbnail on its Details page.
My image looks cropped. Why?
Images that are not 16:9 get trimmed to fit. Resize to 1280 by 720 and upload again.
Want us to handle it? Our team builds your courses, offers and checkout so students can buy and start learning right away. Book a free strategy call and get a free quote.
Related articles
Still stuck? Submit a ticket and our team will help. Need faster answers? See our support plans.
