
How do I see appointment reports?
Quick answer: Go to Reporting > Appointment report. Set the date range, pick a calendar and whether to count by date added or appointment date, then review booked, confirmed, cancelled, showed and no show counts, plus channel and source.
Before you start
- Mark appointments as Showed or No-show in Calendars so your show rate is accurate.
Step 1: Open and filter the report
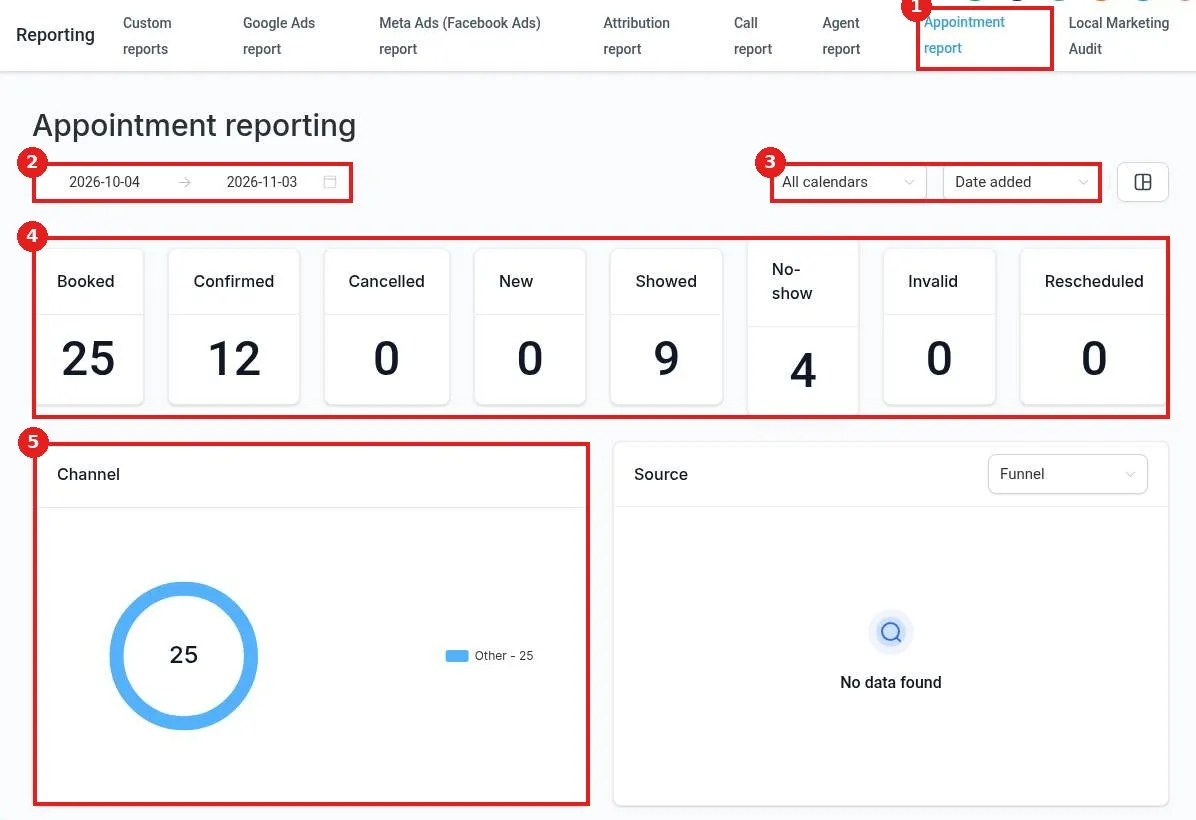
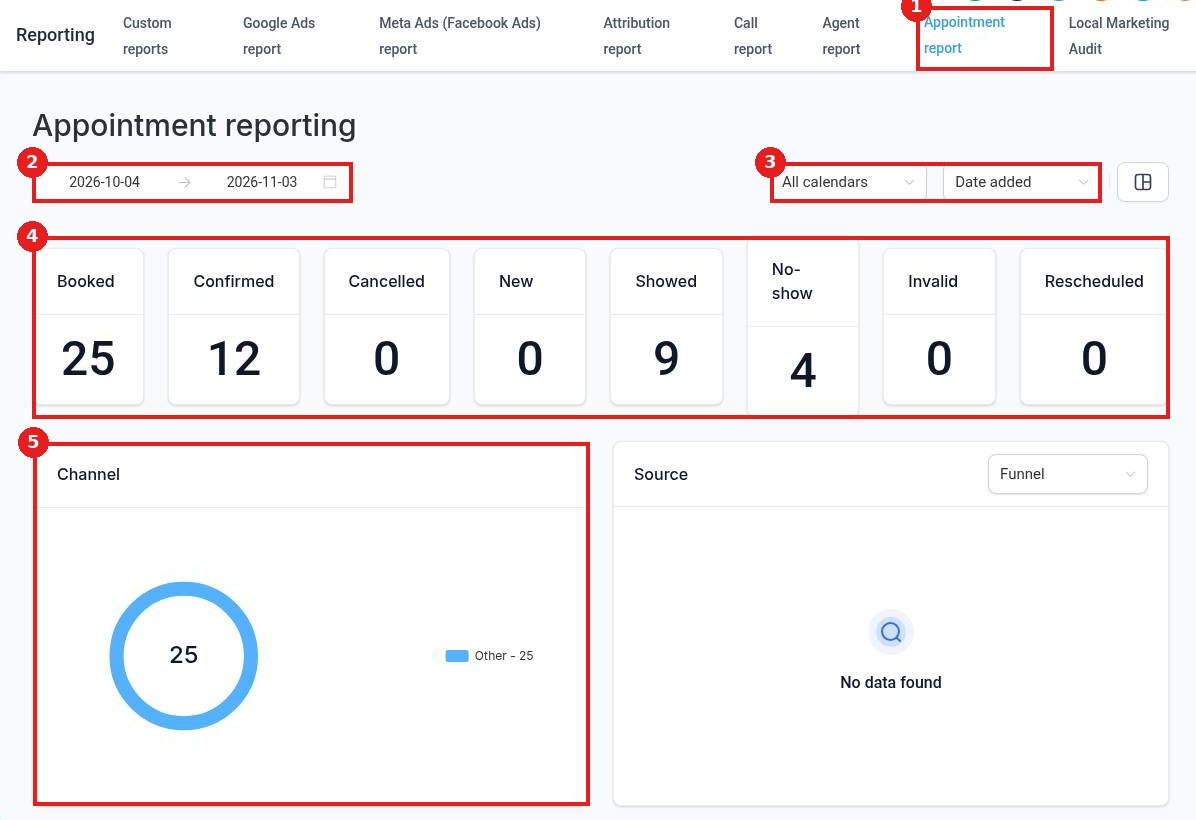
Click the Appointment report tab (1). Set the date range (2). Pick All calendars or one calendar, and choose Date added or appointment date (3). The status cards (4) show Booked, Confirmed, Cancelled, New, Showed, No-show, Invalid and Rescheduled. Channel (5) shows how appointments were booked.
Step 2: Work out your show rate
Divide Showed by Booked. For example, 9 showed out of 25 booked is a 36 percent show rate. Add reminders by text and email to raise it.
Step 3: Check sources
Use the Source chart and its dropdown to see which funnels, forms or widgets bring in bookings.
FAQ
What is the difference between Date added and appointment date?
Date added counts when the booking was made. Appointment date counts when the meeting happens.
Why are no-shows high?
Add confirmation and reminder messages in your calendar or an automation.
Can I see reports per team member?
Yes. Pick a team member's calendar in the calendar filter.
Want us to handle it? Our team builds clear reports and dashboards so you always know what is working. Book a free strategy call and get a free quote.
Related articles
Still stuck? Submit a ticket and our team will help. Need faster answers? See our support plans.
