
How do I build a custom report?
Quick answer: Go to Reporting > Custom reports and click Create your first report. Pick a blank report, a template or a clone. Add widgets from the left panel, set the date range, then click Save. Use Download or Send and schedule to share it.
Before you start
Decide what the report is for, such as a monthly client summary or a weekly sales check.
Connect ad accounts first if you want ad results in the report.
Step 1: Start a new report
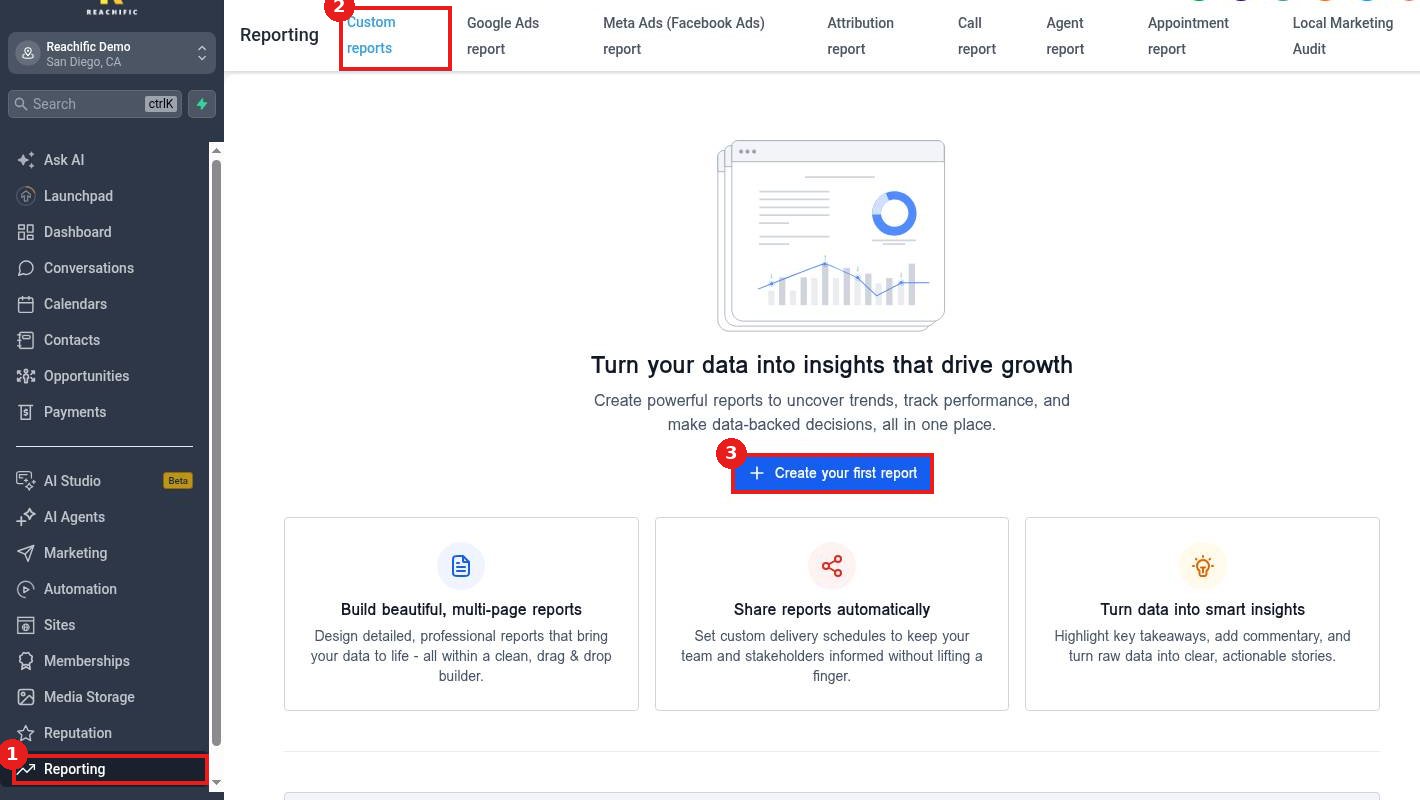
Click Reporting (1) in the left menu. On the Custom reports tab (2), click Create your first report (3). If you already have reports, click New report.
Step 2: Choose a starting point
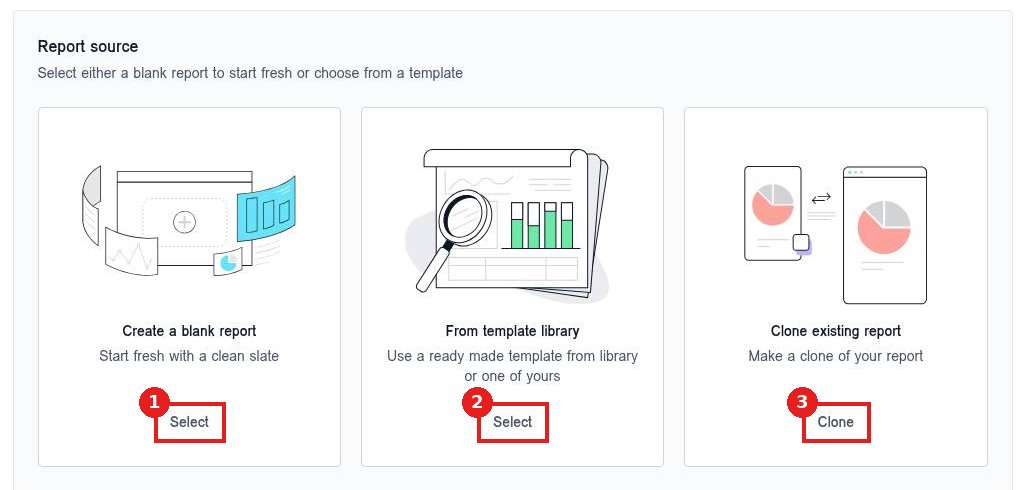
Pick Create a blank report (1), From template library (2) for a ready made layout, or Clone existing report (3). You can also import from an existing dashboard further down the page.
Step 3: Add widgets
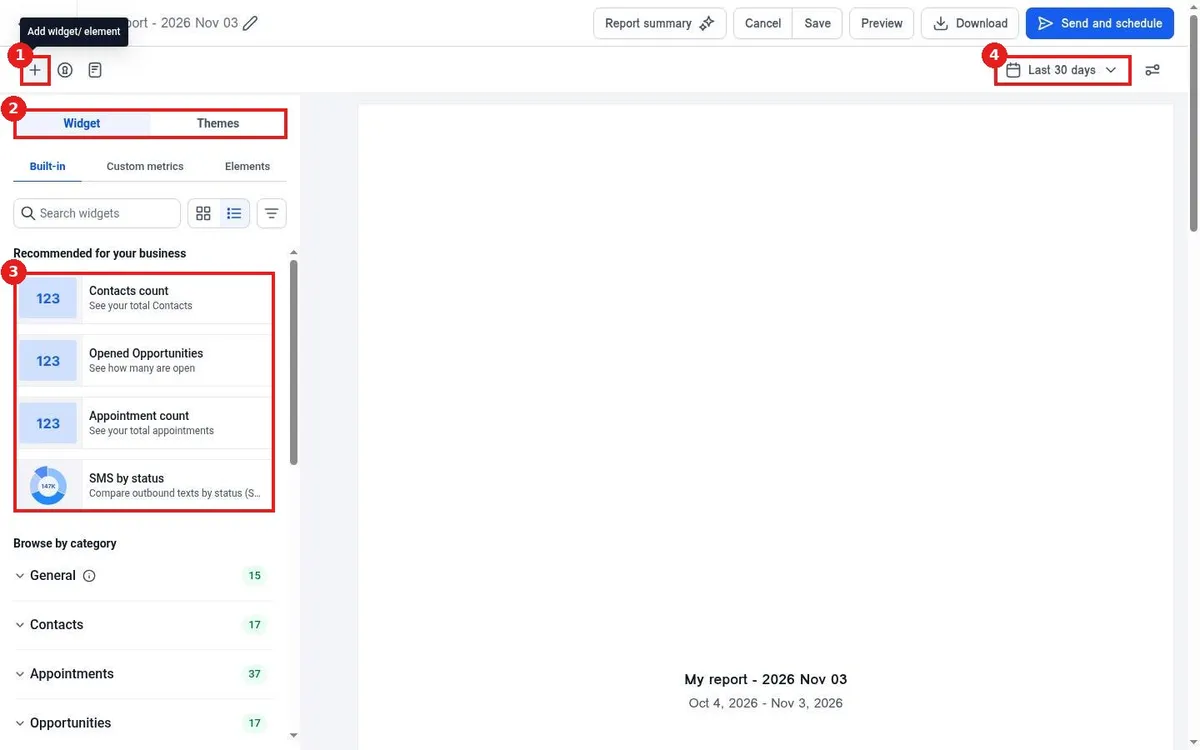
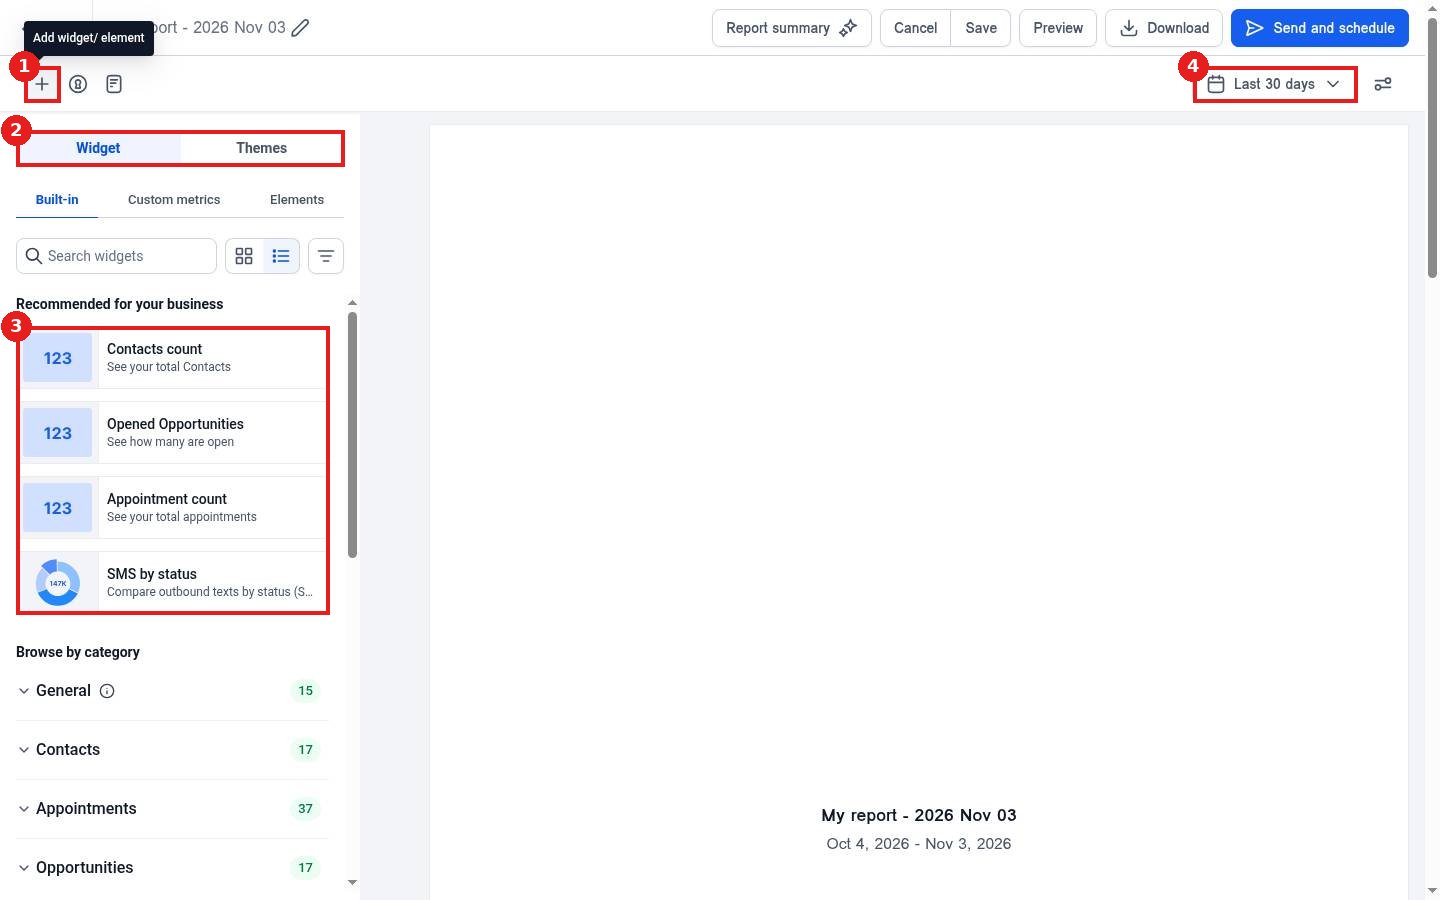
Click the + button (1) to add a widget or element. Use the Widget and Themes tabs (2) to switch between content and styling. Pick from recommended widgets (3) like contacts count, opportunities and appointments, or browse by category. Set the date range (4) for the whole report.
Step 4: Name, save and share
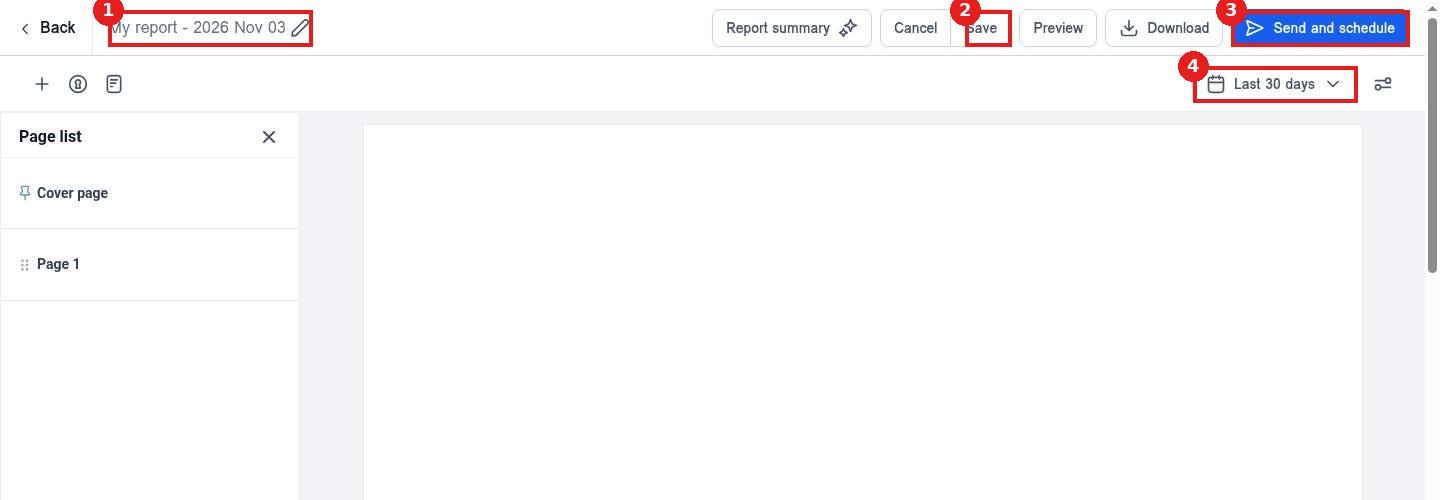
Click the pencil next to the report name (1) to rename it. Click Save (2). Click Send and schedule (3) to email it on a schedule. Check the date range (4) before you send.
FAQ
Can I add more than one page?
Yes. Use the page list on the left to add and reorder pages, plus a cover page.
Can AI summarize the report?
Yes. Click Report summary at the top to add an AI written summary.
Can I send it to clients automatically?
Yes. Send and schedule lets you pick recipients and how often it goes out.
Want us to handle it? Our team builds clear reports and dashboards so you always know what is working. Book a free strategy call and get a free quote.
Related articles
Still stuck? Submit a ticket and our team will help. Need faster answers? See our support plans.
